Subnautica 2: All Biomods Guide

Biomods in Subnautica 2 are character upgrades equipped at the Biolab, split between Active Biomods and Passive Biomods. The starting list is small, but the full Biomod roster opens up through Bioscanner progression, Lifeform scans, and later exploration across the alien ocean.
For more Subnautica 2 crafting routes, alien progression, material guides, and survival help, use the complete Subnautica 2 guide hub.
Jump To
All Biomods In Subnautica 2
Subnautica 2 currently has 15 Biomods, with 5 Active Biomods and 10 Passive Biomods unlocked through the Biolab and Bioscanner Lifeform scanning.
Biomods are character upgrades, not tool upgrades. They change what the player can do while swimming, exploring, avoiding threats, managing food and water, or finding important objects. Active Biomods are manually used abilities, while Passive Biomods stay equipped and give ongoing effects.
The Biolab is found early at the Welcome Center, but not every Biomod is available right away. The first 2 Active Biomods and first 2 Passive Biomods are available by default. The rest are hidden behind scan requirements, and those scans need the Bioscanner instead of the normal Scanner.
| Biomod Type | Current Count | How They Work |
|---|---|---|
| Active Biomods | 5 | Manual abilities used for movement, detection, defense, or predator distraction. |
| Passive Biomods | 10 | Always-on upgrades that improve swimming, survival, detection, food, water, or stealth. |
The useful way to think about Biomods is by problem. Some help with escape. Some help with navigation. Some make survival less demanding. Some help detect threats or bases. The best setup changes based on the route, because a deep exploration run has different needs than a safe base-to-resource loop.
How To Unlock Biomods In Subnautica 2
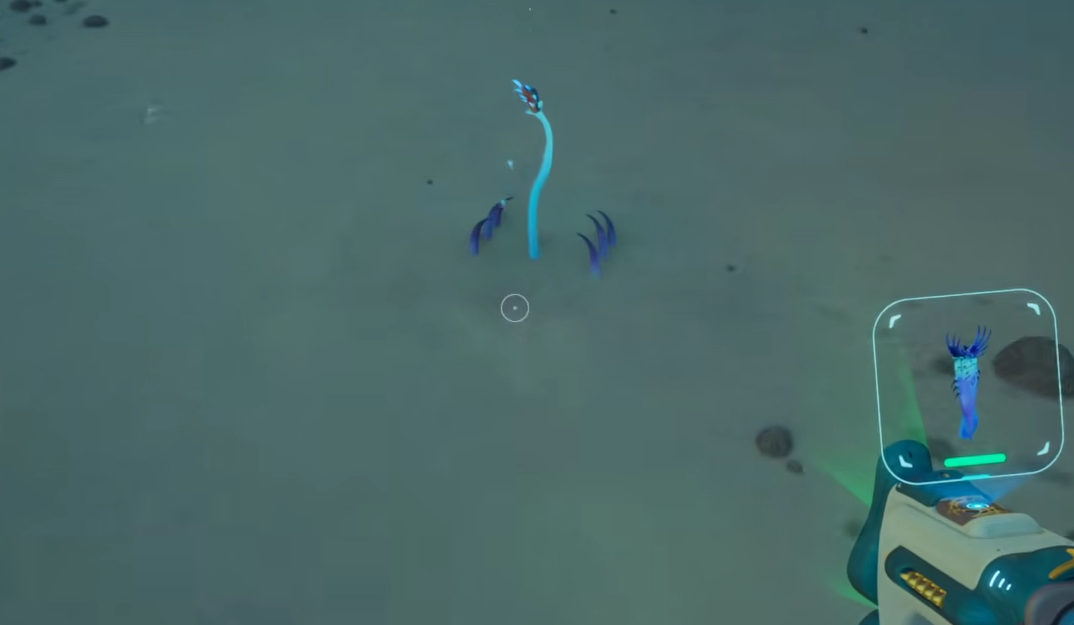
New Biomods are unlocked by scanning specific Flora and Fauna with the Bioscanner, then using the Biolab to equip the unlocked upgrades.
The normal Scanner is not enough for the later Biomod unlock path. Early scanning can fill out basic information, but Biomod progression needs the Bioscanner. That means some creatures or plants may need to be scanned again after the Bioscanner is crafted.
This is the part that trips up the most people. Scanning a creature early with the regular Scanner does not automatically mean its Biomod requirement is finished later. Once the Bioscanner is available, the important Lifeforms should be scanned again for Biomod unlocks.
The Biolab acts as the equip station. Once a Biomod is unlocked, it can be selected there and added to the character’s setup. This makes the Biolab worth checking after major exploration trips, especially after scanning new creatures or plants.
Bioscanner Requirement For Biomods
The Bioscanner is required to unlock new Biomods because Biomod requirements are completed by scanning specific Lifeforms with the upgraded Scanner.
The Bioscanner is crafted at the Modification Station from 1 Scanner, 2 Enameled Glass, and 3 Conduit Crystal. Its blueprint is found inside the wreckage at the Blackbox Iso Signal, in the second large area of the game with alien structures and darker green water.
The Bioscanner route is later than basic early game tool progression. It requires reaching the wreck, using the Repair Tool to get through the blocked path, and scanning the degraded Bioscanner inside. After that, the crafted Bioscanner becomes the main tool for Biomod hunting.
| Bioscanner Requirement | Details |
|---|---|
| Blueprint Location | Wreckage at the Blackbox Iso Signal, roughly 1,800 meters east of the Lifepod or 600 meters southeast of the Alien Ruins Signal. |
| Required Tool | Repair Tool. |
| Crafting Station | Modification Station. |
| Recipe | 1 Scanner, 2 Enameled Glass, 3 Conduit Crystal. |
Conduit Crystal is one of the main material gates for this upgrade. The Subnautica 2 Conduit Crystal guide covers the resource path connected to Axum technology and later Scanner progression.
All Active Biomods In Subnautica 2
Active Biomods are abilities that must be triggered manually, and they are mainly used for movement, detection, defense, and predator distraction.
| Active Biomod | Scan Requirement | Effect | Best Use |
|---|---|---|---|
| Dash | Unlocked by default. | Dash in any direction to avoid predators or hazards. | Quick escape, dodging attacks, and repositioning during risky swims. |
| Pathfinder | Unlocked by default. | Release a trail of pheromones that can be followed back through a route. | Navigation through wrecks, caves, and confusing paths. |
| Sonic Echo | Collector Leviathan. | Emit a sonar pulse to highlight nearby resources. | Resource hunting in wide or dark areas. |
| Electric Discharge | Electric Geordie. | Emit an 800 volt electric shock to deter medium and large predators. | Emergency predator defense. |
| Chum Cloud | Toxic Sponge and Houndgar. | Release a cloud of bait that distracts predators. | Breaking predator attention and creating room to escape. |
Dash is the safest default Active Biomod because it solves a problem that happens constantly: needing distance right now. Pathfinder is better for route control, especially inside wrecks or areas where turning around becomes annoying. Sonic Echo is the resource focused pick, Electric Discharge is the defensive pick, and Chum Cloud is the distraction tool for predator-heavy routes.
All Passive Biomods In Subnautica 2
Passive Biomods stay active once equipped, giving constant benefits to swimming, oxygen control, stealth, survival, detection, food, water, and exploration.
| Passive Biomod | Scan Requirement | Effect | Best Use |
|---|---|---|---|
| Sea Skimmer | Unlocked by default. | Swim faster when close to underwater surfaces or the seafloor. | General travel, cave movement, and seabed resource routes. |
| Oxygen Control | Unlocked by default. | Slows oxygen consumption when not moving. | Scanning, waiting, observing threats, and careful exploration. |
| Bioluminescence | Sandspear and Electric Geordie. | Glow in the dark. | Dark route visibility and low-light exploration. |
| Camouflage | Bullethead. | Become invisible to predators when not moving. | Stealth routes and avoiding predator attention. |
| Water Retention | Coral Crab. | Gain more water from all sources with enlarged, orca-like kidneys. | Longer exploration sessions where hydration becomes a problem. |
| Homing Sense | Surge Jelly and Hammerhead. | Detect nearby bases with electrical power. | Finding powered bases and returning to active habitats. |
| Threat Sense | Hoverthorn. | Detect nearby threats with specialized hair cells. | Dangerous routes and predator-heavy areas. |
| Dermal Garden | Needler Mango. | Slowly grow nutritious algae on your skin. | Food support during longer routes. |
| Slow Metabolism | Nibbler Mango. | Makes the microbiome more efficient, slowing food drain. | Longer exploration without needing as much food. |
| Water Secretion | Water Slug. | Slowly fills a water packet by filtering fresh water from the sea. | Passive water generation during exploration. |
The default Passive Biomods are already strong. Sea Skimmer helps normal movement, while Oxygen Control rewards stopping instead of constantly burning air. Later passive options become more specialized, with Camouflage and Threat Sense helping dangerous routes, while Dermal Garden, Slow Metabolism, Water Retention, and Water Secretion support longer survival loops.
Best Biomods To Use First
The best early Biomods are Dash, Pathfinder, Sea Skimmer, and Oxygen Control because they help with movement, navigation, and oxygen before the later Bioscanner unlocks become available.
Dash is the strongest general Active Biomod because Subnautica 2 constantly puts the player in situations where a fast movement burst helps. Predator gets too close, hazard gets in the way, oxygen gets low, route gets messy. Dash has value in all of those moments.
Pathfinder is the better pick for confusing areas. Wrecks, caves, and layered alien spaces can turn around quickly, especially before routes are familiar. A pheromone trail gives a cleaner way back without relying only on memory and panic.
Sea Skimmer is the best default Passive Biomod for normal exploration because most early travel stays close to terrain. Oxygen Control is better when scanning, hiding, or waiting. My pick for early play is Dash with Sea Skimmer because movement fixes more problems than it gets credit for, especially before the Tadpole starts carrying the exploration load.
| Situation | Best Active Biomod | Best Passive Biomod |
|---|---|---|
| General exploration | Dash | Sea Skimmer |
| Wrecks and caves | Pathfinder | Oxygen Control |
| Resource hunting | Sonic Echo | Sea Skimmer |
| Dangerous predator routes | Electric Discharge or Chum Cloud | Threat Sense or Camouflage |
| Long survival routes | Dash | Slow Metabolism, Water Retention, or Water Secretion |
Once the Bioscanner unlocks more options, the best setup should match the trip. A safe material route does not need the same Biomods as a predator route. A wreck route does not need the same setup as open water resource hunting. Swap Biomods based on the next job instead of treating one setup as permanent.
Active Vs Passive Biomods
Active Biomods give manual abilities, while Passive Biomods give constant effects after being equipped.
Active Biomods are better when a specific moment needs a response. Dash is for movement bursts. Electric Discharge is for immediate defense. Chum Cloud is for distraction. Sonic Echo is for resource detection. Pathfinder is for route marking.
Passive Biomods are better when the whole trip needs support. Sea Skimmer helps movement the entire time. Oxygen Control helps while still. Camouflage helps when avoiding predators. Survival Biomods reduce food and water pressure without needing constant manual use.
| Biomod Type | Best For | Examples |
|---|---|---|
| Active | Manual actions, emergency tools, and route abilities. | Dash, Pathfinder, Sonic Echo, Electric Discharge, Chum Cloud. |
| Passive | Ongoing stat support, survival help, stealth, and detection. | Sea Skimmer, Oxygen Control, Camouflage, Threat Sense, Water Secretion. |
The best Biomod setups usually pair a reliable Active tool with a Passive effect that supports the route. Dash plus Sea Skimmer is clean for movement. Pathfinder plus Oxygen Control is strong for careful wreck exploration. Electric Discharge plus Threat Sense makes more sense when the route is likely to get rude.
Biomod Scan Targets And Unlock Requirements
Biomod scan targets range from small creatures like Water Slug and Coral Crab to major threats like the Collector Leviathan.
The requirements are not equal. Some are easy to scan because the target is small or common. Others are riskier because the required Lifeform is dangerous, rare, or found later in progression. The Collector Leviathan requirement for Sonic Echo is the obvious example, since unlocking that Biomod means getting scan progress from one of the biggest threats in the current ocean.
| Scan Target | Unlocks | Route Note |
|---|---|---|
| Water Slug | Water Secretion | Good early survival style unlock once the Bioscanner is ready. |
| Coral Crab | Water Retention | Useful for hydration support. |
| Nibbler Mango | Slow Metabolism | Supports food management on longer routes. |
| Needler Mango | Dermal Garden | Supports food through passive algae growth. |
| Hoverthorn | Threat Sense | Useful for danger detection. |
| Bullethead | Camouflage | Useful for stealth and predator avoidance. |
| Sandspear and Electric Geordie | Bioluminescence | Unlocks dark visibility support. |
| Surge Jelly and Hammerhead | Homing Sense | Helps detect nearby powered bases. |
| Electric Geordie | Electric Discharge | Unlocks defensive shock ability. |
| Toxic Sponge and Houndgar | Chum Cloud | Unlocks predator distraction. |
| Collector Leviathan | Sonic Echo | High risk scan target for resource detection. |
For dangerous scan targets, the goal is not to be brave. The goal is to get the scan and leave. Bring enough oxygen, use the right vehicle support, and do not turn the scan into a sightseeing tour with teeth nearby.
Some of the scarier scan targets connect naturally to creature knowledge and threat routes. The Subnautica 2 Leviathans guide helps with the bigger creature list before going after riskier Biomod requirements.
Common Biomod Mistakes
The biggest Biomod mistake is scanning creatures with the normal Scanner and assuming those scans will finish Bioscanner Biomod requirements later.
Once Biomods become the goal, scan the required Flora and Fauna with the Bioscanner. The original Scanner is still useful early, but the Bioscanner is the tool that opens the expanded Biomod roster.
Another mistake is keeping one Biomod setup for every route. Biomods are strongest when they match the next trip. Dash is great almost everywhere, but Pathfinder is better in confusing wrecks. Sonic Echo is better for resource hunts. Electric Discharge and Chum Cloud are better when predator pressure is the real problem.
| Mistake | Better Play |
|---|---|
| Only scanning with the normal Scanner. | Use the Bioscanner for Biomod unlock requirements. |
| Forgetting to check the Biolab. | Return to the Biolab after major Bioscanner trips. |
| Using one setup forever. | Swap Biomods based on the route. |
| Ignoring default Biomods. | Dash, Pathfinder, Sea Skimmer, and Oxygen Control are useful right away. |
| Scanning dangerous targets casually. | Plan oxygen, escape path, and vehicle support before going in. |
Biomods are easy to underuse because they sit outside the normal tool crafting loop. They are still one of the better character progression systems in Subnautica 2 because they make the player stronger directly, not just the base or the vehicle.
Final Blurb
Subnautica 2 currently has 15 Biomods, split between 5 Active Biomods and 10 Passive Biomods. Dash, Pathfinder, Sea Skimmer, and Oxygen Control are available early, while the rest unlock through Bioscanner scans of specific Lifeforms.
The Bioscanner is the turning point for Biomod progression. Once it is crafted, the best move is to scan the required Flora and Fauna, return to the Biolab, and build setups around the next route. Movement, oxygen, stealth, survival, resource detection, and predator control all have a place. The trick is choosing the Biomod that fixes the next problem instead of wearing the same upgrade forever like a lucky hat with terrible stats.