

Tower Dominion Guide and Tips
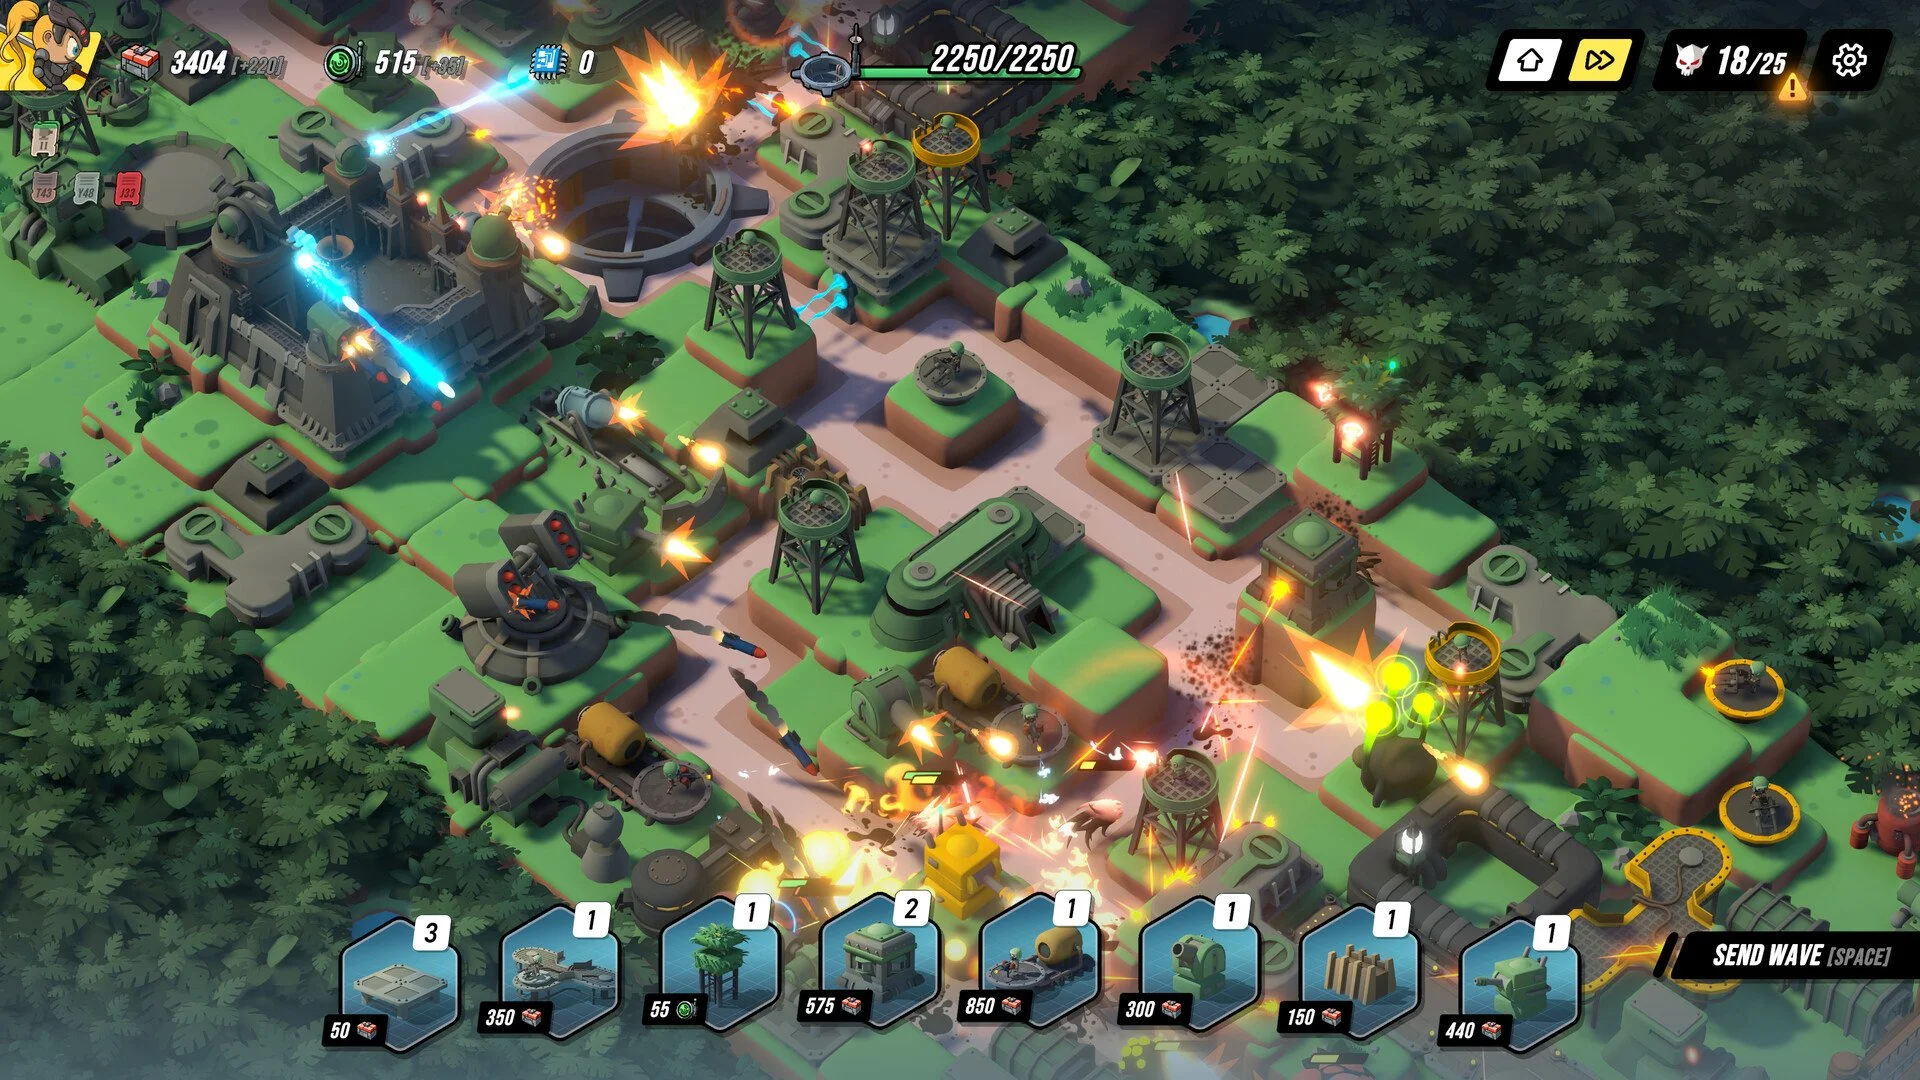
Image Credits: Untitled Studio, Blacksmith Master
Tower Dominion is a tough but addicting tower defense roguelike that lets you build the map, shape enemy paths, and mess things up all on your own.
It’s got flying enemies, stealth bugs, pathing traps, and one mechanic that ruins everyone’s first few runs: the Battlefront system.
Here’s a guide along with some tips and tricks on everything you need to know to survive, thrive, and maybe even clear a difficulty 4 run in Tower Dominion.
Build Smarter, Don’t Care About Style
At first, it’s tempting to throw down paths and towers wherever they fit. Don’t. Your layout matters a lot more than in most tower defense games.
Try to collapse all enemy lanes into a single long one. Doing this turns 4 battlefronts into 1, which makes your life easier and your AOE towers way more effective.
Just be careful not to block access or close off a full loop… Illegal tiles will get rejected.
You can also chain routes in a zigzag so towers hit more. Higher elevations give some towers better range, and placing units near specific buildings can give them extra stats.
That matters more than symmetry or making your base look nice.
Understand Battlefronts Before They Ruin Your Run
A battlefront is a unique connection between an enemy spawn and a base entrance. On difficulty 4, you start with 4 of them.
Many doctrines, perks, and tower effects scale based on how many are active.
Every tile you place can lower or merge battlefronts depending on how it connects paths. Accidentally merging down to 1 might give you great defense lanes, but could also nerf your commander bonuses.
Planning to keep 4 battlefronts? Look at the initial tile layout before placing anything. Some tile shapes will force you into merging them early whether you want to or not.
Resource Tips to Not Fall Behind
There are three core resources:
Supply: The main one. You’ll use this for most tower placements and upgrades.
Recon: Used for rerolling zones or upgrading certain map elements.
Tech: Rare. Used on late-game towers and powerful upgrades.
Use recon smartly. It’s tempting to reroll every bad tile, but sometimes a suboptimal placement is better than falling behind on upgrades.
Prioritize supply upgrades early so you can keep building even if a wave goes poorly.
Keep an eye out for neutral buildings like ammo depots, scout hideouts, and relay stations. Some only need one tower next to them to activate, but others stack benefits with every adjacent placement.
Discovery bonuses make these buildings spawn more often. If you get a doctrine or neutral site that increases discovery, take it early.
Camouflage, Flying, and Shielded Units (a.k.a. The Run Killers)
Not all enemies follow the same rules. Some are just here to waste your time, others will absolutely ruin you if you’re not ready.
Flying Units: Skip terrain and ignore walls. They still get hit by all towers, but take reduced damage. Build anti-air towers like Puma Positions early if you’re expecting them.
High-Flying Units: Fly straight to your HQ. These skip everything. Place air towers near the HQ or in their likely flight path.
Camouflaged Units: Undetectable unless your tower has detection. Look for green antenna tips or upgrade towers like Miridors to gain detection.
Shielded Enemies: Tanky with extra shields. Use shield-break towers or upgrades like Claymore’s multipoles to strip shields before your damage dealers go to work.
AOE towers with explosions (like Durandoll or Omega Emitters) can still damage camo enemies even if they can’t “see” them.
That’s often your only hope in late waves when detection is limited.
Commanders and Doctrines Actually Matter
Pick commanders and doctrines based on what you're trying to build around.
Some are focused on infantry, others on base damage or rerolls.
Read their bonuses. Many builds fail because they try to do everything at once. Stick to one or two core ideas and commit.
Tier III doctrines like Unyielding Determination or Advanced Engineering can hard-carry a build if you make your layout support them.
Don’t just click whatever looks shiny. Synergy wins runs.
Shop Strategy: How to Not Go Broke
Unlocking your store is a game changer. Here’s the basic setup:
Place a Checkout Counter
Assign a Cashier
Add racks with crafted items
Assign Blacksmiths to craft for racks
Decorate the area to raise the attractiveness stat
Decorations give bonuses that scale with the number of racks. If your shop starts to feel empty or your customer line stretches to the map edge, it’s time to expand and drop more plants, banners, and lighting.
Use the indicator settings to toggle wait times and rack visuals so you can see when you need more staff.
Tower Tips and Layout Tricks
Keep storage, HQ, and ammo depots close to each other.
Place bastions next to HQ for +10% damage and HP, or double that with specific upgrades.
Upgrade scout hideouts early if you want to reroll more tiles or doctrines.
Stagger anti-air towers so flying units get hit multiple times before reaching your HQ.
Avoid overvaluing Claymores. They’re fine for shield damage, but not great for general use.
Retribution Positions do great anti-air damage, especially with adjacent support.
Don’t put everything in one spot unless you're 100% sure your pathing can funnel it all correctly.
Final Blurb
Tower Dominion doesn’t hold your hand. You’ll probably lose a bunch of times figuring things out, and that’s normal.
Keep experimenting, manage your battlefronts, and counter enemy types before they appear; you’ll start pushing past wave 30 in no time.
Don’t ignore detection, don’t spread your towers too thin, and remember... every wave is just one bad tile away from disaster.
FAQ
Q: What are battlefronts and why do they matter?
Each one is a unique enemy entrance and HQ connection. Some doctrines and commanders scale with how many you maintain.
Q: How do I deal with camo enemies?
Use towers with detection, like upgraded Miridors or scout support. AOE splash also damages them.
Q: What should I do with recon early?
Spend some on upgrades, not just rerolls. Scout hideouts boost long-term recon production.
Q: Are neutral buildings worth it?
Yes. Some give passive resource income or major tower buffs. Prioritize tiles that activate or stack with them.
Q: How do I counter flying and high-flying enemies?
Puma Positions, Retribution towers, and some command units help. Place near HQ or at flight paths.
Recommended | Go to Home Page


