Avatar Legends: The Fighting Game Guide & Best Tips to Dominate
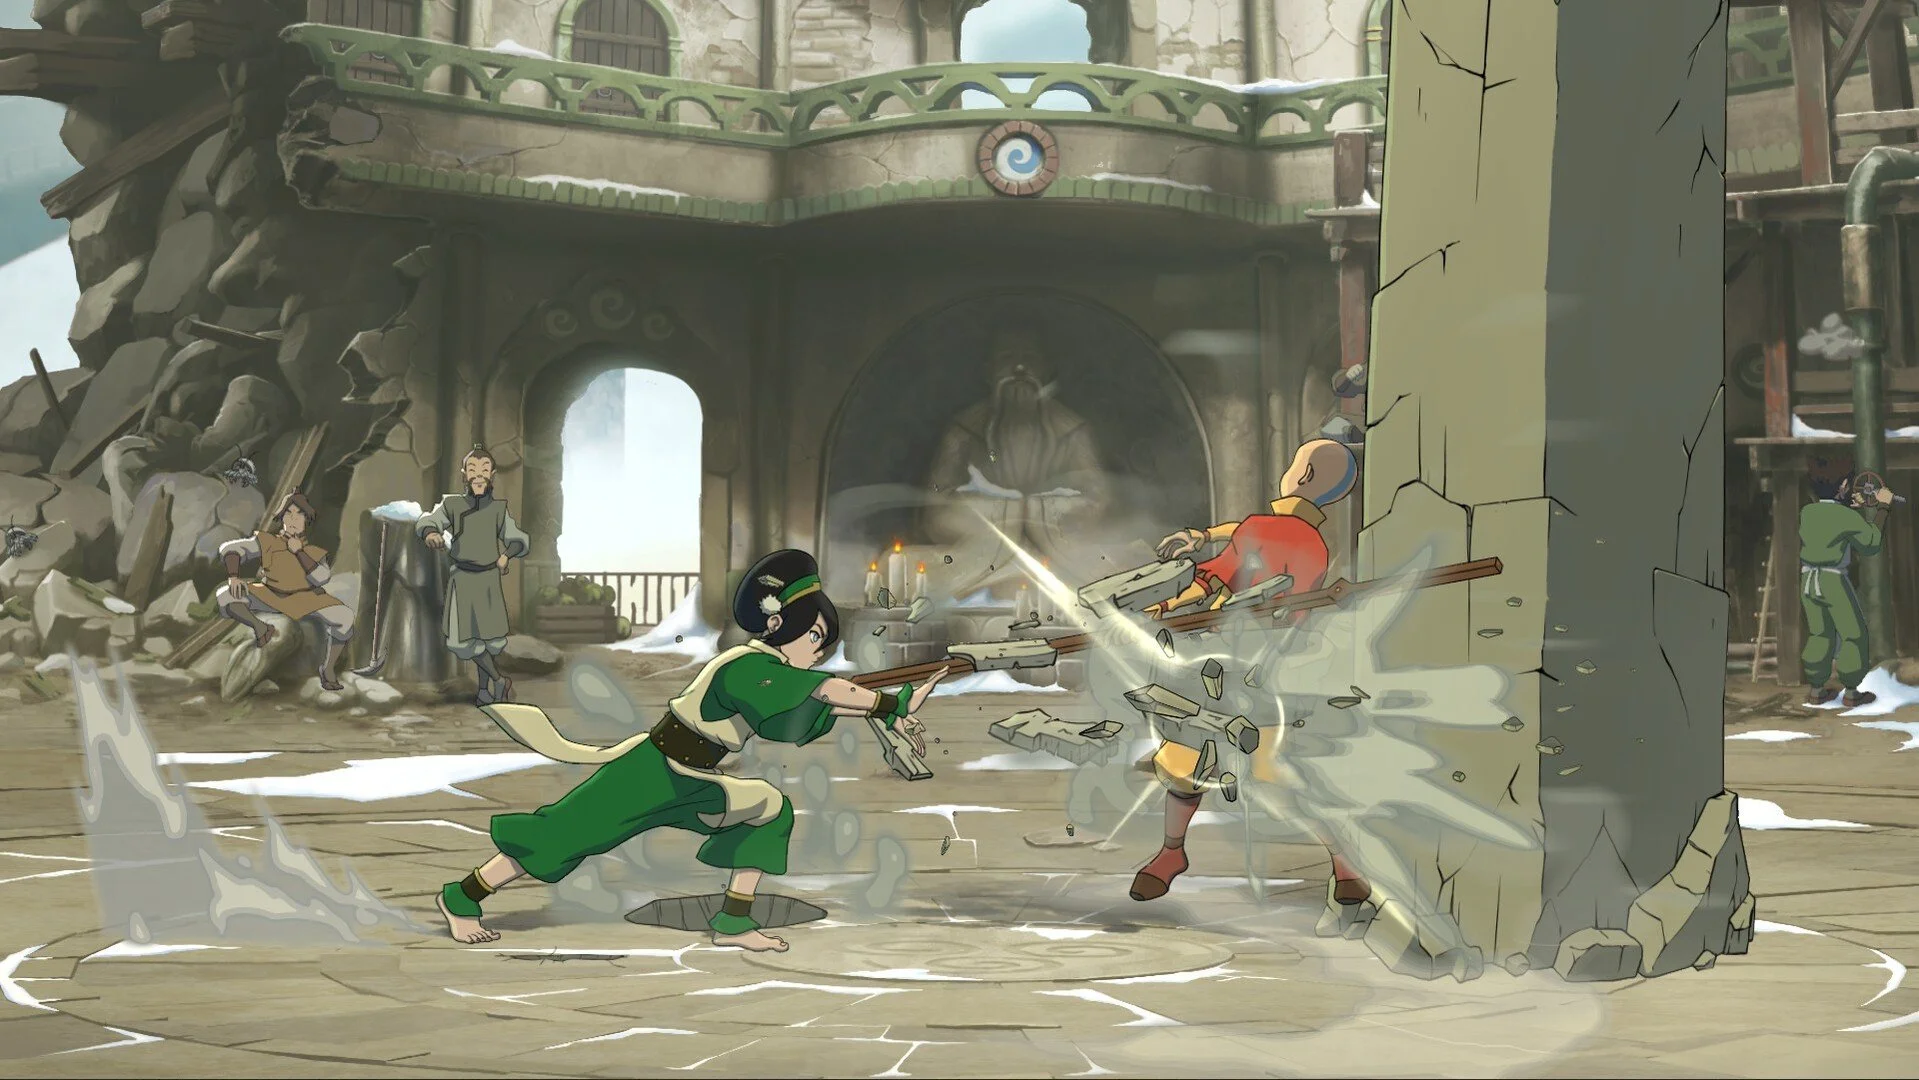
Avatar Legends: The Fighting Game is easier to understand once you stop treating it like a fighter where blocking is free and every opening should lead into the longest possible combo. Movement, defense, combo extensions, and emergency escapes all compete for limited resources. A player who protects their Flow Gauge, earns Energy through deliberate offense, and varies their recovery options can control a match without memorizing every character-specific sequence on the first day.
The Best Beginner Game Plan in Avatar Legends
The strongest beginner strategy is to use movement to avoid pressure, guard only when escape is no longer practical, and save enough Flow for one defensive response. Constant blocking may feel safe, but every guarded attack reduces the Flow Gauge and moves the character closer to the extremely vulnerable Unbalanced state.
On offense, begin with short and repeatable sequences. A simple Light, Medium, Heavy chain followed by a Special Technique teaches more useful timing than attempting an advanced Flow Cancel route before you understand when the opponent can recover.
Your first objective in every round should be identifying how the opponent wants to approach. A player repeatedly jumping can be challenged with an aerial throw. Someone holding guard or Flow Stance can be opened with throws. An opponent constantly retreating can be followed with dash-canceled attacks or a faster dash jump.
Do not spend every resource simply because it is available. Flow keeps your defense and movement alive, while Energy provides EX Special Techniques, Supers, and eventually Final Techniques. A good player threatens several options at once instead of emptying both resources during the first successful exchange.
Learn the Four Buttons Before Character-Specific Combos
Avatar Legends uses four primary buttons: Light, Medium, Heavy, and Flow. The three attack buttons produce different moves while standing, crouching, and jumping, giving every character a broader normal-attack kit than the button count initially suggests.
Light attacks are generally the easiest place to begin pressure. Medium attacks tend to provide additional reach or stronger combo structure, while Heavy attacks are more committed and may serve as launchers, overheads, or powerful finishers depending on the character.
The Flow button controls character-specific movement and several defensive systems. Pressing it with a direction performs a Flow Move, while holding it enters Flow Stance. It also combines with other buttons for throws, Guard Reversals, and emergency recovery options.
Several combination inputs can be assigned to macros. Throw uses Light plus Flow, dash can be performed with two attack buttons, Guard Reversal uses Heavy plus Flow, and Super Techniques use all three attack buttons together after the required directional motion.
Macros can make the inputs more comfortable, but they should not replace understanding the individual commands. Knowing that a throw is Light plus Flow makes it easier to recognize why the same combination is also used for Throw Escapes and aerial throws.
Use Dashes, Jumps, and Momentum to Control Neutral
Ground dashes provide quick repositioning and can usually be canceled into attacks or jumps. This makes them more than a way to run forward. A dash can threaten an immediate normal, a throw, a jump-in, or a retreat before the opponent knows which option you selected.
Canceling a dash into a jump transfers momentum and produces a faster, longer jump. Use this to approach from a less predictable distance, clear a grounded attack, or reposition before the opponent can occupy the space in front of you.
High Jumps are performed by pressing down before an upward direction. They reach farther vertically than standard jumps, while a straight High Jump provides some air control. High Jumps are useful for changing the timing of an approach, but the extra height also leaves more time for an opponent to prepare an aerial throw.
Remember that guarding is unavailable while airborne. Jumping away from pressure is therefore not automatically safer than remaining grounded. A predictable jump can be intercepted before your character has access to a defensive response.
Use ordinary dashes and Flow Moves as the default movement tools, then jump when you have a specific reason. The goal is to change position without surrendering control of the next interaction.
How Guarding Works in Avatar Legends
Hold back to guard standing attacks and aerial attacks, or hold down-back to defend against low attacks. Overheads must be blocked while standing, while lows require crouching guard.
Every blocked attack consumes a small amount of Flow Gauge. Special Techniques also inflict a small amount of chip damage through guard, so remaining defensive forever is not a sustainable plan.
This makes blocking a temporary answer rather than a permanent state. Guard the attacks you cannot safely evade, identify where the opponent’s pressure ends, and then use movement, a reversal, or your own offense to reset the situation.
Watch for opponents alternating between low attacks and overheads. Holding one guard direction indefinitely makes the defense easy to open. Learning the visual difference between grounded lows, command overheads, and jumping attacks is more important than immediately memorizing a long combo.
Guarding is strongest when you still have enough Flow to escape afterward. A player who blocks until the gauge is empty may survive the current sequence only to enter Unbalanced and become much easier to defeat during the next one.
How the Flow System Changes Every Match
The Flow Gauge regenerates over time and powers movement and defensive actions connected to the Flow button. Flow Moves, Flow Stance, Guard Reversals, Flow Cancels, and Flow Escapes all draw from this part of the combat system.
Each character’s Flow Moves are different. Some improve horizontal movement, some evade low attacks, and others avoid higher strikes or reposition through an opponent. Learning which part of the screen your Flow Move controls is more useful than thinking of every Flow input as a generic dodge.
Avoiding an attack with the correct Flow Move is often better than guarding it. Successful avoidance preserves health, prevents chip damage, and can award Energy when the move evades the appropriate high or low attack.
The danger is spending Flow repeatedly without checking the remaining gauge. A player may use one Flow Move to evade an attack, cancel it into another movement option, then spend again on defense and suddenly enter Unbalanced.
Try to end each interaction with enough Flow available for one meaningful response. That reserve may become a Guard Reversal, a Flow Stance read, or an emergency recovery after being knocked down.
Flow Stance Is Powerful but Not a Universal Defense
Holding the Flow button activates Flow Stance, which automatically defends against incoming attacks and produces special defensive animations when a hit is absorbed.
Those animations can be canceled into Flow Moves, allowing you to defend one strike and immediately reposition. This makes Flow Stance valuable against predictable pressure or situations where manually switching between standing and crouching guard would be difficult.
The weakness is throws. Flow Stance is vulnerable to Critical Throws, turning an opponent’s correct read into a much more damaging punishment than a standard grab.
Do not remain in Flow Stance once the opponent recognizes the habit. Mix normal guarding, back dashes, offensive challenges, and throw escapes so the other player cannot solve your entire defense with one repeated option.
Holding Flow Stance for an extended period can earn one Energy point, but waiting only for that reward can consume too much Flow and invite a Critical Throw. Treat the Energy gain as a secondary benefit rather than the main reason to enter the stance.
Know When to Use a Flow Reversal or Guard Reversal
A Flow Reversal is performed by canceling guard into an available directional Flow Move. It can create movement out of pressure, but it does not automatically make the selected Flow Move invulnerable.
The move retains its normal evasive properties. A Flow Move designed to avoid lows can still work against a low attack, while the same option may lose to a strike that covers its vulnerable area.
Guard Reversal uses Heavy plus Flow while blocking. It is fast, invulnerable, and useful for creating space, but it carries a heavy Flow Gauge cost.
Use Guard Reversal when escaping the current sequence matters more than conserving the gauge. It is particularly useful near the corner, where continued blocking can lead to much greater damage if the opponent opens your defense.
Avoid using Guard Reversal automatically after the first blocked attack. Spending a large portion of Flow against weak or incomplete pressure can leave you without a defensive answer when the opponent begins a more dangerous sequence later in the round.
The practical difference is reliability versus efficiency. Guard Reversal is the expensive but dependable escape, while Flow Reversal is more resource-conscious when you correctly match its evasive property to the incoming attack.
Never Spend the Flow Gauge Without Watching the Bottom of the Bar
Completely exhausting Flow puts the character into the Unbalanced state. All actions involving the Flow button become unavailable until the state ends, removing several movement, defensive, and recovery options at once.
The punishment goes beyond losing access to Flow techniques. Every hit received while Unbalanced is treated as a Counter Hit, every throw becomes a Critical Throw, and every knockdown becomes a Hard Knockdown.
This means an empty Flow Gauge can turn one ordinary mistake into an entire round-losing sequence. The opponent gains stronger hit properties while your character loses the systems normally used to escape.
Stop Flow Cancels when the gauge approaches empty, even if another extension is technically possible. Ending a combo slightly earlier is usually better than entering neutral with no defensive resources.
When Flow is low, use grounded movement, standard guarding, and safer normals while the gauge regenerates. Do not attempt to solve the shortage by spending the final amount on another Flow Move unless it will clearly escape a decisive attack.
Start With Chain Combos Before Adding Flow Cancels
Most characters can chain Light into Medium and then Heavy. This provides a reliable beginner sequence for learning hit timing, range, and the moment at which the opponent leaves hitstun.
Repeatedly pressing Light performs an Auto Combo that ends in a Special Technique. Directional inputs can alter which Special Technique is used, making the Auto Combo useful for learning how different enders affect the opponent.
Auto Combos are helpful early, but they should not become the only offense. Their predictable structure makes them easier to defend against, and they may not provide the best positioning, damage, or resource use for every situation.
Command Normals use a direction together with Heavy and can often be Flow Canceled. These moves commonly create stronger pressure, alter movement, or open a specific combo route.
Flow Cancels can be used from Flow Moves, Light attacks, Command Normals, and guarding. They allow one action to transition directly into a Flow Move, creating character-specific pressure and movement sequences.
Practice one cancel at a time. Begin with Light into a Flow Move or a Command Normal into a safe repositioning option. Attempting several chained cancels before you understand the cost can quickly drain the resource that keeps the character out of Unbalanced.
Use Special Techniques to Build Energy, Not Just End Combos
Special Techniques use directional motions followed by Light, Medium, or Heavy. When they successfully hit, they award one Energy point per combo and can deal chip damage when guarded.
Only one Energy point can be earned from Special Technique hits during the same combo. Adding several Special Techniques to one sequence does not continuously generate more Energy.
This makes it useful to confirm a normal attack before committing to the Special Technique. A successful hit creates damage and Energy, while a blocked Special may still provide chip pressure but can leave the character open depending on the move.
Special Techniques can only be canceled into Chakra Arts, so choose the ender with the next stage of the sequence in mind. Do not assume every Special can return to a normal attack or be made safe with an ordinary cancel.
Use Throws Against Guarding and Flow Stance
Throws are performed close to the opponent with Light plus Flow. They deal damage, award one Energy point, and provide the direct answer to players who rely heavily on guarding or Flow Stance.
A dash can be canceled into a throw, substantially increasing its practical range. Mix dash throw with dash attack and dash jump so the opponent cannot react to forward movement with one universal response.
Throws can be escaped by quickly pressing the same Light plus Flow command. The defender must recognize the attempt and respond before the escape window closes.
Aerial throws use the same input while both characters are airborne. They only connect against airborne opponents, but their speed and generous range make them one of the most important answers to repeated jumping attacks.
When someone constantly attacks from the air, jump toward them and input the throw immediately after leaving the ground. This challenges the approach before the opponent’s aerial normal becomes active.
Aerial throws can also be escaped, although the available window is extremely short. Several characters can convert a successful aerial throw into additional damage, making the mechanic worth practicing even before learning advanced grounded combos.
Spend Energy According to the Round, Not the Highlight Clip
Energy is primarily earned by landing Special Techniques, but throws, successful overheads, successful lows, evasive Flow Moves, and extended Flow Stance can also provide points.
The normal maximum is five Energy. After losing a round, the character receives two additional points and the maximum increases to seven, creating access to more expensive comeback options.
EX Special Techniques use two attack buttons after the normal special motion. Moves that enable combos or provide invulnerability cost two Energy, while other EX techniques cost one.
Super Techniques cost four Energy and cause Hard Knockdown. This prevents ordinary Ground Recovery and gives the attacker a more stable advantage after the cinematic damage ends.
Final Techniques require seven Energy and represent the strongest attack available to the character. Since the normal maximum is five, losing a round is what creates access to the full seven-point resource capacity.
Do not hold every point for a Final Technique when a one- or two-point EX move can win the current interaction. An invulnerable EX reversal, stronger combo extension, or safer conversion may prevent the round from reaching the point where a seven-point attack becomes relevant.
At the same time, avoid spending Energy randomly because the gauge is full. Know whether the next EX move provides damage, invulnerability, positioning, or a combo route before committing the resource.
Vary Ground and Aerial Recovery Directions
Holding left or right while knocked down performs a Ground Recovery roll in that direction. The character remains fully invulnerable during the recovery, allowing you to avoid predictable follow-up positioning.
Chakra Arts cause Hard Knockdown and prevent ordinary Ground Recovery. After one of these attacks, the defender must accept the knockdown situation rather than rolling away immediately.
Aerial Recovery also uses left or right while being hit in the air. It remains fully invulnerable until landing, providing a safe route out of some airborne sequences.
Attacking or using a Flow Move during Aerial Recovery forfeits that invulnerability. Do not press immediately unless you have confirmed that the opponent cannot punish the action.
The most important recovery rule is avoiding patterns. Always rolling backward or always recovering toward the center allows the opponent to pre-position and continue pressure.
Alternate directions, occasionally remain grounded when the system allows it, and watch how the opponent responds. Recovery is not simply the end of their combo. It is the beginning of the next positioning decision.
Flow Escape can strengthen Ground or Aerial Recovery at a heavy resource cost. Save it for situations where the standard movement would remain trapped or where escaping the corner is worth the Flow expenditure.
Choose a Support That Fixes a Specific Weakness
Each main fighter has three support options. Most supports do not enter the match as traditional assist characters. Instead, they modify movement, attacks, resource costs, stances, projectiles, combo routes, or other parts of the selected fighter’s existing kit.
Choose a support according to how you actually play the character. A movement support is useful when reaching the opponent is the main problem, while a combo support provides less value if you rarely confirm the attack needed to begin that route.
Aang demonstrates the basic choice clearly. Gyatso improves the air scooter for stronger ground mobility, Momo enhances glider control and aerial movement, while Appa allows normals to cancel into Flow attacks at the cost of additional resource use.
Korra players struggling with resource management may prefer Tonraq because he reduces the cost of Avatar’s Path techniques and Tempest’s Roar. Naga instead improves movement options, while Raava extends Avatar State for players who want to emphasize its offensive power.
Zuko can use Mai for improved projectiles, Ran and Shaw for greater movement speed, or June to strengthen divekicks. The correct selection depends on whether the player wants zoning, ground mobility, or more dangerous aerial offense.
Sokka’s Suki support makes Flow Cancels substantially cheaper, making it especially useful for players who frequently exhaust Flow during pressure. Master Piandao develops Sokka’s sword through Super Splash attacks, while Princess Yue improves his boomerang combo routes.
Do not assume the support most common among advanced players is automatically best for learning. A resource-saving or movement-focused option may provide more immediate value than a high-damage support that requires difficult execution.
Test the same character with all three supports in training mode. Pay attention to which neutral situations, combo routes, or resource problems genuinely change rather than selecting only from the written effect.
A Practical Avatar Legends Beginner Practice Routine
Begin by selecting one character and learning the range of their standing Light, Medium, and Heavy attacks. Repeat the same process while crouching and jumping so you know which normal reaches farthest, attacks fastest, and covers the air.
Next, practice Light into Medium into Heavy, followed by one Special Technique. Confirm that the sequence works on hit, then check what happens when the training opponent guards it.
Record a basic low attack, an overhead, and a jumping attack. Practice changing between crouching and standing guard without spending the entire session inside Flow Stance.
After that, record a repeated jump-in and challenge it with an aerial throw. This should become a deliberate defensive response rather than something attempted for the first time during an online match.
Practice one Flow Move against the type of attack it is designed to evade. Then check how much gauge remains after repeating the movement, canceling into another action, and using a Guard Reversal.
Set the Flow Gauge near empty and observe the consequences of entering Unbalanced. Seeing the Counter Hits, Critical Throws, Hard Knockdowns, and disabled Flow actions makes the risk easier to respect during a real round.
Finally, practice earning Energy through a Special Technique, a throw, an overhead or low, and an evasive Flow Move. Spend the points on one EX move and one Super so you understand the difference between using meter for immediate utility and saving four points for a larger attack.
Winning Without Exhausting Every Resource
The central skill in Avatar Legends: The Fighting Game is recognizing which system should solve the current problem. Standard movement controls spacing, guarding survives immediate pressure, Flow provides stronger movement and defensive options, and Energy turns successful offense into more powerful techniques.
Using the most expensive answer every time creates short bursts of strength followed by severe vulnerability. Guard Reversal is reliable but costly, Flow Stance is broad but loses to Critical Throws, and extended Flow Cancel pressure becomes dangerous when the gauge approaches Unbalanced.
Begin with short combos, deliberate Special Technique confirms, varied recoveries, and one support that strengthens the part of the character you use most often. Once those decisions become automatic, longer Flow routes and advanced resource conversions become much easier to add without losing control of the match.