Dinoblade Guide: Combat, Progression & Beginner Tips
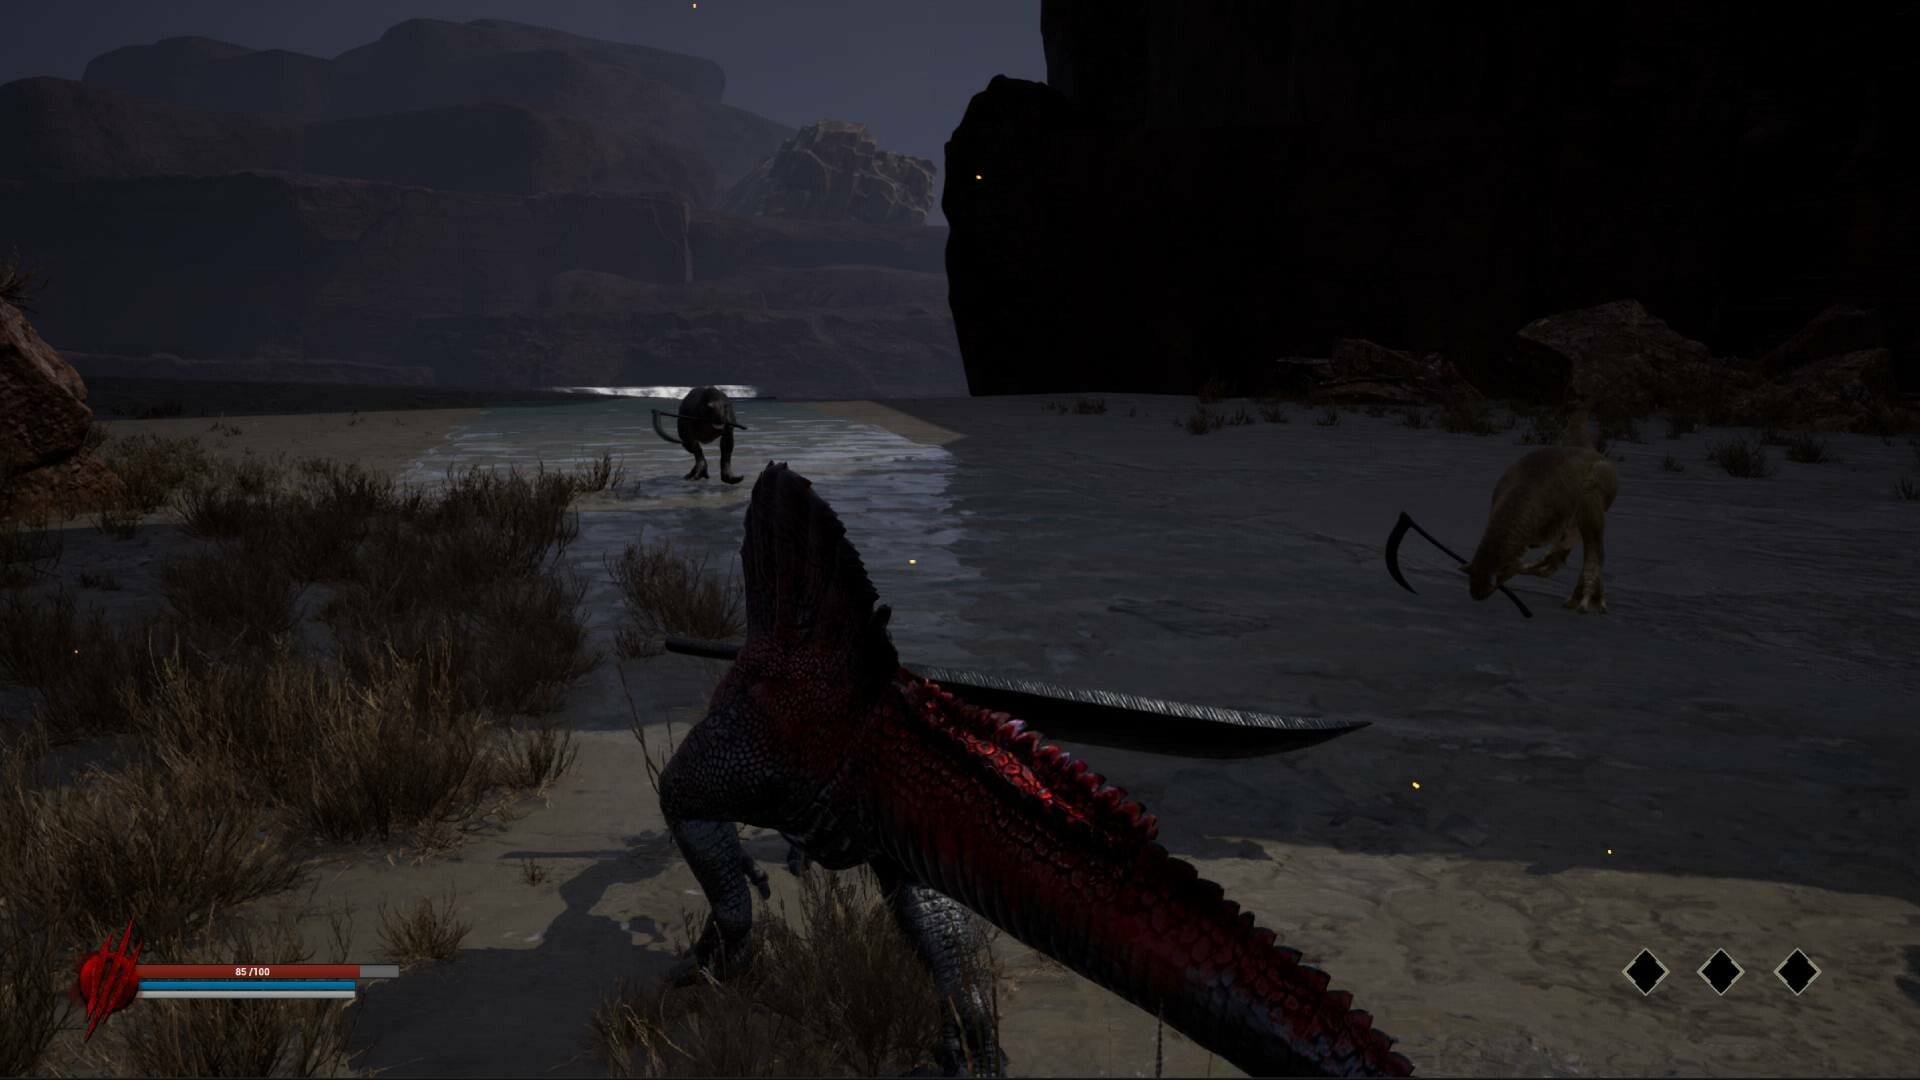
Dinoblade may have the spectacle of dinosaurs swinging enormous weapons, but its combat rewards patience more than chaos. Blocking too late drains stamina, careless attacks leave you open to bosses, and spending Resonance without a plan can remove your best ranged option. A strong start comes from learning the relationship between parries, stamina, Resonance, Resolve, and Instinct Counters before trying to overpower every enemy through raw damage.
Jump To
How Dinoblade Combat Works
Dinoblade uses a Soulslike combat structure built around light attacks, heavier combinations, dodging, blocking, perfect parries, stamina management, and special attacks powered by Resonance. Normal enemies can often be overwhelmed quickly, but larger dinosaurs and bosses punish long attack commitments.
The basic rhythm is to defend first, recognize the end of the enemy’s sequence, and then answer with a short combination. Light attacks provide safer openings, while heavy attacks create stronger pressure but require more commitment.
Special moves and Charge Attacks expand the available offense, but they draw from the blue Resonance bar and may also consume stamina. Using them repeatedly without watching both resources can leave you unable to attack, defend, or retreat when the enemy responds.
Boss battles add another layer through the Resolve Bar. Attacks and successful defensive actions build toward a moment when a perfectly timed parry can trigger an Instinct Counter, creating one of the largest damage opportunities available early in the game.
Dinoblade therefore rewards alternating between controlled pressure and deliberate defense. Trying to remain permanently aggressive may work against small enemies, but it prevents you from taking advantage of the systems that make boss encounters considerably easier.
The Best Opening Route in Dinoblade
After the opening scenes, approach the flaming sword and pick it up to begin the combat tutorial. The first encounters introduce blocking and deflecting before moving into light attack combinations.
Use the nearby blockade to practice chaining light attacks, then defeat the enemies that appear and continue through the narrow passage. The objective during this section is not merely reaching the next room. It is becoming comfortable with the delay between each attack and how quickly you can return to defense.
Once the path opens into the larger cavern area, sprint and dodge become available. Use the additional space to practice locking onto one enemy while keeping the rest of the group visible. Lock-on is useful during direct exchanges, but remaining fixed to one target can make it harder to react when several smaller dinosaurs attack from different directions.
Defeat the groups encountered while moving through the cavern. Clearing these enemies should provide enough experience for the first level while also introducing heavy attack chains and a larger dinosaur that demands more careful spacing.
Rest at the first Save Stone before continuing. From there, move toward the waterfall and proceed through the path where the Charge Attack tutorial appears.
Continue using the moon as a visual guide until reaching the next Save Stone. The route toward Kira begins to the right of this checkpoint and introduces Instinct Counters before the first major boss battle.
Block First, Then Learn the Perfect Parry
Blocking and parrying use the same defensive system but produce very different results. Holding the defensive input protects you from an attack at the cost of stamina, while pressing it with precise timing can deflect the hit and restore both stamina and Resonance.
Late blocks are especially costly because they consume the resource needed for attacking and dodging. If stamina is already low, one poorly timed defense can remove your ability to escape the enemy’s next swing.
Begin by blocking complete attack strings rather than attempting to parry every hit immediately. This reveals the number of strikes in each sequence and prevents you from mistaking the first impact for the end of the combination.
Once the rhythm is familiar, begin timing the defensive input closer to the moment of contact. Perfect parries provide more than damage avoidance. They refill the resources that keep the rest of your combat options available.
Do not continue attacking merely because the first hit landed. Many enemies use two- or three-part combinations, and the safest punish begins only after the final attack has passed.
Against groups, avoid locking onto one small enemy while another stands behind you. Create space, keep the pack on one side of the screen, and use short attacks that allow you to return to block quickly.
Manage Stamina and Resonance as Separate Resources
Stamina controls several fundamental actions, including attacking, blocking, and dodging. Resonance powers special actions and Charge Attacks. Both matter during the same exchange, but depleting one creates a different problem from depleting the other.
Running out of stamina removes your immediate defensive flexibility. You may still have Resonance available for a special attack, but using it while unable to block or dodge can turn an offensive attempt into unnecessary damage.
Running out of Resonance does not make the character defenseless, but it removes powerful ranged and special options. This becomes important when a boss creates distance or when a safer attack could have been used instead of approaching through an active combination.
Charge Attacks consume five Resonance and also require stamina. Treat them as a calculated tool rather than a basic projectile to use constantly.
They are most useful when an enemy is recovering, approaching from a predictable direction, or positioned beyond the reach of a normal combination. Firing one while the boss is already beginning a charge can leave you locked into the animation as the attack arrives.
Perfect parries help solve both resource pressures by restoring stamina and Resonance. This makes defensive skill part of the offensive build rather than a separate survival mechanic.
How Instinct Counters Work
Instinct Counter becomes available shortly before the Kira encounter and is one of Dinoblade’s most important boss mechanics. Bosses have a Resolve Bar that fills during combat, creating an opportunity for a much stronger counterattack.
When the Resolve Bar is full, perfectly parry an eligible boss attack to initiate the Instinct Counter sequence. This creates a clash and can deal substantial damage when completed successfully.
The key is waiting for the correct moment. A full Resolve Bar does not mean you should immediately stand in front of the boss and press block repeatedly. You still need to read the incoming animation and time the parry against a real attack.
Use normal attacks and safe defensive play to build the opportunity, then become more conservative once the bar is ready. Losing most of your health while trying to force the counter defeats the purpose of creating the opening.
Instinct Counters become particularly valuable against bosses whose normal openings are short. Instead of chasing small amounts of damage after every combination, you can use controlled pressure to reach the clash and remove a much larger portion of the health bar.
Practice the system against Kira rather than attempting to defeat him exclusively through dodging and ordinary attacks. The fight is designed to teach how Resolve and perfect parries connect before later bosses become more demanding.
Use Healing Charges Before the Next Hit Becomes Lethal
The opening section provides three Healing Charges, displayed on the HUD. These are limited during the current attempt, so healing after every small hit wastes resources that may be needed during the boss fight.
At the same time, waiting until one remaining hit can kill you creates a different risk. Healing usually requires enough distance and time to complete the action, and a boss may close that distance before the recovery finishes.
Use healing after creating a clear separation, after avoiding the final strike of a long combination, or while the enemy is recovering from a failed charge. Do not begin healing directly in front of a boss simply because the health bar is low.
Save Stones provide checkpoints and restore your condition, but resting also respawns defeated enemies. Use this deliberately. Rest before entering an unfamiliar boss route, but do not repeatedly clear an entire area and then reset every enemy unless you are intentionally farming experience.
The first Save Stone is also a useful place to practice recently unlocked attacks. Nearby enemies can be fought again after resting, allowing you to learn heavy chains or parry timing without risking significant exploration progress.
How to Beat Kira the Exile
Kira the Exile is the first major test of the defensive systems introduced in the cavern. His attacks are readable, but attempting to attack through the complete sequence can quickly drain health and stamina.
One of Kira’s main patterns is a three-hit weapon combination. The opening motion provides enough warning to prepare, but the important detail is that the sequence continues after the first and second swings.
Move out of range or block the complete combination before attacking. Attempting a heavy punish after the first swing can result in being caught by the remaining strikes.
Kira can also charge toward you and follow the approach with a ground explosion that travels forward in a line. Move to the side instead of retreating directly backward along the path of the attack.
After avoiding the charge and explosion, use a short attack sequence rather than committing to every available hit. Kira recovers quickly enough that an extended combination may overlap with his next action.
Continue building his Resolve Bar through safe attacks and successful defense. When the bar is full, prepare to perfectly parry an incoming strike and trigger the Instinct Counter clash.
The counter deals enough damage to change the pace of the encounter, making it more efficient than trying to remove the entire health bar through scattered normal attacks.
Keep one Healing Charge available during the later part of the battle whenever possible. Kira is not mechanically complex, but one mistimed block against the three-hit combination can create an unexpected health deficit.
Defeating Kira unlocks the ability to summon previously defeated bosses and opens the next stage of character development through Soul Arts and Boss SP.
Use Boss Summons to Cover Difficult Combat Moments
After Kira is defeated, he becomes available through the Summoning system. Defeated bosses can be called into battle, turning major victories into additional tools for later encounters.
Do not use a summon automatically against the first ordinary enemy after unlocking it. Boss summons are more valuable when facing a large group, a durable mini-boss, or an opponent whose pressure prevents you from safely beginning your own attack.
A summon can create a temporary distraction, add another source of damage, or give you enough room to heal and recover resources. The best use is often improving the current situation rather than simply adding damage to an encounter you were already winning.
Consider the boss’s attack behavior when deciding when to call it. Kira’s aggressive approach is useful when an enemy needs to be engaged quickly or when you want another combatant occupying the immediate area.
As more bosses are defeated, the Summoning system should be treated as another form of build choice. Different encounters may favor a summon with direct pressure, crowd control, or a more specialized attack pattern.
Spend Boss SP on Soul Arts You Will Actually Use
Boss SP is used to purchase Soul Arts, including special moves such as Meteor Slice, Meteor Dash, Alpha Roar, Meteor Zone, and Survival Instinct.
These abilities create different build directions, but unlocking everything immediately is not necessarily the best use of early Boss SP. Begin with an ability that solves a recurring problem in your current playstyle.
A player struggling to approach enemies may benefit more from mobility or ranged pressure than from another close-range damage option. Someone comfortable with parrying but overwhelmed by groups may prefer an Art that controls space or clears nearby threats.
Test each new Soul Art against ordinary enemies before relying on it during a boss fight. Learn its Resonance cost, range, animation length, and whether it can be used safely after a parry or stagger.
Do not evaluate a Soul Art only by the damage number. A slightly weaker ability that can be activated reliably may contribute more across an entire area than a powerful move that repeatedly leaves you vulnerable.
Choose an Early Build Around Your Defensive Comfort
Dinoblade allows health, damage, mana or Resonance use, stamina, and other attributes to be improved with experience. The best early distribution depends on which part of combat is causing failures.
Increase health when one missed parry or boss combination removes too much of the life bar. More health does not correct poor timing, but it creates room to survive while learning an unfamiliar moveset.
Improve stamina when blocking, dodging, and heavy attacks repeatedly leave the bar empty. This is particularly useful for players who defend reliably but lack enough stamina to punish afterward.
Invest in damage when normal enemies take too long to defeat despite clean execution. Higher damage shortens fights and reduces the number of opportunities enemies have to land a mistake-punishing attack.
Resonance-focused investment suits players who use Charge Attacks and Soul Arts as a major part of the rotation. The build becomes much less useful when special abilities are treated as occasional emergency buttons.
A balanced opening is safer than committing every early point to damage. Bosses still require learning their attacks, and no offensive stat prevents a long animation from being punished.
After defeating several bosses and unlocking more Soul Arts, begin specializing around the abilities and defensive rhythm that have proven reliable rather than the build you expected to enjoy before playing.
Explore Beyond the Main Path, but Secure the Checkpoint First
Dinoblade’s environments contain alternate paths, optional encounters, resources, and additional weapons. Moving directly from checkpoint to boss may advance the story, but it can also leave useful progression behind.
Secure the nearest Save Stone before committing to a suspicious side route. This limits the amount of progress lost if the path leads to a mini-boss or a group stronger than expected.
Distinct biomes such as canyons, scorched forests, volcanic plateaus, and mist-covered jungles are designed around increasingly dangerous enemies and a larger Alpha encounter that controls progression through the region.
Use normal enemies to identify the biome’s combat theme. Their attacks often teach the spacing, timing, or hazard awareness that becomes important against the area’s dominant predator.
Curiosity is most productive when resources are available. Exploring a hidden path with no Healing Charges, low Resonance, and an unspent level creates unnecessary risk. Rest, upgrade, and return rather than treating every side route as something that must be completed immediately.
Legendary weapons and valuable materials make exploration worthwhile, but the strongest reward may be discovering a shortcut that reduces the distance between a Save Stone and a difficult encounter.
Common Dinoblade Beginner Mistakes
One of the most common mistakes is treating block as a permanent shield. Blocking consumes stamina, and holding it through every attack can leave the bar empty when the enemy’s most dangerous strike arrives.
Another mistake is attempting to parry without first learning the complete combination. Perfectly deflecting the opening hit means little when the next two attacks land during the attempted punish.
Dodging directly backward can also be dangerous. Charges and ground explosions often continue forward, so lateral movement creates a more reliable escape path.
Players may also spend Resonance as soon as it becomes available. Charge Attacks and Soul Arts are useful, but draining the blue bar before a boss exposes a safe opening removes options that could have dealt much more damage.
Ignoring small enemies during the cavern can delay the first level and leave the opening boss route harder than necessary. Clear enough of the initial groups to understand the combat and secure the early stat improvement.
Resting at a Save Stone without considering enemy respawns can turn a cleared route back into a complete combat area. Use the checkpoint when healing, upgrading, or intentionally farming rather than interacting with it automatically.
Finally, do not spend every early upgrade point without deciding what problem the build needs to solve. More damage will not help when the actual issue is running out of stamina after one blocked combination.
A Reliable Dinoblade Beginner Progression Plan
Pick up the flaming sword and use the tutorial enemies to learn the timing of light attacks, blocking, and deflecting. Do not rush through the blockade section without understanding when the character can return to defense.
Clear the smaller dinosaurs in the cavern, defeat the larger enemy, secure the first level, and rest at the Save Stone. Practice heavy attacks here if their animation length is still unfamiliar.
Move toward the waterfall, unlock the Charge Attack, and test it against an enemy from a safe distance. Watch both stamina and Resonance instead of judging the attack only by its damage.
Follow the route toward the moon and activate the next Save Stone. Use the path to the right to learn Instinct Counters before entering Kira’s arena.
Against Kira, defend through the full three-hit combination, move sideways around the charging ground attack, and use short punish sequences. Build the Resolve Bar and prioritize a successful Instinct Counter over forcing constant damage.
After defeating him, test the Kira summon against regular enemies and review the newly available Soul Arts. Spend Boss SP on an ability that improves the current playstyle rather than unlocking whichever move has the largest-looking attack.
From there, use each biome as a progression cycle: find the Save Stone, learn the regular enemies, explore side paths while resources remain, develop one reliable response to the area’s strongest attack pattern, and then challenge the Alpha controlling the route forward.
Dinoblade becomes much more manageable once combat stops being a contest to attack first. Build resources through perfect defense, spend them during a real opening, and allow each boss to teach the mechanic needed for the next part of the prehistoric journey.