Scrap Mechanic 1.0 Beginner Tips for Survival
Scrap Mechanic 1.0 gives new players an enormous amount of freedom before they have the materials, storage, or mechanical knowledge to use it efficiently. You can dismantle nearly everything around the crash site, begin farming, assemble a vehicle, explore ruins, build a permanent base, or follow the new Drilling Thunder story. The strongest start is not collecting every object you can carry. It is establishing mobility, crafting, storage, food, and defense in an order that prevents one unfinished system from slowing down everything else.
Best Way to Start Scrap Mechanic 1.0 Survival
The best way to begin Scrap Mechanic 1.0 is to complete the crashed ship objectives, salvage useful materials from the surrounding area, construct the basic vehicle, and move toward the Mechanic Station before committing to a permanent farm or base.
The crash site contains enough materials to teach the major systems, but it is not where the complete Survival experience opens. Restoring the ship console reveals the Mechanic Station through the Logbook, and reaching that station provides better crafting, a reliable respawn point, and access to the equipment needed for more capable vehicles and structures.
Do not spend the opening hour dismantling every decorative object around the ship. Scrap wood, metal, Components, bearings, wheels, gasoline, healing items, buckets, and food directly support immediate progression. Large furniture pieces and cosmetic objects occupy space without helping you restore power or complete the starter vehicle.
The first major goal is mobility rather than perfection. The starter car will be unstable, underpowered, and unpleasant to steer, but even a poor vehicle helps transport materials and reduces the time spent walking between ruins, the Packing Station, story objectives, and the Mechanic Station.
Once the Mechanic Station is active, progression becomes less linear. You can improve the vehicle, begin a controlled farm, establish storage, follow the full story, explore new ruins and NPC requests, develop automated machinery, or eventually prepare for Excavation Island and the underground Drilling Thunder content.
What to Do First at the Crashed Ship
Begin by collecting the nearby buckets and filling them at the pond. Multiple buckets reduce the number of trips required to extinguish the fires spread across the ship, so bring every usable one you find instead of carrying water one container at a time.
Search the ship while putting out the fires. Sunshakes and other consumables provide early recovery, while loose wheels, blocks, seeds, and usable parts can reduce the amount of crafting needed for the first vehicle.
After the fires are extinguished, follow the objective to locate the missing Master Battery. Search the nearby structures rather than wandering far from the crash area. Defeating the robots and dismantling scrap along the route provides metal and Components while you look for the battery.
Install the Master Battery in the ship, then craft the Connect Tool required to restore the damaged console wiring. Once the connection has been completed, use the terminal and open the Logbook with L to mark the Mechanic Station on the compass.
Finish looting the immediate area before leaving, but apply a practical stopping rule. Components, gasoline, bearings, scrap metal, healing items, wheels, and materials needed by the active quests deserve inventory space. Large decorative pieces can remain until you have a vehicle with proper storage.
Nearby structures can also be dismantled for building material. Breaking a few panels, fences, and scrap objects can replace part of the early wood and metal gathering process, but dismantling the complete crash site is less useful than reaching the systems that let you process those materials properly.
Best Early Resources to Keep in Scrap Mechanic
Components should receive some of the highest early priority. They are used throughout progression and are considerably harder to replace than basic wood gathered from the nearest tree.
Controllers are another important resource. Hostile robots can drop them, and the Mechanic Station uses them in several meaningful crafting and upgrade paths. Do not spend Controllers on experimental machinery until the core Craftbot, vehicle, and base systems are functioning.
Bearings are essential for steering, powered wheels, rotating mechanisms, and most serious mechanical builds. The starter car alone requires several, so collect loose bearings and preserve enough scrap metal to craft replacements.
Gasoline deserves space whenever the current vehicle uses a gas engine. Running out far from storage can turn a useful exploration trip into a long walk while an immobile vehicle remains exposed beside the road.
Beeswax may not appear urgent when first collected, but it is used by improved wheel recipes. Gathering it while passing hives or ruined structures prevents a later vehicle upgrade from being blocked by a material that seemed optional during the first journey.
Wood and metal remain the foundation of early construction, but they can be gathered deliberately when needed. Do not discard a Component or Controller to carry another small stack of material that can be collected directly outside the Mechanic Station.
Keep several healing items on the hotbar. Flower Tea can handle smaller losses without wasting a stronger consumable, while Sunshakes are better reserved for dangerous fights or larger health deficits.
Seeds, soil, fertilizer, and farming supplies are useful, but they do not all need to remain in the character inventory. Move them into a chest once storage becomes available and retrieve them when a defended farm is ready.
How to Build the First Car in Scrap Mechanic 1.0
Place the Lift inside the highlighted area to reveal the starter-car blueprint. The quest expects the requested parts to occupy the indicated positions, so placing an extra block nearby or mounting a required item in the wrong space may not advance the objective.
Raise the Lift when you need access beneath the frame. Building the underside while the vehicle remains flat on the ground makes it difficult to install bearings and confirm how each wheel is attached.
The basic design needs a frame, four wheel bearings, wheels, a driver’s seat, and an engine. Scrap metal can be used to craft missing bearings, while additional wood may be needed for the seat and surrounding frame.
Use Q to rotate parts before placing them. The seat needs to face the correct direction, and bearings must be aligned consistently or the wheels may steer and rotate against one another.
After constructing the physical vehicle, equip the Connect Tool. Link the driver’s seat to the steering bearings, then verify that the left and right wheels turn in the intended directions.
Connect the seat to the engine and the engine to the powered wheel bearings. The starter blueprint uses the rear bearings for propulsion, although future vehicles can use different drive layouts when you understand how weight and steering affect handling.
Add gasoline to the engine before attempting to drive. A completed wiring network does not provide fuel automatically.
Do not expect the starter vehicle to handle well. Its narrow frame, basic wheels, lack of suspension, and light construction make it easy to bounce, spin, or roll. Its job is to teach building and carry you toward the Mechanic Station, not become the permanent centerpiece of the save.
Early Vehicle Building Tips That Prevent Constant Flipping
A stable vehicle begins with proportion rather than engine power. Widen the wheelbase before increasing speed, keep the heaviest parts low, and avoid placing large storage containers high above the frame.
Extending the front or rear can improve weight distribution, but every addition changes the balance. A heavy chest mounted entirely over the front wheels may reduce wheelies while making steering sluggish or causing the nose to strike uneven terrain.
Engine power should match the vehicle you have built. Turning a crude engine to maximum output can make bad wheels and an unbalanced frame substantially harder to control. Begin at a moderate setting and increase it only after confirming that the car can travel in a straight line.
The 1.0 controls allow engine speed to be increased by one notch while driving with Shift. Treat that as a temporary adjustment rather than an instruction to keep the motor permanently at maximum.
Improved wheels are one of the first upgrades worth making. Better contact with the ground can produce a more noticeable improvement than adding more power to a vehicle that already struggles to steer.
Suspension becomes valuable once the necessary materials are available. Off-road suspension provides more travel for uneven terrain, while firmer suspension can suit a vehicle designed primarily for roads. Installing only part of a suspension system may create uneven behavior, so prepare enough materials to treat the complete axle or vehicle consistently.
Carry the Lift during every long trip. It can raise a damaged or overturned vehicle, provide access to its underside, and serve as an improvised elevator when a ruined staircase or elevated loot area cannot be reached normally.
A practical exploration vehicle should eventually carry a small chest, a Portable Craftbot, spare fuel, a few building blocks, and replacement materials. That arrangement turns minor damage into a field repair instead of a forced return to base.
Why the Mechanic Station Should Be Your First Major Destination
The Mechanic Station is the most useful early progression hub. Restoring its power opens better crafting, gives you a reliable place to organize materials, and provides a bed that can be used to set the respawn point.
Follow the Logbook waypoint from the crashed ship, but stop at nearby ruins when the detour is short and your inventory still has room. Early ruins can provide Controllers, healing items, metal, bearings, gasoline, Garment Boxes, and other useful supplies.
Once you arrive, search the surrounding buildings for the Master Battery needed to restore the station. Activate the nearby bed as soon as it is found rather than postponing the respawn update until after another fight.
Power the Mechanic Station and build the full Craftbot. The small crash-site crafting machine has a limited recipe selection and processes one item at a time, while the station’s progression is designed to support more serious building.
Avoid spreading storage randomly across every room. Establish one organized material area near the Craftbot, separate farming supplies from vehicle components, and leave enough floor space for machinery that will be added later.
The station does not have to remain the permanent endgame base. It is valuable because it provides a safe transition between the crash site and the larger world, not because every future farm, defense, refinery, and vehicle workshop must fit inside the same structure.
How Craftbot and Schematicbot Progression Works
The Craftbot is the center of Survival manufacturing. Use it to replace temporary scrap equipment, construct storage, improve vehicles, and create the machines needed for gathering and automation.
Do not craft one of every available recipe simply because it has appeared. Build according to the next limitation. If travel is slow, improve the vehicle. If the inventory fills during every ruin, build storage. If farming is becoming necessary, prepare water, defenses, and crop transport before expanding the field.
Version 1.0 adds Schematicbot progression, allowing new parts to be unlocked for the Craftbot. This means exploring and obtaining schematics is part of the larger building loop rather than every advanced component appearing immediately.
Prioritize schematics that expand what the current save can accomplish. A functional interactive part, improved vehicle component, storage solution, or automation tool generally contributes more than a specialized decorative block during early Survival.
The new Garage in Scrap City can construct creations made in Survival and Creative. This creates a useful long-term path for players who prefer designing reliable machines in Creative mode before bringing the finished concept into Survival.
Do not let blueprint access replace understanding. A complex vehicle can still fail when it is overloaded, improperly fueled, or used in terrain it was not designed to cross. Learn the purpose of its bearings, engines, controllers, and interactive parts before depending on it for important cargo.
Use Mobile Storage Instead of Carrying the Entire World
Inventory pressure begins almost immediately because Scrap Mechanic allows so many loose objects to be collected. The solution is not deciding that every item may become useful later. It is separating expedition supplies from base materials.
The character inventory should contain healing, fuel, the Lift, primary tools, several flexible building materials, and room for valuable loot. Seeds, fertilizer, spare wheels, cosmetics, and bulky components can remain in storage until needed.
Add a small chest to the vehicle when possible. Even limited storage allows farming supplies, Garment Boxes, extra blocks, or recovered machinery to be transported without removing healing and combat resources from the hotbar.
Place the chest where it does not block the driver’s view or place too much weight on one side. Storage is useful only while the vehicle remains driveable.
Garment Boxes can be saved for the Dressbot rather than carried through every ruin. Cosmetics are a legitimate collection goal, especially in multiplayer, but they should not displace Controllers, fuel, food, or crafting components during the opening progression.
Large chests gained an additional practical benefit in 1.0 because they can collect loot bubbles. Once larger-scale gathering begins, storage can become part of the collection system rather than merely a container visited after every trip.
How to Fight Farmbots Without Losing Every Healing Item
The hammer has enough power for early robots, but its range and attack timing encourage players to stand too close. Do not assume constant backward movement will cause every Haybot swing to miss.
Approach until the bot begins its attack, move away or around the swing, then step back in for a controlled hit. Repeating that rhythm is safer than standing inside its reach and trading damage.
Separate groups whenever possible. Two aggressive robots can alternate attacks quickly enough that recovering from one hit leads directly into another.
Use terrain and structures to reduce the number of attack directions. A doorway, narrow passage, or obstacle can prevent several enemies from surrounding you, although destructible terrain should not be treated as permanent protection.
Keep partial and major healing separate. Use a smaller consumable when only a modest amount of health is missing, and save stronger recovery for fights where another hit could end the trip.
The 1.0 enemy roster more than doubles the limited selection from the earlier Survival build. Do not assume an unfamiliar robot follows the same approach pattern as a basic Totebot or Haybot.
Prioritize the Red Explosive Totebot whenever it appears. Its explosive threat can punish both the player and nearby creations, making it more dangerous to ignore than an ordinary melee robot.
Vehicles are also part of combat preparation. Parking the only transport directly beside a group of enemies can leave it damaged or flipped while you fight. Stop far enough away that the battle does not begin with robots striking the wheels and storage.
Prepare for Raids Before Expanding the Farm
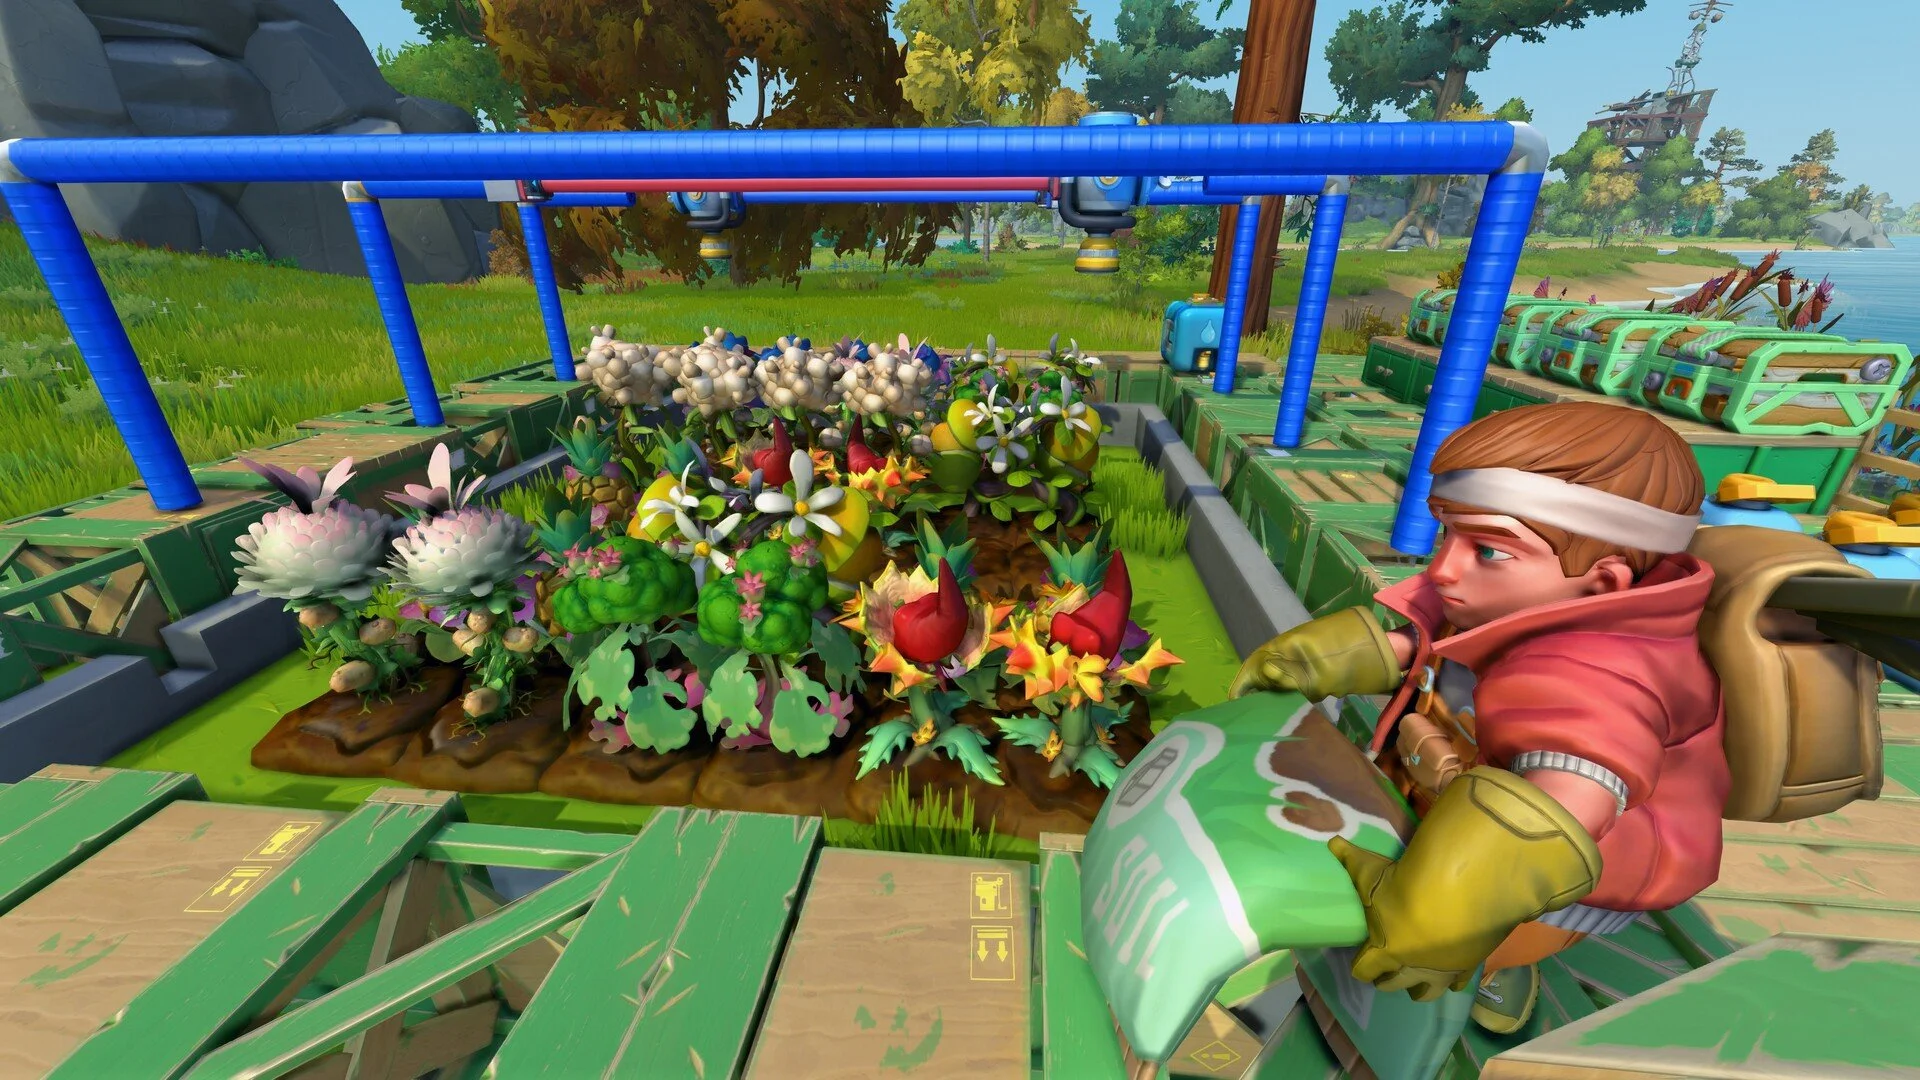
Farming provides food and supports the Packing Station economy, but the first field should be treated as a defensive commitment rather than a harmless side activity.
Do not plant a large collection of every seed immediately after the crash. Establish a nearby water source, storage, healing supply, and defensible position before producing more crops than you can protect.
Version 1.0 redesigns raids with improved enemy pathing, broader difficulty scaling, additional robot types, and encounters that begin when triggered rather than forcing the player to wait through the old schedule.
This makes defensive layout more important than placing a tall wall around an open field. Robots can choose better paths, and some of the new enemies can dig, preventing simple terrain manipulation from solving every raid.
Begin with the amount of food needed for survival and early objectives. Expand after observing how the current defenses handle the first pressure rather than discovering the farm is too large during an attack.
Keep valuable machinery and crop storage away from the outer edge. A defense can technically stop the raid while still allowing one bot to destroy the chest containing the entire harvest.
Leave clear paths for your own movement and repairs. A farm surrounded by an intricate maze may delay enemies but can also prevent you from reaching a damaged wall, loose crop, or disabled machine.
The Packing Station becomes relevant once crop production is consistent. Mark its location when discovered, but do not rush into industrial farming before the vehicle and base can move, store, and defend the resulting produce.
How to Choose a Good Base Location
A good Scrap Mechanic base supports the current stage of progression. Early on, that usually means access to water, roads, wood, salvage, the Mechanic Station, and enough flat space for vehicles and crafting.
Water access matters for farming and several crafting interactions. A base that requires a long vehicle trip for every bucket creates unnecessary work before automation is available.
Road access makes cargo transport easier and reduces the chance that an unstable vehicle flips before reaching the Packing Station or story objective. It also provides a clear route back after exploring at night.
Do not judge a location only by how defensible it looks under the old rules. The Claygun can reshape terrain, but 1.0 also introduces enemies capable of digging. A cliff or artificial clay barrier may remain useful without being completely secure.
Leave more construction room than the first shelter appears to require. Crafting machinery, automated farms, refining equipment, storage, large vehicles, and defensive systems consume space rapidly.
Separate the vehicle workshop from the main crop area. Testing an engine or turning radius beside storage and farmland creates unnecessary opportunities to destroy your own production.
The Mechanic Station is an excellent temporary headquarters, but moving or creating a second specialized base can make sense once the story, resource routes, or Excavation Island begin pulling progression farther away.
Search Ruins Vertically, Not Just Room by Room
Ruins contain more than the materials visible from the road. Broken staircases, roofs, hidden ledges, destructible piles, and elevated containers can hold useful loot.
Carry the Lift and use it as a temporary platform when a staircase is missing. It can raise the player high enough to reach a roof, recover a chest, or inspect a structure without building a permanent scaffold.
Look beneath hay piles, behind scrap, and around collapsed walls. Valuable objects can remain hidden inside areas that appear decorative from the entrance.
Watch your height while climbing. Scrap Mechanic includes fall damage, and reaching a roof for one chest is not valuable when the fall consumes the healing items found inside it.
Loot selectively as the inventory fills. Controllers, Components, healing, fuel, useful blocks, Garment Boxes, schematics, and rare materials justify a return trip. Generic pipes and furniture may be craftable or easier to collect later.
Use the Logbook and compass to preserve important discoveries. The dynamically generated Survival world includes reworked terrain, new roads, desert areas, ruins, growlabs, random NPC encounters, and dangerous weather such as tornadoes.
Do not treat every nearby landmark as an objective that must be completed immediately. Mark useful locations, finish the current supply run, and return with the equipment required to explore them properly.
Follow the Story Without Ignoring the Sandbox
Scrap Mechanic 1.0 adds a complete Survival story from the crash through the larger mystery surrounding the rogue Farmbots and the journey toward the planet’s core.
The story provides direction through quests, voiced NPCs, new locations, and builder objectives, but it does not replace the sandbox systems. Progress still depends on the machines, vehicles, bases, farms, and defenses you create between story stages.
Use main quests to unlock direction and systems, then pause when the current equipment is clearly underprepared. Driving into another dangerous area with the starter wheels, no storage, and only one healing item is not faster than spending a short session improving the vehicle.
Side objectives can provide blueprints, rewards, clothing, materials, and reasons to explore locations that the direct story path passes by. Complete those that strengthen the current progression rather than clearing every marker before continuing.
The new onboarding provides more guidance than the Early Access version, including builder quests for early creations. Follow those tasks closely enough to learn the systems, then adapt the finished machine instead of assuming the example blueprint is the best possible design.
Preparing for Drilling Thunder and Excavation Island
Drilling Thunder adds Excavation Island, an abandoned mining region where progression moves underground through caves, plasma drilling, rare treasures, and the deeper story.
Do not rush the mine with the same loadout used to clear the first roadside ruin. Underground exploration demands reliable transport, storage capacity, food, healing, and enough replacement material to repair or rebuild important equipment.
Design mining vehicles around the environment rather than maximum road speed. A wide frame, stable suspension, accessible storage, and room for specialized tools will generally outperform a narrow vehicle built only to move quickly across flat ground.
The Claygun introduces direct terrain shaping in both Survival and Creative modes. It can create ramps, repair routes, change awkward building areas, or support new construction ideas.
Clay should not be treated as an invulnerable defense. Some robots can dig, so reshaping the terrain changes enemy movement without permanently removing the need for walls, traps, weapons, or active defense.
Prepare the surface economy before committing to deep exploration. A functioning farm, stocked base, organized Craftbot area, and dependable cargo vehicle reduce the number of times an underground expedition must be abandoned for basic food or materials.
Excavation Island is part of the larger game rather than something every new save must reach immediately. The early world teaches the same engineering principles that become more important once drilling, underground routes, and advanced enemies enter the progression loop.
Scrap Mechanic Multiplayer Tips
Scrap Mechanic supports online co-op throughout the Survival adventure. Version 1.0 also improves network responsiveness for connected players, making vehicle movement and interactions smoother for guests than in earlier versions.
Divide responsibilities without separating the group so widely that every player builds an unrelated progression system. One player can gather wood and metal while another finishes the vehicle or organizes storage, but both efforts should support the same immediate objective.
Agree on vehicle controls before connecting engines, bearings, switches, and controllers. One player changing a steering direction while another adjusts the engine can create a machine whose individual parts work but whose complete behavior is impossible to diagnose.
Use shared storage categories. A chest labeled or designated for vehicle parts prevents bearings and Components from disappearing into personal inventories when another player needs to complete a repair.
During raids, assign coverage rather than having everyone chase the first bot. Protect the crops, storage, and machinery as separate priorities, and call out explosive enemies before they reach the structures.
Build co-op vehicles with passenger safety and cargo placement in mind. A fast vehicle designed around one driver can become unstable after additional seats, players, and loaded storage change its center of mass.
Keep important progression items in known shared storage rather than on the player most likely to disconnect or explore alone. The best multiplayer base reduces the amount of explanation required whenever someone joins the session.
Should You Start a New World for Scrap Mechanic 1.0?
Start a new Survival world for the complete Scrap Mechanic 1.0 experience. The new version includes a full story, revised terrain generation, new locations, updated progression, new enemies, altered recipes, and other systems built around the fresh Survival structure.
Old Creative worlds continue to work in 1.0. Existing Survival worlds require switching to an older game version rather than loading normally into the new progression.
Do not update a heavily modded world without checking its dependencies. Some older mods may continue working, but Parts and Custom Games content is particularly likely to require updates.
A mod updated specifically for 1.0 may stop working on the legacy game version. Keep separate backups and confirm which version each mod supports before opening an important save.
Use the new world as an opportunity to learn the revised onboarding instead of recreating the old Early Access routine exactly. The starter quests, story structure, resource rebalance, raids, Craftbot unlocks, and terrain systems are intended to change how Survival progresses.
Recommended Scrap Mechanic 1.0 Survival Progression
Begin at the crashed ship by gathering buckets, extinguishing the fires, collecting useful food and materials, recovering the Master Battery, and crafting the Connect Tool to restore the ship console.
Open the Logbook, mark the Mechanic Station, and then complete the starter vehicle blueprint. Use the Lift to access the underside, attach bearings correctly, connect steering and propulsion with the Connect Tool, add fuel, and keep the engine below maximum power.
Travel toward the Mechanic Station while looting only worthwhile nearby ruins. Prioritize Components, Controllers, fuel, bearings, healing, beeswax, Garment Boxes, useful blocks, and other materials directly tied to crafting or survival.
At the Mechanic Station, find and install the Master Battery, activate the bed as the new respawn point, build the Craftbot, and organize a small storage area.
Improve the starter vehicle with better wheels, a wider and more balanced frame, mobile storage, and a Portable Craftbot. Add suspension once enough material is available to make the upgrade consistent rather than attaching one mismatched component.
Establish a controlled farm near water after a basic defensive plan exists. Grow enough food to support exploration, learn how the redesigned raids pressure the location, and expand production only after the first defenses hold.
Use the Packing Station, story quests, NPC requests, ruins, World exploration, and Schematicbot unlocks to broaden the available crafting options. Build machines according to actual problems rather than producing every newly unlocked part.
As the save develops, create specialized vehicles for cargo, farming, combat, and difficult terrain instead of forcing the original car to perform every job. Use Creative mode and the Scrap City Garage when a more complex design benefits from testing outside Survival.
Prepare food, healing, storage, repair materials, and a stable mining vehicle before committing to Excavation Island. Use plasma drilling and the Claygun as extensions of the same engineering principles learned during the opening rather than treating Drilling Thunder as a separate game.
The strongest Scrap Mechanic progression is a chain of solved problems. The first vehicle solves travel, the Mechanic Station solves basic crafting, storage solves scavenging, farming solves food, defenses protect production, schematics expand engineering, and specialized machines carry the story toward the planet’s core.