Palworld 1.0 Tips and Tricks for Beginners

Palworld 1.0 changes enough of the early game that relying on old progression routes can leave you underleveled, short on Iron, and rebuilding a poorly placed base before the first few hours are over. A better start comes from using the new five-catch experience bonus, choosing early Pals that remove resource bottlenecks, and building around the upgrades that improve movement and automation rather than unlocking everything without a plan.
Jump To Section:
Change Your World Settings First
Build Your First Base Properly
Prepare for the Iron Bottleneck
Should You Start a Fresh Save in Palworld 1.0?
Starting a new world is the better way to experience the reworked tutorial, mission structure, Pal spawns, and progression introduced with Palworld 1.0. Existing saves can still be loaded, but carrying an older character forward means entering a heavily revised game with technology, story, and map progress that may no longer line up cleanly.
A fresh save also makes the new early-game balance easier to understand because every unlock arrives in the order the current version expects. If you keep an older world, create a backup first and remove outdated mods before loading it. Old mod files and a major version update are rarely a charming combination.
Change Your World Settings Before You Begin
Solo players and private hosts can adjust world settings at any time, so there is little reason to accept every default if one mechanic consistently makes the game less enjoyable. These options do not need to turn the world into a creative-mode sandbox. Small adjustments can remove wasted time while preserving the survival and progression systems that give Palworld its structure.
Setting the Death Penalty to No Drops prevents a failed dungeon run from turning into a naked recovery trip through the same enemies that killed you. Egg Incubation Time can be lowered or removed entirely if waiting on real-time timers adds nothing to your playthrough, while Structure Deterioration can be disabled to protect buildings placed outside the Palbox boundary.
The default Supply Drop and Meteorite interval is long enough that some players barely see the system during an ordinary session. Reducing it to somewhere between 15 and 60 minutes creates more opportunities to find loot, accessories, schematics, and permanent stat items without making drops constant.
Item Weight, gathering multipliers, maximum bases, and the number of workers allowed at each base can also be adjusted, although extremely high worker counts may affect performance. I would raise resource collection modestly before removing weight entirely, since inventory decisions remain part of exploration even when the grind is reduced.
Place a Foundation Before Building Your First Palbox
Your first Palbox determines the center of the base and cannot be repositioned casually afterward. Destroying or moving it later can disrupt base-specific structures and leave you rebuilding far more than expected, so place a foundation first and set the Palbox on top of it rather than dropping it directly onto uneven ground.
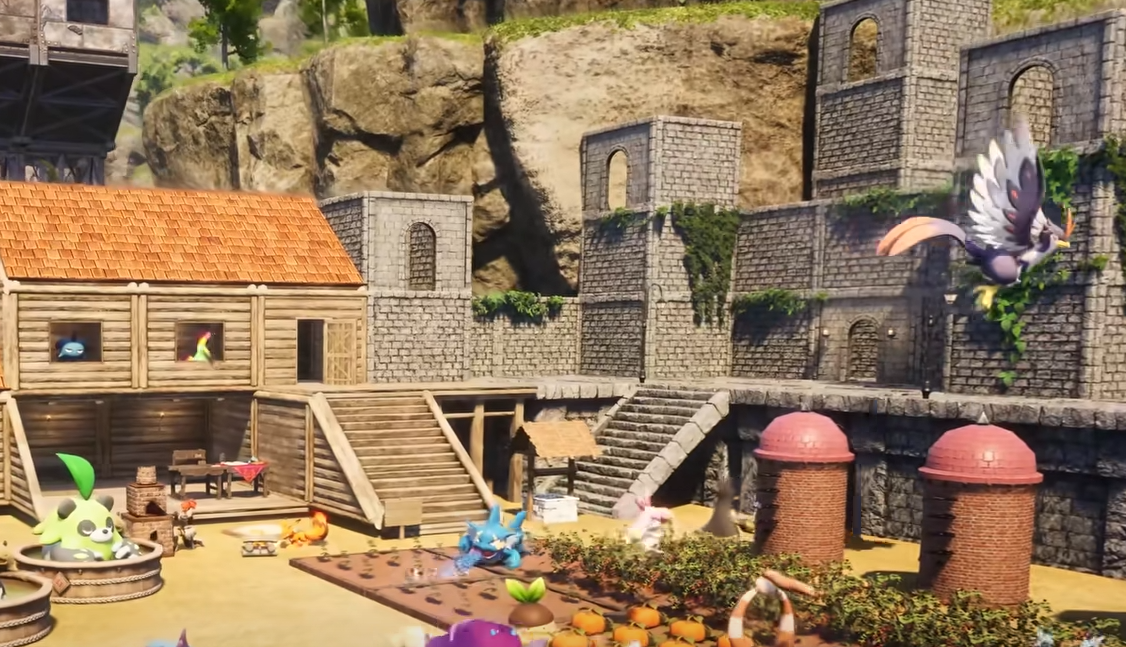
Choose a wide, reasonably flat area with enough room for farms, storage, production stations, and Pal movement. Resource nodes are useful, but pathing and expansion space matter more for the first camp because this base will handle several unrelated jobs until specialized outposts become available.
Leave open lanes between workstations instead of arranging every structure as tightly as the building system allows. Pals lose more production time from poor pathing and blocked stations than you gain from fitting one additional workbench into a cramped corner.
Storage placement matters as well. Put containers beside the work areas that consume or produce those materials, such as a chest near logging and mining stations or food storage near farms. A worker carrying a single item across the entire base is technically helping, although it may not feel that way by the fifth trip.
Your first structures should cover basic storage, food, beds, a campfire, and the workstations required by the current Palbox upgrade. Once farming is unlocked, automate a Berry Plantation with Pals that can Plant, Water, and Gather. That single production loop removes the need to forage constantly and gives your workers a stable food supply while you explore.
When you eventually outgrow the starting camp, use the best base locations in Palworld 1.0 guide to choose a stronger long-term site rather than relocating to the first flat patch you happen to fly over.
Catch Five of Every Early Pal Species
Capturing Pals is the fastest foundation for early leveling because Palworld 1.0 awards a substantial experience bonus for the first five captures of each species. Catching one Lamball, one Cattiva, and one Chikipi before moving on leaves a large amount of easy experience untouched.
Work through the starting region methodically and aim for five captures whenever the species is easy to find. Once a Pal reaches its fifth capture bonus, move to another species rather than continuing to farm the same group purely for experience.
Repeated captures also provide more than levels. Each additional Pal gives you another chance at better passive skills, adds workers for new bases, and supplies copies that can eventually be used for condensation. You do not need to manage a full breeding and condensing project during the opening hours, but catching duplicates now prevents those systems from beginning at zero later.
Missions should be completed alongside capture runs. Main and sub-missions now contribute heavily to progression, and some content, spawns, fast-travel access, and systems are tied more closely to mission advancement than they were during Early Access.
Once your damage begins killing low-level Pals before they can be captured, use a Ring of Mercy. It prevents your attacks from reducing a target below one health, removing the increasingly familiar experience of watching the Pal you needed collapse during the final hit.
Catch Vixy, Cattiva, Foxparks, and Daedream Early
Vixy should be one of your earliest Ranch assignments because it can dig up Pal Spheres and other useful materials. A single Vixy working while you build and explore can create a steady stockpile of basic spheres, saving Paldium and reducing the amount of manual crafting required to maintain your capture loop.
Cattiva is useful both as an early worker and as a temporary answer to low carry capacity. Its Cat Helper Partner Skill increases the player’s Weight limit while Cattiva is in the party, and the bonus stacks when several are carried together. Filling multiple party slots with Cattivas is not an exciting combat composition, but it makes early mining trips far less restrictive.
Foxparks provides Kindling at the base and becomes a strong opening combat tool once its Partner Skill is unlocked. The ability turns Foxparks into a handheld flamethrower that deals heavy damage to early enemies and bosses, although the cooldown means it works better as a burst option than a permanent replacement for ordinary attacks.
Daedream becomes especially useful after crafting its necklace. It can remain beside the player and attack while another Pal is summoned, effectively adding another source of damage without consuming the active Pal slot. Its support attacks are also helpful during capture runs because they can pressure weakened targets without finishing them.
Do not build the entire roster around whichever Pal happens to have the highest number beside its name. Early teams need complementary roles, including one reliable fighter, a Fire Pal, mobility support, and enough base workers to keep food and materials moving while you are away. The Palworld 1.0 tier list provides a broader look at the strongest workers, mounts, and combat Pals as your roster expands.
Spend Early Stat Points on Weight, Stamina, and Work Speed
Weight delivers the most immediate quality-of-life improvement because early progression involves carrying Wood, Stone, Paldium, Iron, food, ammunition, and building materials between locations that may not have a nearby fast-travel point. Every additional trip back to storage interrupts whatever objective you were actually trying to complete.
Stamina improves nearly every part of movement, including sprinting, climbing, gliding, gathering, and certain attacks. It remains valuable after mounts become available because there will always be cliffs, interiors, and short-distance movement where your character has to do the work directly.
Work Speed can be useful during the opening levels while the player still crafts many items manually. Its value decreases once strong Handiwork Pals and specialized workers take over production, so I would invest enough to make early building comfortable without treating it as the primary long-term stat.
Attack and Health become more important when tougher bosses and late-game regions begin punishing weak equipment, but early fights are usually improved more by upgrading weapons, armor, shields, and Pals than by spending every point on raw damage.
Remedies and Elixirs found through supply drops or produced later can permanently improve character stats, so the first several level-up points do not need to solve the entire build.
Collect Iron Before You Think You Need It
The early technology tree moves from Stone and Paldium into Iron quickly, and the demand does not arrive gradually. Weapons, armor, higher-tier workstations, ammunition, and base upgrades begin competing for the same ingot supply, which can bring progression to a stop if you waited until the first recipe appeared before collecting ore.
Mark dense Iron clusters as soon as you find them and carry ore home even if your Furnace is not ready. A chest filled with unsmelted Iron is still a useful head start once Kindling Pals and ingot recipes become available.
Hardwood creates a similar problem later because several 1.0 recipes require more advanced boards rather than ordinary Lumber. The Palworld Hardwood location and farming guide covers where to collect it once those recipes begin appearing.
Avoid selling unfamiliar materials merely because they are not part of the current crafting tier. The 1.0 technology tree and recipe structure changed substantially, and items that appear useless during the opening hours may become part of an important structure, weapon, or Pal Gear recipe later.
Use Celaray Before Rushing Your First Flying Mount
Celaray provides the first major movement upgrade because its gloves unlock at Level 7 and allow it to function as an improved glider. That makes descending from cliffs faster, extends travel distance, and gives exploration a better rhythm before a full flying saddle becomes available.
Eikthyrdeer is a strong early ground mount once its saddle unlocks at Level 12. Its dash covers open terrain quickly, while the double jump helps with cliffs and uneven ground that make slower mounts feel more restrictive than walking.
Nitewing becomes the early flight target at Level 15. It is not one of Palworld’s fastest mounts, but the ability to cross water, avoid hostile terrain, reach elevated Effigies, and approach islands directly changes what parts of the map are realistically accessible.
Keep unlocking faster travel options instead of remaining loyal to the first mount that carried you out of the starting zone. The Palworld 1.0 flying mounts list compares the available flyers and their progression requirements.
The Wing Pack eventually provides another movement option by using Wing Cells instead of occupying a Pal slot. That becomes useful when you want all five party positions devoted to combat or utility rather than carrying a Pal purely for traversal.
Turn Your Second Base Into a Mining Outpost
Reaching Palbox Level 10 unlocks the ability to establish another base, and the second Palbox is better spent on a focused resource operation than another general camp. Find an area with several Iron nodes, place the Palbox where its boundary includes the deposits, and keep the layout centered on extraction, food, beds, storage, and worker recovery.
Level 2 Mining workers are enough to begin automating the ore nodes. Incineram is one early option that can be captured near the Windswept Island Watchtower through an encounter involving a Syndicate enemy that summons it, allowing you to obtain one without traveling immediately to the more dangerous volcanic region.
Pair miners with Transporting Pals so the ore actually reaches storage rather than remaining scattered across the base. Add Kindling workers and Furnaces if you want the outpost to produce finished ingots, although centralizing smelting at your main production base can be easier when food and worker support are still limited.
Build a Hot Spring early enough that poor Sanity does not quietly destroy output. A mining camp filled with exhausted Pals may look automated from a distance, but it is closer to a collection of decorative ore enthusiasts.
As stronger workers become available, replace early miners rather than expanding the roster indefinitely. Anubis later combines strong Handiwork, Mining, and Transporting, and the Palworld 1.0 Anubis breeding guide explains how to obtain one through Penking and Bushi before facing its Alpha boss.
Mark Dungeons, Resource Clusters, and Skillfruit Trees
Custom map markers save far more time than their small interface suggests. Mark every dungeon entrance when you find it because dungeons cycle between active and inactive states while the physical cave locations remain in place. Returning to a marked entrance is much easier than trying to remember which cliff face contained a dark opening several sessions ago.
Dense Iron, Sulfur, Coal, and other resource clusters also deserve markers even after you establish automated bases. Wild deposits remain useful when a new crafting project suddenly needs more material than the existing workers can produce.
Skillfruit Trees should be marked for repeated visits, and nighttime exploration should include searching for glowing green Effigies. Turning them in at a Statue of Power raises Capture Power, improving catch rates and reducing the number of spheres lost to low-percentage attempts.
Watchtowers are valuable exploration targets because they reveal sections of the surrounding map and function as fast-travel points. Ancient Ruins also contain short activities that reward schematics, making them more than scenery placed between larger destinations.
Explore the same regions during both day and night because nocturnal Pals create a different capture pool after sunset. The 1.0 update also moved older species and added many new ones, so relying on remembered Early Access spawn locations can leave large sections of the current Paldeck undiscovered. The Palworld 1.0 new Pals guide covers the additions if you want to identify unfamiliar spawns.
Build an Egg Incubator and Keep Every Schematic
Wild eggs can provide Pals much earlier than their normal habitats or encounters would suggest, which makes the Egg Incubator one of the strongest early Ancient Technology unlocks. Pick up eggs during ordinary exploration and keep the incubator running whenever possible, even when the egg type does not appear immediately relevant to your current team.
An unexpected hatch can replace several weaker workers, unlock a new breeding route, or give you access to a combat Pal before you are equipped to visit its home region. Once the Breeding Farm becomes available, use the Palworld 1.0 breeding combinations guide to turn those early captures into more targeted results.
Weapon and armor schematics should also be stored rather than discarded, including duplicates and low-rarity versions. The Drafting Table allows blueprints to be improved toward legendary quality later, so a schematic that looks unimpressive during the opening hours may still become part of an endgame equipment path.
Schematics must be available when using the relevant crafting station, so organize them in a dedicated container near your production area. Spreading recipes across random storage boxes is an efficient way to own the required schematic while becoming convinced that the game has deleted it.
Palworld 1.0 Beginner Mistakes to Avoid
Do not rush the World Tree because it is visible and appears to be the obvious final destination. The region is built around Level 80 progression, and reaching it early places a new character among enemies that can end the visit before you have learned much beyond the loading-screen artwork. The Palworld World Tree guide covers the route and requirements once your team is prepared.
Wildlife Sanctuaries also demand more caution in 1.0 because drones, searchlights, and powerful enemies make them less forgiving than ordinary islands. Their rare Pals are tempting, but attempting them before upgrading armor, shields, and mobility usually costs more resources than it earns.
Do not skip missions while focusing entirely on base building. The reworked quest system is tied to experience, rewards, access, and progression, so ignoring it can leave a well-developed base attached to a character who has not unlocked the systems needed to move forward.
Use the new dash during combat rather than treating it as a renamed dodge roll. Attacking and reloading during the dash allows you to keep pressure on enemies while repositioning, which becomes increasingly important against faster Alpha Pals and bosses.
Avoid assigning every worker based only on the number of jobs listed in its Work Suitability panel. Specialists are often more reliable because they do not abandon an important task whenever another workstation becomes active. A Pal that can perform five jobs may spend an impressive amount of time performing the wrong one.
Finally, do not remain at the first base indefinitely merely because rebuilding feels inconvenient. The first camp exists to establish food, storage, and technology. Once mounts, additional Palboxes, and stronger workers are available, specialized farming, mining, and production sites will outperform one increasingly crowded settlement trying to handle the entire game inside a single blue circle.
A Strong Palworld 1.0 Start in Order
Begin by adjusting any world settings that would otherwise frustrate you, then place a foundation and build the first Palbox in an open area. Catch five copies of every common species you encounter, prioritize Vixy, Cattiva, Foxparks, and Daedream, and automate Berries before food becomes another recurring chore.
Spend early stat points on Weight and Stamina, collect Iron before it appears in every recipe, and use Celaray and Eikthyrdeer until Nitewing opens the map through flight. Mark dungeons, Effigies, Skillfruit Trees, and resource clusters while completing missions rather than wandering without a progression target.
Once the second base unlocks, turn it into a mining outpost and begin replacing temporary workers with specialists. Keep every schematic, hatch every egg you can support, and resist the urge to rush the World Tree or Wildlife Sanctuaries before your equipment catches up.
Palworld becomes far less grind-heavy once food, spheres, ore, and movement stop requiring constant manual attention. The first several hours are not about building the perfect base or catching a final team. They are about creating enough automation and mobility that every later objective takes less time than the one before it.