

Palworld Best Sulfur Locations
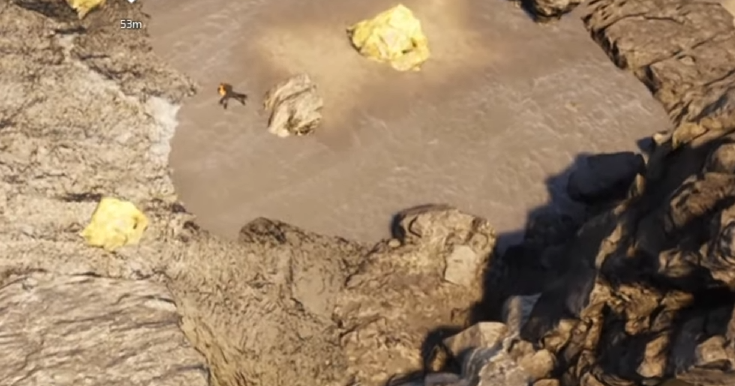
Sulfur is one of the first resources in Palworld that turns exploration into a supply problem. You can get by on small amounts early, but once Gunpowder and ammunition enter your regular crafting loop, the occasional yellow node from a random trip stops being enough.
The better approach is to treat Sulfur like a route, not a pickup. Palworld 1.0 gives you several strong mining spots, but they are not all useful for the same reason. Some are safer for an early run, some are better for repeat farming, and one late-game structure eventually changes the whole resource from a volcano errand into base production.
Jump To
Where to Find Sulfur in Palworld 1.0
You can find Sulfur by mining bright yellow ore nodes, with the best deposits concentrated in the Mount Obsidian volcano region. The strongest repeat spot is near the Tower of the Brothers of the Eternal Pyre, around coordinates -595, -520, where several Sulfur nodes sit close together near the lava edge.
Mount Obsidian is the main Sulfur region because the nodes are easier to find in clusters there than in lower-pressure areas like the desert. Desert Sulfur still exists and can help if you are avoiding the volcano, but it is not the route I would build around once your gear is ready for heat zones.
The catch is that Mount Obsidian asks more from you than a normal resource trip. Heat-resistant armor matters, a flying mount makes the routes much less awkward, and you want enough carry space to make the trip worth it. If you walk in underprepared, the volcano turns Sulfur farming into a terrain argument with occasional mining.
Best Sulfur Locations
The best Sulfur locations in Palworld 1.0 are all in or around Mount Obsidian. The Eternal Pyre Tower area is the best repeat farm, Foot of the Volcano is the best first route, and Beach of Everlasting Summer is better when you want a longer mining run instead of a quick refill.
| Location | Approx. Coordinates | Why Use It |
|---|---|---|
| Beach of Everlasting Summer | -741, -443 | Good for larger runs once you have a flying mount and can move between lava pools safely |
| Eternal Pyre Tower area | -595, -520 | Best repeat location because the Sulfur nodes are dense and easy to route |
| Foot of the Volcano | -385, -507 | Best first volcano route because it is easier to approach than deeper Mount Obsidian pockets |
| Mount Obsidian Midpoint | -465, -412 | Useful when you also want nearby Ore, oil field access, or dungeon access |
| Southern Midpoint pocket | -497, -513 | Strong node count, but the surrounding Pal pressure makes it better for prepared runs |
The reason I would not just chase the highest node count is that farming routes have to be repeatable. A slightly smaller cluster near a fast travel point can beat a larger pocket if the larger one takes longer to reach, forces awkward lava movement, or constantly drags you into fights. Sulfur becomes an ammo resource, so the route has to hold up across multiple trips.
Best Early Sulfur Route
The best early Sulfur route is the Foot of the Volcano area near coordinates -385, -507. Start from the Foot of the Volcano fast travel point, move slightly west, and look for the yellow Sulfur nodes in the clearing.
This is the route I would use when you are just starting to need Gunpowder but are not fully comfortable in Mount Obsidian yet. It gives you a useful batch of Sulfur without pushing you straight into the more dangerous lava pockets around the middle and western parts of the region.
You still need to respect the area. Heat-resistant armor should come before the farming run, not after your health starts disappearing. A basic flying mount also helps, even if it is not one of the faster late-game options. The difference between walking and flying in Mount Obsidian is the difference between a mining route and a punishment lap.
Best Volcano Farming Route
Once Mount Obsidian is safe for your gear and party, shift your main Sulfur route to the Eternal Pyre Tower area near -595, -520. Mine the cluster near the tower first, then branch out only if you need a larger haul.
From there, you can add the Mount Obsidian Midpoint pocket near -465, -412 if you want a mixed resource run with Ore, oil field access, and a nearby Volcanic Cavern. The southern pocket near -497, -513 is also worth farming, but it has more hostile activity nearby, so it fits better after your party can handle interruptions without slowing the whole trip down.
For bigger stockpiles, add the Beach of Everlasting Summer route. Travel to the fast travel point around -741, -443, head north, and mine the Sulfur nodes around the lava pools. This area is more spread out, which makes it worse for a fast refill but better when you are deliberately staying out longer.
A good volcano loop usually looks like this: Eternal Pyre Tower for the core cluster, Foot of the Volcano if you want a safer secondary stop, then Midpoint or Beach of Everlasting Summer when you need volume. That gives you flexibility without turning every run into a full map tour.
How to Build the Sulfur Mine
The Sulfur Mine is the long-term answer once you are far enough into Palworld 1.0. It unlocks at Level 52, costs 5 Ancient Technology Points, and lets you produce Sulfur at your base instead of relying only on manual volcano runs.
| Sulfur Mine Requirement | Amount |
|---|---|
| Stone | 70 |
| Sulfur | 100 |
| Paldium Fragments | 30 |
The required 100 Sulfur is why your first Mount Obsidian route still matters. You need to mine enough manually to unlock the structure that eventually reduces how often you have to mine manually. It is a very survival-game bargain: do the chore now so the game lets you do less of the chore later.
Once the Sulfur Mine is running, Sulfur becomes easier to keep in the background. Manual mining still has a place when you need a large amount quickly, but the mine keeps ammunition crafting from constantly pulling you away from other progression.
What Sulfur Is Used For
Sulfur is mainly used to craft Gunpowder. Gunpowder unlocks at Level 21 for 2 Technology Points, and each craft requires 1 Sulfur and 2 Charcoal.
| Craft | Recipe | Use |
|---|---|---|
| Gunpowder | 1 Sulfur, 2 Charcoal | Used for ammunition crafting |
| Sulfur Mine | 70 Stone, 100 Sulfur, 30 Paldium Fragments | Produces Sulfur at your base |
That is why Sulfur demand creeps up instead of arriving all at once. At first, you only need enough to make a few batches of Gunpowder. Later, firearms become part of longer fights, base defense, boss prep, and general exploration, and the resource starts disappearing much faster.
How to Farm Sulfur Efficiently
For your first real batch, use Foot of the Volcano. Once you have better gear and a flying mount, make the Eternal Pyre Tower area your main repeat route. Add the Midpoint pockets or Beach of Everlasting Summer when you are farming for a larger stockpile instead of a quick ammo refill.
Bring heat-resistant armor, clear your inventory before leaving, and use a flying mount whenever possible. Mount Obsidian has too much uneven terrain and lava for ground travel to feel good over repeated runs. If you need a better travel option before committing to volcano farming, our Palworld 1.0 flying mounts list breaks down the best flyers by stage and speed.
For mining, use a strong pickaxe or bring a Pal with good Mining suitability. Digtoise is a useful earlier option, while Astegon becomes more attractive later because it helps with mining efficiency and broader resource farming. The goal is not just to find Sulfur. It is to leave with enough of it that you do not have to turn around and repeat the trip the moment you craft ammo.
The route I would follow is Foot of the Volcano first, Eternal Pyre Tower as the main repeat spot, wider Mount Obsidian loops for larger hauls, then the Sulfur Mine once Level 52 and your Ancient Technology Points allow it. That moves Sulfur from a recurring interruption into a resource you can actually plan around.
