The best modules in Probably Stolen aren't necessarily the ones with the biggest bonuses. Some machines reduce certain upgrade effects, while others ignore specific stats entirely. Choosing the right modules means understanding what each machine needs and which improvements actually make a difference.
Best Modules for Every Machine
Best Module Combinations
Important Machine-Specific Upgrades
Is the Neural Core Worth Using?
Which Modules Should You Get First?
Best Modules for Every Machine in Probably Stolen
The best overall modules in Probably Stolen are Performance, Efficiency, Quality, and Refinement, although their usefulness depends on the machine you're upgrading. Performance is excellent for increasing production speed, Efficiency helps control electricity consumption, and Quality or Refinement can improve the value or grade of what certain machines produce.
However, using the same modules everywhere is inefficient. Some equipment receives reduced bonuses, while machines like the Furnace don't benefit from Performance upgrades at all.
Here are the recommended modules for each machine:
| Machine | Best Modules | Main Benefit |
|---|---|---|
| Furnace | Refinement, Quality, Efficiency | Better ingot purity |
| Water Purifier | Quality, Refinement, Performance | Higher water purity |
| 3D Printer | Performance, Efficiency | Faster, cheaper production |
| Hydroponic System | Performance, Quality, Refinement | Production and crop quality |
| Moisture Farm | Performance, Quality, Refinement | Improved production |
| Cryptographic Desequencer | Performance, Overclock, Efficiency | Faster keycard processing |
| Security Alarm System | Performance, Efficiency | Improved theft protection |
| Evaporator | Performance, Quality | Processing and output quality |
| AgeWell | Quality, Efficiency | Better output and power management |
| Mirage Projector | Quality, Performance | Greater attractiveness |
| DNA Manipulator | Performance, Quality, Efficiency | Balanced improvements |
These recommendations are starting points rather than fixed recipes. The best configuration can change depending on whether you're trying to increase output quality, reduce electricity consumption, or eliminate a slow step in your production process.
Best Module Combinations in Probably Stolen
Probably Stolen includes several modules that improve one stat while reducing another. These can be more powerful than standard upgrades, but their disadvantages are important when choosing where to install them.
Performance and Efficiency for Reliable Production
For machines that already produce acceptable items, combining Performance and Efficiency is one of the most practical approaches. A standard Performance Module provides +16% Performance, while an Efficiency Module adds +16% Efficiency, reducing electricity consumption.
Unlike more aggressive upgrades, neither introduces a negative stat modifier. This makes them useful when you want a machine to work faster without substantially increasing the strain on your power supply.
The 3D Printer is a particularly good candidate because it receives only 25% of Quality bonuses. A standard +8% Quality Module contributes just +2% effective Quality, making Performance and Efficiency more attractive for ordinary production.
Refinement and Quality for Higher-Grade Products
When the quality of a finished product matters more than processing speed, Refinement becomes one of the strongest available upgrades. It provides +25% Quality but reduces Performance by 8% and Efficiency by 15%.
Compared with the standard Quality Module's +8% bonus, Refinement provides considerably more Quality from a single module. However, that improvement comes with slower processing and increased electricity consumption wherever those penalties apply.
This makes Refinement particularly useful on machines where improving the output is your primary objective. It's less attractive when you already have acceptable product quality and simply need to produce more items.
Overclock Is Powerful, but Not Always Efficient
Overclock provides +36% Performance at the cost of -44% Efficiency. That can be useful for speeding up a machine, but the additional electricity consumption may create problems if your production setup is already close to its power limit.
Eco Modules offer the opposite approach, reducing Performance by 16% while increasing Efficiency by 32%.
An interesting detail is what happens when you combine one of each. Their modifiers add up to +20% Performance and -12% Efficiency before machine-specific adjustments. That provides only four percentage points more Performance than a single standard Performance Module, while using an additional module and increasing power consumption.
For this reason, I wouldn't automatically combine Overclock and Eco to cancel their penalties. In many situations, a straightforward Performance Module may offer a better balance of speed, electricity consumption, and available module space.
Important Machine-Specific Module Upgrades
Furnace: Don't Waste Modules on Performance
The Furnace is unusual because Performance Modules have no effect on it. This makes the usual approach of upgrading production speed ineffective, regardless of how much Performance you add.
Instead, focus on Quality and Refinement to improve ingot purity. Refinement is especially interesting here because its negative Performance modifier is less concerning on a machine that doesn't benefit from Performance in the first place.
However, the -15% Efficiency penalty still matters, so adding Efficiency Modules can help manage the increased electricity requirements of a heavily upgraded Furnace.
I would prioritize output quality first and address power consumption as needed rather than filling the bay with speed upgrades that offer no benefit.
Water Purifier: Reach the Quality Threshold Before Maximizing Speed
The Water Purifier has an important upgrade target: reaching at least 100% Quality allows you to unlock the 99.9% purity cap required for Pure Water.
Because this is a specific threshold, improving Quality can be more important than simply making the machine run faster. A setup that processes water quickly but cannot reach the necessary purity still falls short of that objective.
Refinement Modules are useful here because each provides +25% Quality, compared with +8% from a standard Quality Module. However, stacking Refinement also introduces substantial Efficiency and Performance penalties.
I'd concentrate on meeting the required Quality threshold first, then consider Performance improvements once the Purifier can consistently produce the quality you're targeting.
Avoid installing Streamlining Modules carelessly during this process. Although they improve Performance and Efficiency, their -16% Quality penalty can work against the threshold you're trying to reach.
Security Alarm System: Stop Upgrading Once Protection Is Maxed
The Security Alarm System offers another example where reaching a particular result matters more than maximizing a stat indefinitely.
At 49 Performance, the system can provide 100% theft protection. This makes Performance Modules the main priority until you've reached the protection level you want.
Once the alarm displays maximum protection, additional Performance becomes less attractive unless it provides another benefit you're specifically pursuing.
I'd check the actual protection value after installing modules rather than automatically filling every remaining space with more Performance upgrades. If the protection is already maxed out, using other resources to improve your wider shop setup may be more productive.
Hydroponic System and Mirage Projector: Watch for Reduced Bonuses
Some machines don't apply module stats at their full listed values. The Hydroponic System receives only 50% of Performance and Quality bonuses, while the Mirage Projector receives 25% of Performance and 50% of Quality.
For example, installing a standard +16% Performance Module in a Hydroponic System provides only +8% effective Performance. The same module contributes just +4% effective Performance to a Mirage Projector.
This doesn't make those modules useless, but it changes how efficiently you're using them. A module producing its full effect elsewhere may be more valuable than installing it in a machine with heavy reductions.
The DNA Manipulator also halves Performance and Quality bonuses, while AgeWell halves Performance and Efficiency. These penalties are worth checking whenever you're comparing expensive module combinations.
Is the Neural Core Module the Best in Probably Stolen?
The Neural Core Module (Uncapped) is one of the most powerful individual upgrades available, providing +200% Performance and +100% Quality. However, it also applies -100% Efficiency, potentially doubling the machine's normal electricity consumption.
It's classified as Critical-Level Contraband and is available through the Hypertech Smuggler, with a listed cost of 1,500 Credits.
Although its bonuses are impressive, the Neural Core isn't automatically the best choice for every machine. The actual effects depend on which stats the machine accepts and whether it applies any reductions.
For example, a Hydroponic System receives only half of its Performance and Quality modifiers. An Uncapped Neural Core therefore provides an effective +100% Performance and +50% Quality on that machine, rather than the full advertised bonuses.
The Furnace is an even more questionable destination because it doesn't benefit from Performance upgrades, eliminating the value of the Neural Core's largest positive modifier.
I'd reserve the Uncapped Neural Core for equipment where its bonuses provide a meaningful improvement and where you can comfortably support the additional power requirement. Installing it simply because it has the highest numbers can lead to an expensive and inefficient setup.
Which Modules Should You Get First in Probably Stolen?
For most players, the best approach is to begin with standard modules and upgrade the machines that are currently limiting production. Performance is useful when a machine takes too long to finish work, while Efficiency becomes valuable when electricity is preventing you from operating equipment together.
Quality and Refinement deserve priority when you're working toward a specific output requirement, particularly with equipment like the Water Purifier. There's little benefit in maximizing processing speed if your machine still cannot produce the grade of item you need.
Don't Expand Every Module Bay Immediately
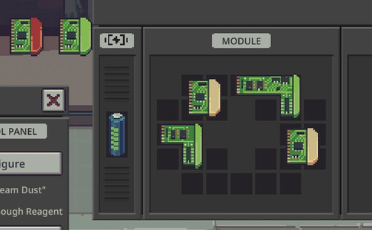
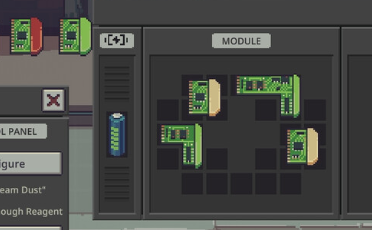
Machines generally begin with 26 usable cells inside a 35-cell module bay. Module Bay Expansion Kits increase that capacity to 31 and eventually all 35 cells, giving you additional room to install upgrades.
However, expanding a machine doesn't directly improve its stats. The benefit comes from being able to fit additional modules, so I recommend purchasing expansions when you already have useful upgrades that cannot fit inside the existing layout.
Module shapes also matter, meaning an expansion can be worthwhile simply because it removes blocked spaces that prevent a particular arrangement from fitting.
Make Better Use of Unwanted Modules
Not every module you acquire will be useful for your current machines. Rather than installing unnecessary upgrades or immediately disposing of them, consider using the Underground Exchange.
You can exchange two unwanted modules for a random replacement once per night, potentially giving you something better suited to your production setup. Our Probably Stolen Underground Exchange guide explains the process.
Also, be careful with modules that become stuck after installation. A Module Extractor is required to remove certain upgrades without destroying them, so it's worth having one available before experimenting with specialized equipment.
Ultimately, the best modules in Probably Stolen are the ones that improve what your machines actually need. A standard Performance Module can be more useful than an expensive Overclock, while a Refinement Module may be essential for reaching a quality requirement. Prioritizing those practical improvements will give you better results than simply filling every available slot with the strongest modules you own.