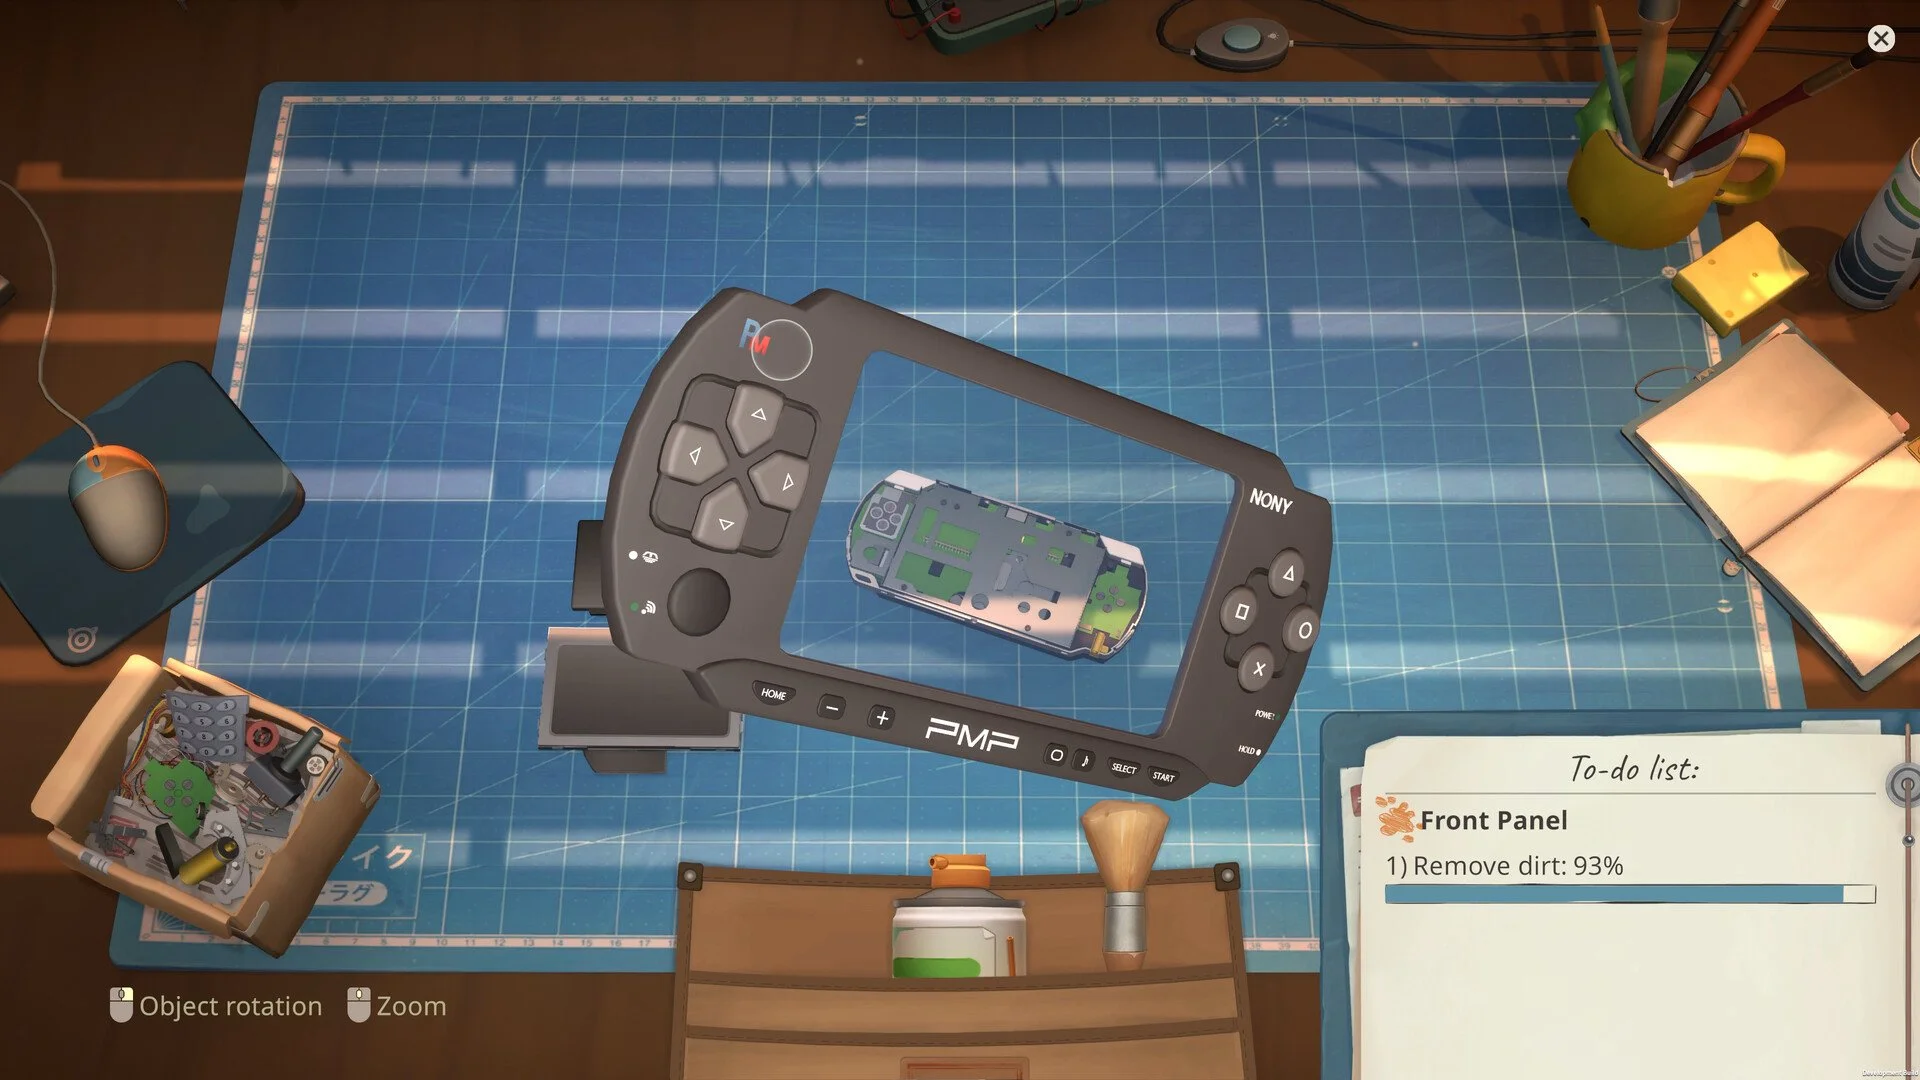
Cleaning electronics in ReStory: Chill Electronics Repairs is not handled by wiping the assembled device from the outside. You need to take the item apart, identify which individual components are dirty, and clean each one before rebuilding the device.
The basic process is simple once you understand the workbench controls: disassemble the item, drag a dirty part to the cleaning supplies, move the brush directly across the visible grime, and continue until the game marks the component as clean. The harder part is keeping track of every loose piece while avoiding a workbench covered in nearly identical components.
Jump To Section:
How to Clean Parts
Finding Dirty Components
Organizing the Workbench
Cleaning Stuck at 0%
Best Cleaning Tools
Is the Sonic Bath Worth It?
Reassembling the Device
How to Clean Parts in ReStory
Begin by disassembling the device far enough to expose every component listed as dirty. Remove screws, covers, batteries, circuit boards, buttons, and any other detachable pieces until you can reach the parts that need attention.
Pick up a dirty component and drag it to the cleaning supplies on the side of the workbench. Once the cleaning view opens, move the brush across the visible dirt marks on the part. The cleaning percentage only increases when the brush passes over an area that is actually dirty, so waving it across an already clean surface will not make progress.
Continue brushing the marked areas until the game completes the process and returns the part to the workbench. Repeating that process for every dirty component clears the cleaning requirement for the order.
The game may mark a part as clean before every faint speck of grime has visibly disappeared. That is normal. Once the cleaning interaction completes and the notepad no longer marks the part as dirty, there is no reason to keep trying to scrub it.
How to Find Every Dirty Component
Open the notepad whenever you are unsure which part still needs to be cleaned. It tracks the condition of the device and identifies components that are dirty, broken, or missing.
The notepad is especially useful after completely disassembling a larger electronic because several pieces can look almost identical once they are spread across the desk. Selecting an entry helps identify the relevant component instead of forcing you to drag every loose part toward the brush.
Some dirt is also less obvious than a large patch of dust. Rotate the component during cleaning and inspect its edges, back, connector areas, and recessed sections. A small dirty spot can keep the cleaning percentage from moving even when most of the part appears spotless.
Do not replace a component simply because the notepad temporarily shows it as unavailable. A part placed inside a cleaning machine may be treated as missing until the machine finishes and returns it to the workbench.
Keep Dirty and Clean Parts Separate
The easiest way to avoid cleaning the same piece twice is to divide the workbench into separate zones. Place dirty components on one side, move cleaned parts to the other, and leave broken pieces in their own small area until you decide whether to replace or salvage them.
This becomes far more useful than it sounds once you begin working on devices with several layers. If every screw, casing piece, button, and internal component is dropped into one pile, it becomes difficult to tell which parts are ready to reinstall and which still need attention.
A clean workbench also makes reassembly faster. You can work through the cleaned pile in order without repeatedly opening the notepad or checking each part individually.
Clear empty packaging and other unnecessary objects before starting a large repair. The more open space you have, the easier it is to maintain a consistent layout throughout the job.
Why Is Cleaning Stuck at 0%?
If you can hear the brushing sound but the cleaning percentage remains at 0%, the brush pointer is probably not touching the component. Dragging a part into the cleaning area can leave the cursor positioned away from it, so the game plays the sound even though the tool is moving through empty space.
Move the pointer directly over the visible grime and make small passes across the dirty section. Watch the percentage rather than relying only on the audio. Once the brush reaches the correct spot, progress should begin immediately.
A part can also have one specific dirt patch that must be cleaned. Rotating the component usually reveals a mark on the back, side, or edge that was hidden from the original viewing angle.
If the cursor is clearly touching the dirt and the percentage still refuses to change, return the part to the desk and try the interaction again. Persistent cleaning problems can appear after the game has remained open for a long session, and restarting ReStory can restore parts that no longer respond correctly.
Reinstalling the entire game should not be the first response to a stuck component. Check the pointer position, rotate the part, reopen the cleaning interaction, and restart the game before using a more disruptive fix.
Which Cleaning Tool Should You Use?
The regular brush is enough to complete early orders and remains the most dependable tool throughout the game. Brush upgrades are inexpensive and reduce the time spent manually removing dirt, making them a better early investment than repeatedly buying temporary cleaning supplies.
Canned air can clean a component almost instantly, but it is consumed through use. Save it for large parts that would otherwise require a long brushing session rather than wasting it on tiny buttons or simple covers that take only a few seconds by hand.
The brush becomes increasingly practical as it is upgraded, while canned air remains more of a convenience item. You can skip buying it entirely when money is tight and put those funds toward tools, licenses, or other shop improvements.
The screwdriver is also worth upgrading even though it does not clean anything directly. Faster disassembly means you reach the dirty internal components sooner and spend less of each order repeatedly removing screws.
Is the Sonic Bath Worth Buying?
The Sonic Bath cleans several components automatically, allowing you to work on another part of the device while the machine runs. The first version can hold three pieces and takes around 30 seconds to complete them.
That sounds efficient, but early components can usually be cleaned by hand in only a few seconds. Waiting half a minute for three small parts is often slower than brushing them yourself, especially when you do not have another useful task to complete during that time.
The machine becomes more valuable later, when upgrades improve its performance and larger orders give you enough parallel work to stay busy. You can place three components inside, continue disassembling or rebuilding another device, and return once the cycle is finished.
Do not buy replacement parts while the originals are still inside the Sonic Bath. The notepad can temporarily treat those components as missing, even though they will return as soon as the cleaning cycle ends.
Clean While Rebuilding Larger Devices
There are two effective ways to handle a cleaning order. You can disassemble the entire device first and clean everything in one batch, or clean each component as you reach it during reassembly.
Batch cleaning works well when the device has only a few large pieces. Place all dirty parts on one side, clean them consecutively, and then rebuild the item from the completed pile.
Cleaning during reassembly is better for complicated electronics with many small layers. Use the notepad to follow the installation order, clean the next required component, and place it directly back into the device. This prevents loose parts from accumulating across the entire workbench.
The second approach also makes it easier to notice when a component is missing or broken because you are handling the device in the same order used by the notepad.
Use the Notepad to Reassemble the Device
Once every required component is clean, open the notepad and follow the listed assembly order. The entries are arranged to help you determine which piece belongs inside the device next.
If a part refuses to install, another component may need to be placed beneath it first. Check the previous entries rather than repeatedly dragging the same piece over the device.
The notepad also distinguishes dirty parts from permanently broken ones. Cleaning will not repair a damaged component, so replace broken pieces with matching parts from the market, spare-part boxes, licensed suppliers, or donor electronics.
Do not throw away a component simply because it looks worn or dirty. Clean it first and check its listed condition. Dirt and mechanical damage are separate problems, and many ugly-looking pieces are still fully usable once restored.
How to Finish Cleaning Orders Faster
The biggest improvement comes from reducing unnecessary movement rather than buying every machine immediately. Keep the workbench organized, place the cleaning supplies within an easy drag path, and avoid mixing completed pieces back into the dirty pile.
Upgrade the brush early, use canned air only on large surfaces, and delay the Sonic Bath until you regularly have enough parts and simultaneous work to justify its timer.
Cleaning-only online orders are also useful when the shop is closed for deliveries. You can complete several devices overnight, then send them out after shipping becomes available again in the morning.
When a job includes both cleaning and repairs, finish the cleaning before purchasing replacement components. The notepad gives you a clearer picture of what is genuinely broken once every usable part has been restored and returned to the desk.
Cleaning Electronics Without Losing Track
To clean an item in ReStory: Chill Electronics Repairs, disassemble the device, drag each dirty component to the brush, and scrub the visible dirt spots until the cleaning interaction completes. Use the notepad to locate any remaining dirty parts and follow its order when putting the device back together.
Keep clean and dirty components on opposite sides of the workbench, rotate parts when the percentage will not increase, and make sure the brush pointer is physically touching the grime when cleaning appears stuck at 0%.
The upgraded brush is the best everyday cleaning tool, canned air is useful for large pieces, and the Sonic Bath becomes worthwhile later when you can clean parts passively while completing other work.