Subnautica 2 Celestine Guide: How To Get Celestine

Celestine in Subnautica 2 is a deep water ore used for major Tadpole upgrades and Strontium crafting. It is one of the first resources that pushes progression past normal starter zone gathering, because the best deposits sit near the Alien Ruins at the edge of the Tadpole’s safe depth limit.
Jump To
How To Get Celestine In Subnautica 2
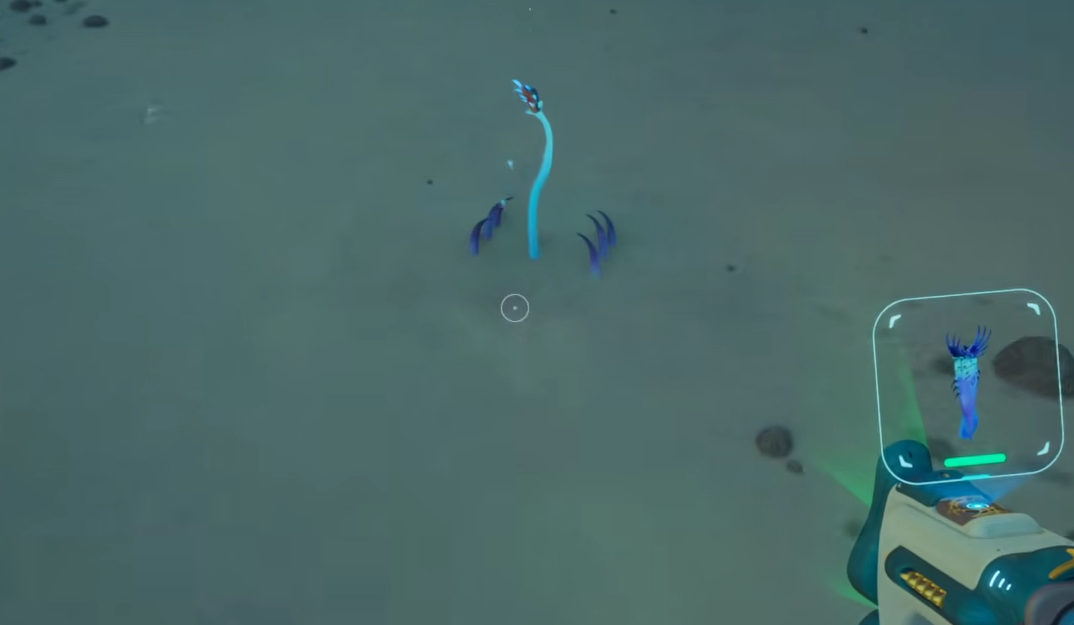
Celestine is found near the Alien Ruins in Subnautica 2, mostly around deep rock walls and seabed areas close to 250 meters down, and it must be mined from blue crystal deposits with the Sonic Resonator.
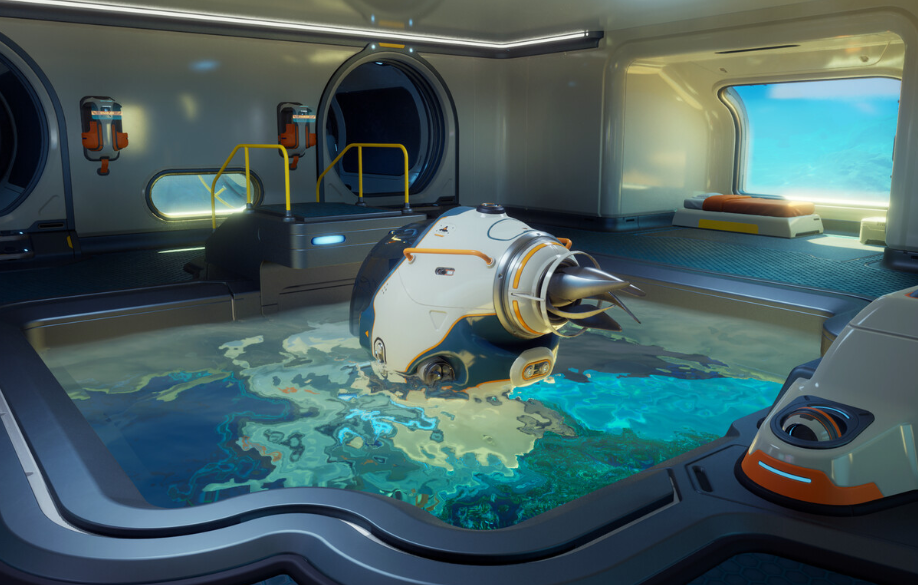
This is not a normal early ore like titanium, copper, or quartz. Celestine sits deep enough that swimming from the Lifepod is a bad plan unless oxygen management is already under control. The clean route is to build the Tadpole first, drive it toward the Alien Ruins, park near the 250 meter limit, then swim out to break nearby celestine deposits.
The main pressure point is depth. The base Tadpole can only safely handle 250 meters before hull damage becomes a problem. Celestine can appear around that threshold and below it, which means the safest early method is to use the Tadpole as a mobile oxygen stop while mining the deposits within short swimming range.
Celestine becomes much easier once the Tadpole Depth Module Mk. I is crafted, but getting that upgrade also requires celestine. Classic Subnautica behavior, really. The first celestine trip is the awkward one, because it is the trip that helps unlock safer future trips.
Where To Find Celestine In Subnautica 2
Celestine spawns around the Alien Ruins region, roughly 1,300 meters east of the Lifepod, with the best deposits appearing along deep walls, cliff edges, caves, and lower seabed sections near 250 meters deep.
The ore has a silver blue crystal look, which makes it easier to spot once the terrain gets darker. It usually appears as jagged blue crystals attached to rock surfaces or clustered on deeper seabed formations. The color stands out against the darker stone, but it is still easy to miss while watching oxygen, depth, and local wildlife at the same time.
Before heading out, open the character menu and make sure landmark signals are enabled. The Alien Ruins signal is the most useful navigation point for this farm, because the celestine route starts once the Tadpole reaches that deeper region.
The Alien Ruins trip is also the point where the game starts asking for better preparation. A Tadpole, Sonic Resonator, extra oxygen, and room in the inventory make the run cleaner. Trying to do it like a casual copper run wastes time and usually ends with a panicked swim back to the sub.
For early progression connected to this region, the Subnautica 2 Tadpole Pens keycode guide is useful before making the deeper push toward the Alien Ruins and celestine farming.
Best Celestine Farming Location In Subnautica 2
The best celestine farming location in Subnautica 2 is near the Alien Ruins, along the deep cliff and cave area close to the 250 meter depth line where multiple celestine deposits spawn close together.
A strong farming route starts from the Alien Ruins area. From there, take the Tadpole toward the deeper wall near the ruins, stay close to 250 meters, and scan the rock wall and cliff edge for blue celestine deposits. The best pocket has several deposits close enough that the Tadpole can stay parked near the safe depth while the mining happens in short trips.
There are also celestine deposits near cave sections in the same deep region. These are worth checking because cave walls can hold extra ore that is easy to miss from the open water. The risk is oxygen and navigation, not just enemies. Always keep the Tadpole’s location clear before swimming into a cave, because getting turned around at 250 meters is a very efficient way to make a simple ore run stupid.
From my experience, the cleanest first run is not about clearing every deposit in the zone. It is better to grab enough celestine for the first upgrade needs, return safely, process what is needed, then come back with better depth control. Greedy first trips are where the ocean starts collecting repair bills.
What To Bring Before Farming Celestine
The main items needed for celestine farming are the Tadpole, Sonic Resonator, enough oxygen support, and enough inventory space for ore.
The Sonic Resonator is required because celestine comes from larger mineral deposits, not loose pickup chunks scattered everywhere like basic starter resources. Without the Sonic Resonator, the trip can still reveal where celestine is, but it will not turn into a real farming run.
The Tadpole is the bigger requirement. It gives mobility, oxygen access, and a safe return point near the deep farming area. The base Tadpole reaches the edge of celestine depth, but the Depth Module Mk. I makes later farming much safer once it is crafted.
| Item Or Prep | Why It Helps |
|---|---|
| Tadpole | Lets the route reach the Alien Ruins and gives oxygen support near the mining area. |
| Sonic Resonator | Breaks celestine deposits so the ore can be collected. |
| High Capacity Airtank | Makes short swims below the Tadpole safer and less rushed. |
| Repair Tool | Helps recover if the Tadpole takes damage near the crush depth or from wildlife. |
| Empty Inventory Space | Prevents wasted trips when several deposits are found close together. |
The high capacity airtank is not strictly required if the route is tight, but it makes the first celestine trip less annoying. Celestine farming usually means leaving the Tadpole, mining, collecting, then returning for oxygen before repeating the same pattern.
How To Mine Celestine Deposits
Celestine deposits are mined by aiming the Sonic Resonator at the blue crystal ore node, breaking the deposit, and collecting the celestine pieces that come from it.
Each deposit can give multiple pieces of celestine. After breaking a node, check the area around the rock face or seabed carefully so no pieces get left behind. Deep water lighting and uneven terrain can hide dropped materials, especially if the deposit breaks near a slope or cave wall.
The safest method is simple. Park the Tadpole near the deposit without crossing the crush depth, swim out, break the node, grab the celestine, then return to oxygen before searching farther. If a deposit is slightly below 250 meters and the Tadpole does not have a depth module, leave the vehicle at its safe limit and make the final drop by swimming.
Do not force the Tadpole below its crush depth for one ore node. The damage is not worth it, and the celestine route has enough deposits that one bad angle does not need to turn into a full repair situation.
How To Make Strontium From Celestine
Strontium is crafted by processing celestine at the Processor, with 2 celestine turning into 1 strontium after a short processing time.
This makes celestine more than a direct upgrade material. It also becomes the base resource for strontium, which is used in additional Tadpole upgrade crafting. Because of that, it is worth farming more celestine than the exact amount needed for one recipe.
| Material | Processing Result |
|---|---|
| 2 Celestine | 1 Strontium |
The main thing to remember is that strontium costs celestine. Spending every piece on one recipe can leave the next upgrade blocked. A good celestine run should bring back enough for the immediate craft and a little extra for processing, especially once Tadpole modules start asking for deeper resources.
What Celestine Is Used For In Subnautica 2
Celestine is mainly used for Tadpole upgrade progression and strontium crafting, making it one of the key materials for pushing past the early deep water limit.
The biggest early reason to farm celestine is the Tadpole Depth Module Mk. I. That upgrade raises the Tadpole’s safe diving range, which makes deeper exploration and future resource runs much smoother. Celestine is also connected to strontium, which appears in other upgrade recipes.
This is why celestine is such an important resource gate. It sits at the edge of the Tadpole’s starting depth limit, then helps craft upgrades that make that same depth limit less restrictive. Once the first celestine haul is done, deeper routes become easier to plan and less dependent on risky swimming below the vehicle.
Celestine farming can also overlap with other Alien Ruins progression and deeper biome exploration. If the route starts pushing into dangerous areas or strange creature zones, the Subnautica 2 Necrolei Cyst location guide can help with another deeper resource path connected to later crafting needs.
Celestine Farming Tips
The best celestine farming approach is to treat the Tadpole as a parked oxygen station, not as something to ram deeper than its limit. Stay near 250 meters, mine deposits close to the vehicle, and only swim below the safe depth for short pickups.
Enable landmark signals before leaving the Lifepod area. The Alien Ruins signal makes the trip easier to repeat, and repeatable routes are what turn celestine from a scary deep ore into a normal crafting stop.
Bring the Sonic Resonator every time. Celestine deposits need to be broken, and forgetting the tool turns the whole trip into sightseeing with extra drowning pressure. Also leave with open inventory slots, because the best farming pocket has several deposits close together.
Multiplayer groups should coordinate before the trip. One player can scout while another watches the Tadpole, but everyone still needs their own oxygen and inventory plan. If connection problems get in the way of group exploration, the Subnautica 2 multiplayer not working fix guide covers the main issues that can stop co op from working cleanly.
The cleanest farming loop is to gather enough celestine for the Depth Module Mk. I first, return to base, craft or process what is needed, then come back with the upgraded Tadpole. After that, the Alien Ruins route feels less like sneaking around the depth limit and more like a real mining run.
Final Blurb
Celestine in Subnautica 2 is found near the Alien Ruins, deep enough that the Tadpole and Sonic Resonator should be ready before the trip. The first haul is the important one because it feeds into Tadpole depth upgrades and strontium crafting, both of which make later deep water routes easier to handle.
The best play is to reach the Alien Ruins, park the Tadpole near the 250 meter line, mine nearby blue celestine deposits, and return before pushing too far below the safe depth. Once the first upgrade path opens, celestine farming becomes much cleaner, and the ocean gets slightly less rude about every meter of progress.