Subnautica 2: How To Get Silver
Silver is one of the first resource walls in Subnautica 2 because it is needed for better oxygen, electronics, and early base progress, but it is not found the same way as common starter materials. Copper and titanium show up all over the shallow routes, while silver is usually tucked into deeper cave systems, colony routes, and later mining spots.
For more early resource routes, survival help, and crafting guides, the main Subnautica 2 guide page keeps the important early game help together.
Jump To
How To Get Silver In Subnautica 2
To get silver in Subnautica 2, search deeper caves north of the Lifepod, especially around the Old Habitat route, Camp One, and other colony cave systems, then collect small silver nodes by hand or mine larger deposits later with the Sonic Resonator.
The main thing to understand is that silver is a cave material first. It is not reliable on the open surface near the Lifepod, and it is not meant to be farmed like copper or titanium. If every rock keeps turning into copper, the route is probably too shallow.
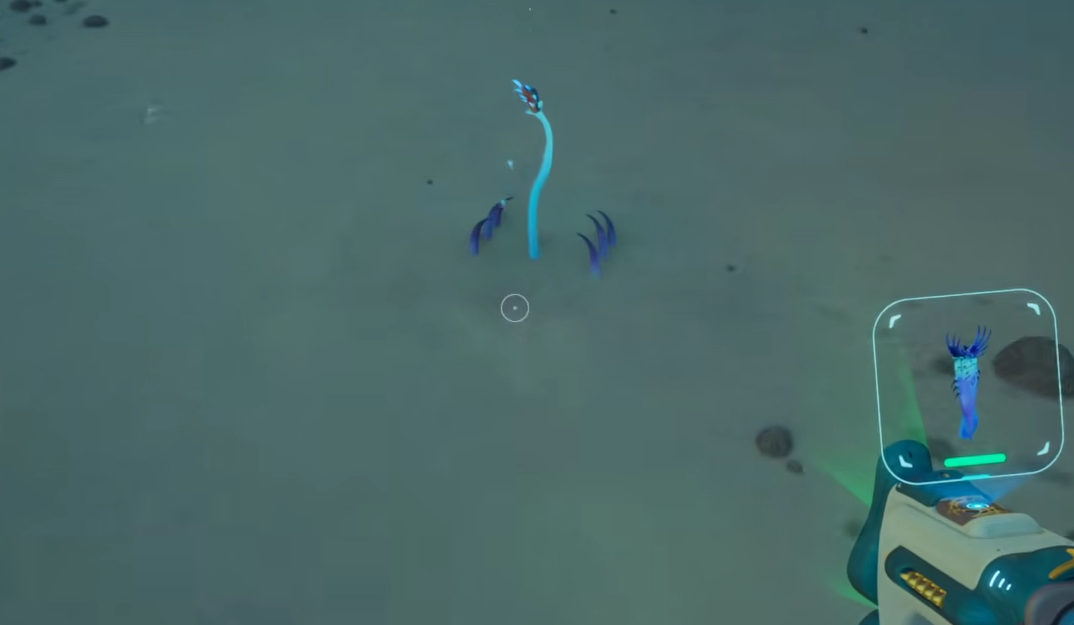
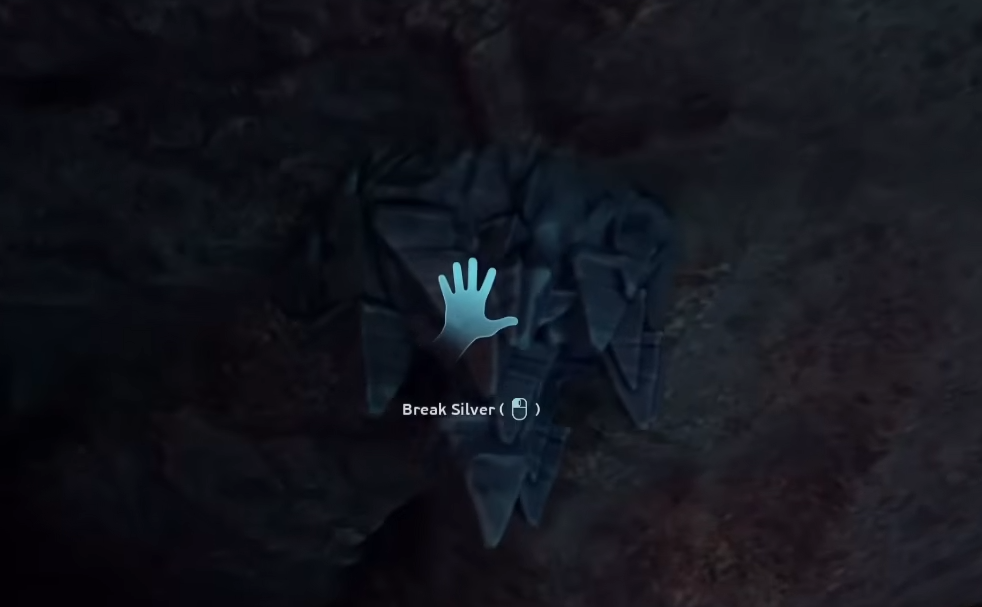
Early silver comes from small nodes that can be picked up by hand. That is the silver needed for the first big upgrades, especially the air tank and basic electronics. Larger silver deposits are a later farming option because they require the Sonic Resonator before they can be broken open.
If the Sonic Resonator path is not ready yet, the Subnautica 2 Lead guide helps with another early metal that connects to better tool progression.
The best early plan is simple: swim north, find the cave systems around the colony routes, grab hand collected silver, craft the air tank, then come back with more oxygen for better farming. Drowning while looking for the thing that helps with oxygen is very Subnautica, but it is still not the ideal strategy.
Best Early Silver Location Near The Lifepod
The best early silver location is the cave system north of the Lifepod near the Coral Dome, adaptation tree area, and Old Habitat colony ruins.
Start at the Lifepod and swim north. Pass the Coral Dome sitting on top of the pillar in the open area, with the adaptation tree route off to the right. Keep moving until the ruined colony structures start coming into view ahead and slightly to the right.
Before reaching the ruins, check the right side for lower cave openings under rock shelves and overhangs. One strong visual clue is an overhang with Jelly Lei hanging near it. The cave entrance can be easy to miss because it sits below the obvious route, not directly on the surface path.
Inside the cave, check the walls, floor, ledges, and small side pockets for silver nodes. Small silver can be grabbed by hand, which makes this the best early target before the Sonic Resonator is available. This cave is also close enough to the Lifepod that it works before longer oxygen upgrades, as long as the trip stays focused.
If the main problem is still setting up a real base for storage and crafting, the Subnautica 2 Habitat Builder guide covers the tool needed to start building properly.
All Good Silver Locations In Subnautica 2
The best silver locations in Subnautica 2 are cave based, with the safest early routes north of the Lifepod and the stronger later routes stretching toward Camp One, the Colonist Bunker cave, and the geothermal vent outskirts.
| Silver Location | Where To Look | Best Use |
|---|---|---|
| North Lifepod Cave | North of the Lifepod near the Coral Dome and Old Habitat route. | Best first silver run for hand collected nodes. |
| Old Habitat Ruins | Caves near the colony ruins roughly north of the Lifepod. | Reliable early silver once the ruins are found. |
| Camp One Cave | Northeast of Camp One’s northern building, down the cliffside cave entrance. | Strong follow up route with several small silver deposits. |
| Colonist Bunker Cave | West to southwest of the Angel Comb Digestion area. | Good longer cave route while exploring colony salvage. |
| Geothermal Vents Outskirts | East of the Lifepod near the safer edge of the vent biome. | Better later route for larger deposits and Sonic Resonator farming. |
The north Lifepod and Old Habitat cave routes should come first because they are close and useful before heavy tools. Camp One and the Colonist Bunker cave are better once the first oxygen upgrades are handled. The geothermal vents area is worth saving for later because heat, depth, and large deposits make it less friendly as a first silver trip.
Camp One Silver Cave Location
Camp One has one of the better silver caves once the early route has pushed farther north to northeast from the Lifepod.
The useful cave is not found by searching the flat ground outside Camp One. That area can still give basic materials, but silver is more reliable below the buildings. Look northeast of the northern Camp One building and move down the nearby cliffside. The cave entrance sits below that upper area rather than directly beside the easiest surface path.
A good landmark is the cave entrance marked by plants with translucent teal fronds and a purple center. That visual cue helps separate the actual silver cave from the plain outer terrain, where it is easy to waste time grabbing more titanium while pretending progress is happening.
This is a strong follow up silver spot because the cave can hold multiple small deposits. It is better after an air tank upgrade, since the route and cave search take longer than the simplest north Lifepod run.
Colonist Bunker Silver Cave Location
The Colonist Bunker cave is another good silver route, found west to southwest of the Angel Comb area used for the Digestion Adaptation.
This location works well after the early survival loop is more stable. If the Angel Comb route has already been explored, the Colonist Bunker cave is a natural next place to check because it combines salvage interest with useful silver farming.
The route is longer than the first northern silver cave, so it is not the best first stop for a brand new run with weak oxygen. Once the air tank is crafted, the Colonist Bunker cave becomes much more practical. Look through the cave walls and pockets carefully, because silver can blend into the busy cave layout when the main focus is just finding the bunker salvage.
This spot is useful because it gives the silver guide a second real route. The first cave gets the air tank started. The Colonist Bunker cave helps stockpile more silver for electronics, Wiring Kits, and base progression after the first emergency is solved.
Geothermal Vents Silver Location
Silver can also be found around the geothermal vent outskirts east of the Lifepod, but this is better treated as a later farming route.
The geothermal vent area is more dangerous because heat becomes part of the problem. If the water temperature starts climbing and the proper adaptation is not unlocked yet, stay on the safer outer edge instead of pushing straight into the hot zone. The ocean already has enough ways to be rude without adding boiling water to the list.
This route is more useful once the Sonic Resonator is available. Many of the better silver finds around the vents are larger deposits, and those need the Sonic Resonator to break. That makes the vent outskirts a stronger midgame silver route than an early air tank solution.
If the hot zone is starting to matter for other crafting routes, the Subnautica 2 Strong Acid guide covers another resource that becomes important once progression moves into harsher areas.
The best use for this area is bulk farming later. Early on, use the northern caves and hand collected nodes. Later, come back to the geothermal outskirts with better tools, better oxygen, and enough confidence to leave before the temperature warning becomes the main character.
Small Silver Nodes And Large Deposits Explained
Silver appears as small nodes that can be collected by hand and larger deposits that require the Sonic Resonator.
| Silver Type | How To Collect It | Best Time To Use It |
|---|---|---|
| Small Silver Nodes | Pick them up by hand. | Early game, especially before the air tank and Sonic Resonator. |
| Large Silver Deposits | Break them with the Sonic Resonator. | Later farming routes, especially around deeper caves and vent outskirts. |
Small silver nodes are the priority early because they do not require extra tools. These are the nodes that solve the first real silver problem and let the air tank or electronics path begin.
Large deposits are worth remembering, but they should not distract from the first goal. If a large silver deposit appears before the Sonic Resonator is available, mark the area mentally and move on. The first silver run should be about collecting usable pieces now, not staring at a deposit the game has not allowed anyone to break yet. Extremely helpful rock behavior, clearly.
Once processed materials start blocking upgrades, the Subnautica 2 Titanium Ingots guide explains how the Processor works and why ingots become part of the stronger crafting chain.
What Silver Is Used For In Subnautica 2
Silver is used for the air tank, Wiring Kits, advanced electronics, system chips, dedicated cores, base facilities, and the Tadpole vehicle.
The air tank is the first major reason to get silver. More oxygen makes cave exploration safer and gives more time to search for materials without turning every route into a last second swim back to the surface.
After the air tank, silver becomes an electronics material. Wiring Kits and more advanced parts make it important for base progression and vehicle crafting. That is why silver should be stockpiled when a good cave is found. It is not a one recipe material that becomes useless after the first upgrade.
| Silver Use | Why It Matters |
|---|---|
| Air Tank | Improves oxygen time and makes deeper resource runs safer. |
| Wiring Kits | Supports important electronics crafting. |
| System Chips | Connects silver to more advanced tech progression. |
| Dedicated Cores | Feeds into later base facility crafting. |
| Tadpole Vehicle | Makes silver part of vehicle progression. |
Silver is worth grabbing whenever a route has safe access to it. Even after the first air tank, later electronics can burn through stored silver quickly, and returning to the same cave because one more Wiring Kit is needed gets old fast.
Later progression also starts asking for rarer materials, so the Subnautica 2 Lithium location guide is a good next stop once air tank and processed material upgrades start opening up.
Silver Farming Tips
The best silver farming habit is to stop circling the shallow Lifepod area and start checking lower cave entrances connected to colony routes.
- Head north from the Lifepod first and check caves near the Coral Dome and Old Habitat route.
- Use Jelly Lei overhangs, cables, colony debris, and lower cliffside openings as cave clues.
- Prioritize small silver nodes early because they can be collected by hand.
- Craft the air tank before committing to longer silver routes like Camp One or the Colonist Bunker cave.
- Save large silver deposits for later if the Sonic Resonator is not available yet.
- Use the geothermal vent outskirts later, not as the first silver route.
- Bring extra storage when planning a longer cave sweep.
The first good silver run is usually the hardest because oxygen is still limited and the right cave entrance is not obvious yet. Once the air tank is crafted, the same kind of cave route becomes much easier to search properly.
For much later resource chains, the Subnautica 2 Conduit Crystal guide and Subnautica 2 Troilite guide cover the advanced materials that show up after the early silver problem is already solved.
Subnautica 2 Silver Video Guide
The video below can help with the visual side of silver farming, especially for matching cave entrances, landmarks, and early route direction from the Lifepod.
Final Blurb
Silver in Subnautica 2 is found by searching deeper cave systems, with the best early route north of the Lifepod near the Coral Dome, adaptation tree area, and Old Habitat ruins. Camp One and the Colonist Bunker cave are strong follow up locations once oxygen is better, while the geothermal vent outskirts are better saved for later Sonic Resonator farming.
The main fix is to stop treating silver like copper. It is not sitting everywhere in the starter shallows. Go lower, check cave openings, follow colony routes, and grab small hand collected nodes first. Once the air tank is crafted, silver farming becomes a normal route instead of a 40 minute argument with suspiciously unhelpful rocks.