Where to Find Lead in Subnautica 2
Lead is one of the first awkward metals in Subnautica 2 because it does not show up everywhere like titanium, but it is needed for the Sonic Resonator, one of the most important early tools. The best early lead route sends players northeast of the Lifepod into a ravine with a blue natural current, colony construction, and both small lead pieces and larger deposits.
For more Subnautica 2 resource routes, tool unlocks, and early progression guides, the main Subnautica 2 survival hub has the related help in one place.
Jump To
How To Get Lead In Subnautica 2
To get lead in Subnautica 2, head about 280 meters northeast of the Lifepod at roughly 75 degrees, enter the blue natural current that drops into a ravine, then search the sand, smaller breakable blocks, and larger deposits around the colony platform area.
Lead is easy to miss because the game does not scatter it across the starting area the way it does with titanium and copper. The early route is more specific. The ravine northeast of the Lifepod is the clean first target, especially before lead becomes easier to find later near the Alien Ruins.
The main reason to get lead early is the Sonic Resonator. That tool opens up mining for bigger metal and mineral blocks, and it is also used for clearing Angel Combs connected to adaptations. In plain survival terms, lead is the metal that helps unlock better resource farming and better progression routes.
Lead is not used for a huge pile of early recipes, but the recipe it does support is important enough that the metal should not be ignored. Once the ravine is found, grabbing extra lead before leaving saves a second trip back to the same hole in the ocean. Nobody needs a repeat performance unless the first one was somehow enjoyable.
If early crafting is also stuck on electronics, the Subnautica 2 Silver guide covers the other early metal that blocks several important upgrades.
Best Lead Location Near The Lifepod
The best early lead location is the ravine about 280 meters northeast of the Lifepod, near the blue natural current and colony platform construction.
This ravine is the first reliable lead spot because it has multiple lead sources in the same area. There are small lead pieces that can be picked up, smaller blocks that can be broken, and larger lead deposits that become more useful once the right tool is available.
The ravine also has a Tadpole fragment nearby, so the trip can support more than one progression goal. That makes it a stronger route than randomly searching shallow terrain and hoping lead appears. Subnautica 2 rewards specific landmark routes, and lead is a perfect example of that.
How To Reach The Lead Ravine
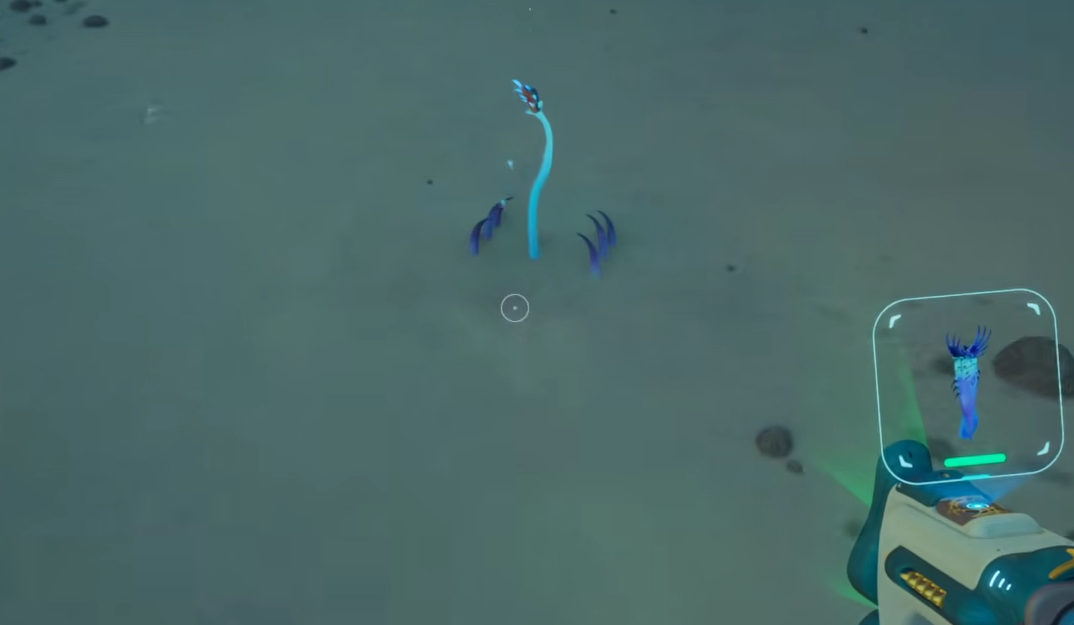
Start at the Lifepod and face northeast, around 75 degrees on the compass. Swim in that direction until a blue natural current becomes visible below.
Drop into the current and let it pull the route down into the ravine. This current is the major landmark because it separates the real lead route from random northeast wandering. Once inside the ravine, look for colony platform construction on the left side. A Tadpole fragment should also be near this area, which helps confirm the correct spot.
After reaching the platform area, do not only stare at the large blocks. Swim farther north or east along either side of the ravine and check the sand, slopes, and smaller mineral blocks. Early lead can be found as little pieces in the ravine, not only as big deposits.
| Step | What To Do |
|---|---|
| 1 | Start at the Lifepod and face northeast. |
| 2 | Use a bearing of about 75 degrees. |
| 3 | Swim until the blue natural current appears below. |
| 4 | Enter the current and ride it down into the ravine. |
| 5 | Stop near the colony platform construction and Tadpole fragment. |
| 6 | Search the sand, ravine sides, and smaller deposits for lead. |
Where To Search Inside The Lead Ravine
The best places to search inside the lead ravine are the sandy floor, the north and east sides of the ravine, and the area around the colony platform construction.
The lead is not always sitting directly beside the first landmark. After dropping in through the current, use the platform as the anchor point, then sweep the ravine like a resource lane. Check low first, then move along the sides. Small lead pieces can blend into the sand and rock clutter, especially when the area is visually busy.
Large block deposits may be visible too, but those are not always the early answer if the Sonic Resonator is not ready yet. The small pieces and smaller breakable blocks are the practical targets before better mining opens up.
This route becomes much better after oxygen upgrades. The ravine is not impossibly far, but it is deep enough and wide enough that a rushed first trip can turn into a bad return swim. Get in, grab what is obvious, and leave with time to spare. Heroic drowning is still drowning, just with worse branding.
Small Lead Pieces And Large Lead Deposits
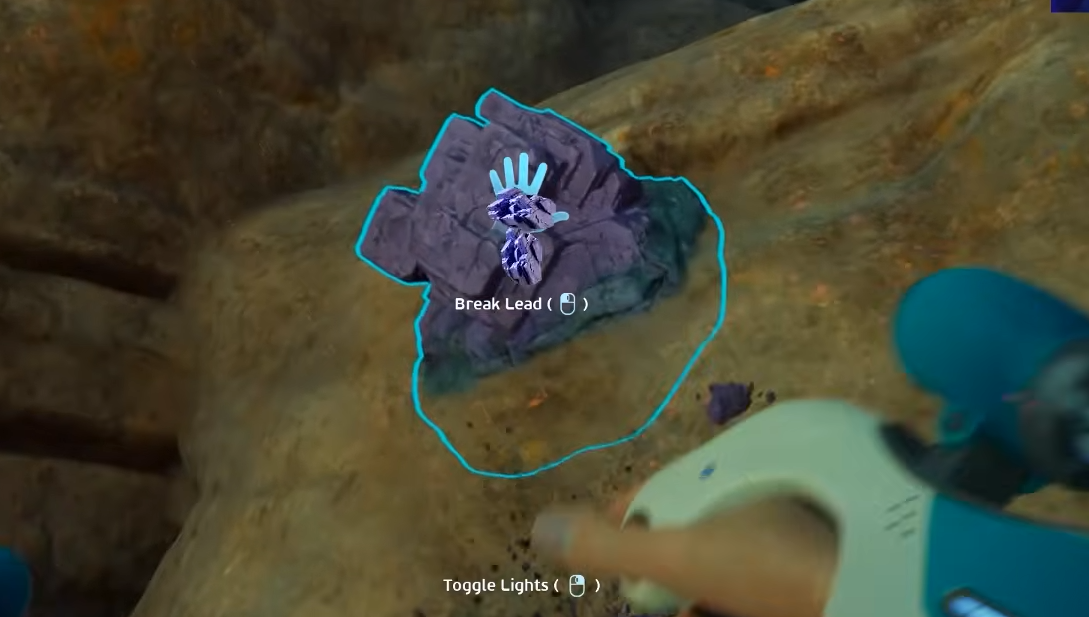
Lead can appear as small pieces that can be picked up, smaller blocks that can be broken, and larger deposits that are better handled once mining tools are available.
| Lead Source | How To Collect It | Best Time To Use It |
|---|---|---|
| Small Lead Pieces | Pick them up by hand. | Best early source for Sonic Resonator crafting. |
| Small Breakable Blocks | Break them when found in the ravine. | Good early extra lead while sweeping the area. |
| Large Lead Deposits | Mine them with the Sonic Resonator. | Better after the tool is crafted. |
This is why the first lead trip should focus on anything that can be collected immediately. The Sonic Resonator needs lead, but larger deposits are exactly the kind of thing the Sonic Resonator exists to deal with. Very funny system. Very rude timing.
If a large lead deposit is found before the tool is ready, remember the location and move on. The ravine is still worth checking because smaller lead sources can be collected without needing to mine the biggest blocks first.
Once the Processor and ingot crafting start becoming the next wall, the Subnautica 2 Titanium Ingots guide covers the processed material step that starts showing up in stronger crafting routes.
What Lead Is Used For In Subnautica 2
Lead is mainly used early for crafting the Sonic Resonator, and it can also be used for germanium ingot production through the Processor.
The Sonic Resonator is the big one. It lets players mine bigger metal and mineral blocks, which changes resource farming from small hand collected pieces to larger hauls. It also has progression value because it can clear Angel Combs connected to adaptations.
Lead is not the most recipe heavy early metal, but that does not make it minor. A material can be important because of one key craft, and the Sonic Resonator is exactly that kind of craft.
| Lead Use | Why It Matters |
|---|---|
| Sonic Resonator | Allows mining of large mineral blocks and helps clear Angel Combs. |
| Germanium Ingot | Can be used in Processor crafting, though silver can also work for this path. |
| Later Stockpile | Useful to store so the ravine trip does not need to be repeated immediately. |
Once the Sonic Resonator is crafted, the value of lead shifts. It becomes less of an emergency hunt and more of a resource to keep stocked for future crafting. Later areas near the Alien Ruins have far more lead available, so the early ravine is mostly about breaking through the first tool gate.
That same tool progression eventually connects to more advanced material hunts, including Troilite mining and harder later routes like the Feedback Resonator fragment guide.
Lead Farming Tips
The best lead farming strategy is to use the northeast ravine for the first Sonic Resonator craft, then stockpile extra lead before leaving if oxygen and inventory space allow.
- Use the 75 degree northeast bearing from the Lifepod.
- Look for the blue natural current instead of searching open terrain randomly.
- Use the colony platform construction and Tadpole fragment as confirmation landmarks.
- Search the sand and ravine sides for small lead pieces.
- Break smaller blocks when possible.
- Ignore large deposits until the Sonic Resonator is ready.
- Bring extra oxygen support if the ravine route feels tight.
- Store spare lead at base so a second trip is not needed right away.
Lead feels rare early because it has one clear route instead of being scattered generously through the starter biome. Once that route is known, the hunt becomes much simpler. Follow the current, sweep the ravine, craft the Sonic Resonator, and then start mining the bigger deposits that were previously just sitting there being smug.
If the next progression wall is a rarer material instead of lead, the Subnautica 2 Lithium location guide covers the Great Jaw route and the safer later lithium source.
Subnautica 2 Lead Video Guide
The video below can help with the visual side of the lead route, especially for finding the blue current, ravine drop, and colony platform landmarks northeast of the Lifepod.
Final Blurb
Lead in Subnautica 2 is found early in the ravine about 280 meters northeast of the Lifepod. Swim on a 75 degree bearing, enter the blue natural current, drop into the ravine, and search around the colony platform construction, sand, and ravine sides for small lead pieces and breakable blocks.
The main reason to get lead is the Sonic Resonator, which unlocks large mineral mining and helps clear Angel Combs for adaptations. Grab enough for the tool, store any extra, and remember the ravine for later large deposits. Early lead is annoying only until the route is known. After that, it is just a metal hiding at the bottom of a very specific water slide.