Tears of Metal Guide: 15 Beginner Tips for Your First Campaign
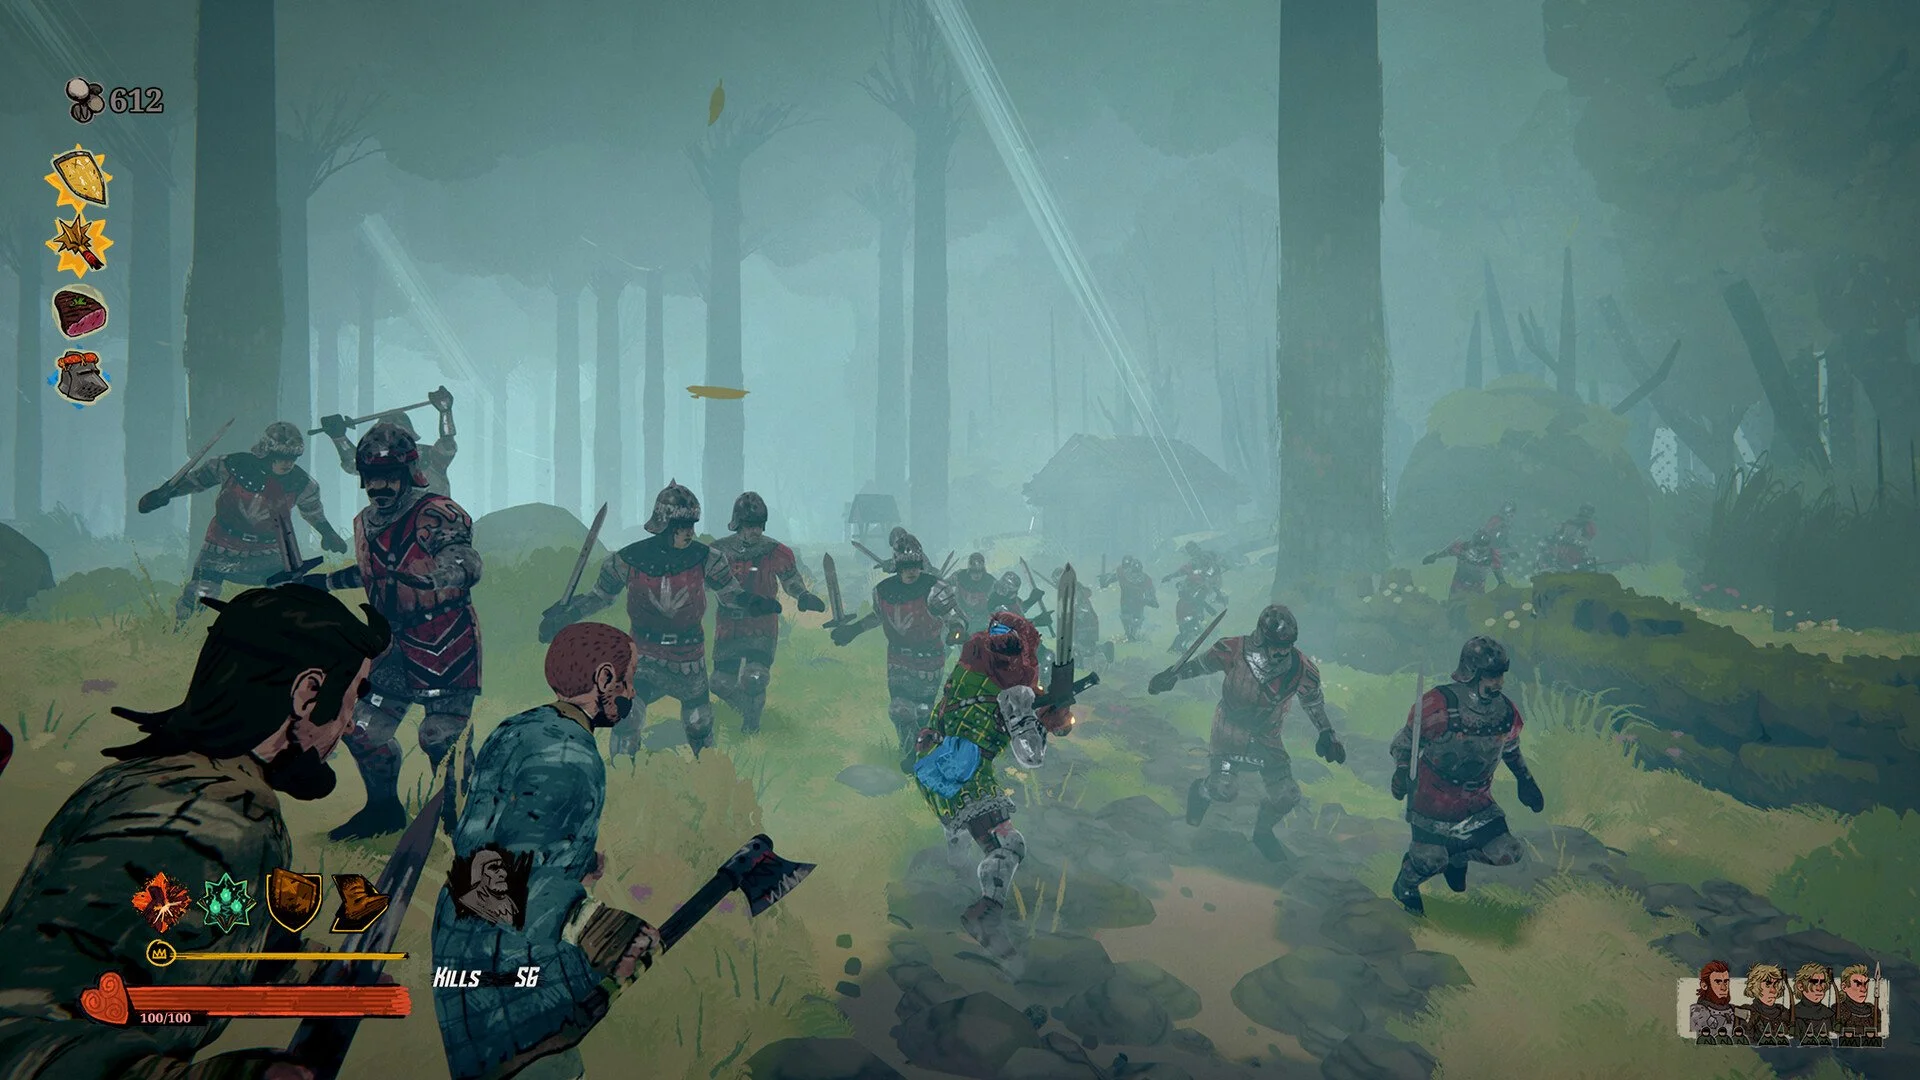
Tears of Metal can initially look like a straightforward horde-clearing game, but the campaign becomes much more demanding once armored captains interrupt your attacks, Threat Level adds new hazards, and random rewards pull your build in several directions. The most reliable runs are not necessarily the ones that find the rarest Artifact. They are the ones that preserve health, develop one coherent Emblem plan, use the battalion deliberately, and convert every return to the Village into permanent progress.
1. Treat Your First Tears of Metal Run as Reconnaissance
Your first campaign should be used to understand the combat rhythm, map structure, reward systems, and Threat Level rather than forcing a complete three-act clear. Tears of Metal includes three acts, three launch heroes, more than 100 Artifacts, and over 45 handcrafted environments, so one run cannot teach every interaction.
Pay attention to what happens before and after each battle. Note which map symbols lead to Emblems, which encounters provide safer non-combat rewards, how quickly Threat Level rises, and which enemy attacks can be blocked rather than dodged.
A failed campaign still provides useful information and may return enough currency or progression to improve the next attempt. Reaching a new boss, discovering a reliable Emblem interaction, or identifying a dangerous objective type can be more valuable than extending a collapsing run for one additional reward.
Do not judge the game by whether the first build feels powerful. Early runs are partly about learning which choices actually work together and which impressive-looking rewards produce very little value with your current hero.
2. Learn Blocking and Parrying Before Chasing Damage
Blocking and parrying should be your normal defensive tools in Tears of Metal. Dodge has a longer cooldown and is better reserved for large area attacks, unblockable charges, and situations where positioning has already failed.
Against ordinary melee enemies, hold block while reading the attack pattern instead of immediately rolling away. Once the timing becomes familiar, press the same defensive input near the moment of impact to attempt a parry and create a stronger punish opportunity.
Captains and armored elites are designed to interrupt careless aggression. Completing one more heavy attack is rarely worth losing health, especially when recovery opportunities can be limited during a campaign.
Practice the defensive rhythm during the opening encounters: block the first swing, parry a predictable follow-up, then respond with a short heavy combination while the enemy is staggered. This produces more consistent damage than committing to long attack strings and hoping the target never retaliates.
3. Save Your Dodge for Attacks That Block Cannot Solve
Dodge is most valuable when escaping a visible area-of-effect marker, a boss charge lane, an arrow barrage, or another attack that threatens a large section of the battlefield. Spending it on every basic sword swing can leave the ability unavailable when the dangerous telegraph appears.
Movement and blocking should handle most routine pressure. Circle an elite while defending, keep nearby enemies in view, and reposition before the battlefield closes around you.
Release target lock when you need to escape a wide attack. Remaining anchored to one enemy can pull your movement back toward the danger or make the camera harder to control while several effects cover the ground.
The goal is not to preserve dodge indefinitely. It is to use the cooldown on attacks where it creates a meaningful advantage rather than treating it as the first response to every enemy animation.
4. Complete the Objective Before Clearing the Entire Horde
Many campaign encounters revolve around captains, elite targets, defense points, rescues, or other marked objectives. The surrounding soldiers create pressure, but defeating every ordinary enemy may not contribute directly to completing the battle.
Check the minimap and objective marker before committing to a large group. If the encounter only requires an elite kill, cut through enough of the horde to reach that target and direct your strongest attacks there.
This becomes more important as Threat Level rises. Spending too long fighting endlessly replenished enemies can allow an objective timer to expire or give additional hazards more opportunities to damage the battalion.
Clear ordinary enemies when they prevent movement, surround an objective, or threaten a vulnerable teammate. Otherwise, treat them as an obstacle between the group and the actual win condition rather than the purpose of the battle.
5. Spend Battalion Commands Before the Fight Is Already Lost
Defeating enemies fills a three-segment special gauge. A single segment can be spent on a battalion command, while the complete gauge can be used for a wider emergency attack capable of clearing pressure around the hero.
Do not automatically hoard all three bars for a dramatic final ability. A well-timed infantry focus, spearman charge, or archer volley can remove an elite earlier, prevent damage, and keep the objective under control.
Single-bar commands are especially valuable when a captain is buried inside a crowd. The battalion can pressure the target while you defend, break armor, or move around the formation to attack from a safer angle.
The full-gauge attack remains useful when enemies surround a defense point or the group needs immediate space. Use it as a deliberate reset, not as compensation for ignoring several minutes of mounting pressure.
6. Protect Your Soldiers Instead of Treating Them as Disposable Effects
Your Scottish battalion is part of Tears of Metal’s long-term progression. Soldiers gain experience and permanent skills between campaigns, and losses can remove developed units that would otherwise strengthen future attempts.
Issue commands where they can accomplish something specific. Sending troops into an unnecessary horde while the objective sits elsewhere exposes permanent resources for no meaningful gain.
Watch the battalion during elite fights and objective defenses. If soldiers become isolated, redirect pressure, remove ranged enemies, or use the hero to pull dangerous attacks away from them.
Recruit before beginning another serious campaign when the roster has been depleted. Entering an act understaffed makes objectives take longer, which raises the chance of additional damage, failed timers, and higher Threat Level.
7. Commit to One Emblem Direction Early
Emblems modify actions such as light attacks, heavy attacks, blocking, and dodging, with additional value coming from combinations within compatible families. A build spread across unrelated Emblems may provide several small bonuses without creating one dependable strength.
Use the first meaningful reward to establish a direction. If your hero relies heavily on heavy attacks and armor breaking, prioritize Emblems that improve that part of the moveset. If your safest openings come from blocking and parrying, develop effects that reward successful defense.
Campaign nodes display reward information before you enter them. Use those symbols to route toward the same Emblem family rather than accepting whichever battle sits directly above the current position.
You do not need to reject every reward outside the chosen family. A broadly useful defensive effect can still solve an immediate weakness, but the core of the run should become more focused with each node rather than less coherent.
8. Build Around Actions You Can Trigger Reliably
A powerful effect is only valuable when your hero can activate it frequently. Before taking an Emblem or Artifact, identify what causes the bonus and whether that trigger already fits the way you are playing.
An effect tied to the final hit of a long combination may look impressive, but it provides little value if elites constantly interrupt that sequence. A smaller bonus connected to blocking, heavy attacks, battalion commands, or another action you use repeatedly may improve the run more consistently.
Match upgrades to the hero’s natural strengths and your own habits. A player who regularly parries should not abandon that reliable rhythm because one reward encourages reckless full-combo aggression.
After each battle, ask whether the build made the previous encounter easier in a way you can explain. If you cannot identify what activated or improved, the next reward should strengthen a clearer part of the setup rather than adding another uncertain interaction.
9. Choose Artifact Synergy Over Isolated Rarity
Tears of Metal contains more than 100 Artifacts, which makes it unlikely that every campaign will provide one predetermined perfect combination. Strong general play comes from recognizing interactions rather than waiting for an exact list of top-tier drops.
Two or three effects supporting the same result can outperform a collection of individually powerful bonuses. A build centered on parry rewards, battalion strength, repeated heavy attacks, survivability, or another consistent theme is easier to activate and evaluate.
Read the complete effect text before selecting a reward. Conditions involving a final combo hit, damage taken, enemy defeat, objective state, or another trigger may make an Artifact much narrower than its headline effect suggests.
Avoid changing the entire build because one rare reward appears. Consider whether it reinforces the current plan, covers a genuine weakness, or requires rebuilding several other choices before it becomes useful.
10. Use Event Nodes to Repair a Weak Run
Not every useful campaign node needs to contain a large battle. Event and merchant locations can provide Charms, equipment, healing, or other benefits without adding the same combat risk as an optional elite encounter.
Use these nodes to solve the problem currently threatening the campaign. A hero entering the next act with low health needs recovery more than another offensive reward. A build with strong damage but poor stamina or defense may benefit more from a survival-focused Charm.
Safe nodes become particularly valuable when Threat Level is already approaching another difficulty threshold. Adding one practical passive without risking a failed objective can be better than entering a harder battle for a reward the build may not need.
Do not enter every merchant automatically. Check whether the available resources, current health, and upcoming route make the detour worthwhile. Event nodes are tools for stabilizing a campaign, not mandatory stops that should extend every path.
11. Take the Shorter Route on Your First Clear
Longer routes provide more opportunities to gather Emblems, Artifacts, Charms, and Village resources, but every additional node also increases the pressure placed on the campaign. Beginners should prioritize reaching the act boss with enough health and a manageable Threat Level.
Take the shortest reasonable path through Act 1 while learning the objective types and boss telegraphs. Add lateral nodes only when they provide a reward that clearly supports the build or repair a dangerous weakness.
Long paths become more attractive after permanent Village upgrades and battalion improvements make ordinary encounters less expensive. A developed build can convert the extra risk into more resources, while an unfocused early run may simply arrive at the boss damaged and overexposed.
Route length should be decided again during every act. A successful Act 1 does not guarantee that the same level of greed will remain safe once new enemies and hazards appear later in the campaign.
12. Treat Threat Level as a Limited Budget
Threat Level rises as you conquer nodes and take longer routes, while failed objectives can accelerate the increase. Higher levels introduce tougher enemies and additional hazards, making every remaining encounter more dangerous.
Before selecting an optional battle, compare its possible reward with the next Threat threshold. An elite room may be worthwhile when the build is missing one important component, but less attractive when it activates another difficulty modifier immediately before the boss.
Objective discipline is one of the best ways to control Threat. Prioritize marked captains, defense timers, and rescue conditions rather than allowing the group to become distracted by the surrounding horde.
Higher Threat can improve the value of a successful campaign, but that value matters only when the party survives long enough to collect it. Push the meter deliberately during farming runs and protect it during first clears.
13. Spend Village Currency After Every Return
The Village is not a waiting room between the important parts of Tears of Metal. It contains permanent progression capable of making every future campaign more consistent.
Settlement expansion can open shops, upgrades, difficult challenges, and additional opportunities. Special objectives may also reveal new Artifacts, playable characters, cosmetics, upgrades, or combinations.
Spend early currency on improvements that affect many different campaign situations rather than one extremely narrow setup. Additional access, stronger battalion development, equipment options, and reliable permanent bonuses provide value regardless of which Artifacts appear during the next run.
Visit every relevant Village menu after a victory or defeat. It is easy to launch another campaign immediately and overlook a new building, soldier promotion, shop inventory, or unlock created by the previous attempt.
14. Keep Temporary Run Power Separate From Permanent Progression
Emblems, Artifacts, Charms, battalion development, and Village upgrades do not all operate on the same timeline. Understanding what belongs to the current campaign prevents confusion when a powerful setup disappears after returning to the settlement.
Judge temporary rewards by whether they help complete the current acts. Judge permanent spending by how much it improves the next several campaigns, including runs with different heroes or reward combinations.
Soldier skills and settlement improvements provide the foundation, while campaign rewards create the temporary build placed on top of it. A weak permanent foundation makes every run more dependent on favorable drops.
This also changes how failure should be viewed. Losing a campaign after unlocking permanent improvements is not a complete reset. The temporary build is gone, but the account returns with more options, stronger soldiers, or additional knowledge than it had before departure.
15. Divide Co-Op Responsibilities Without Forcing Fixed Classes
Tears of Metal supports solo play and online co-op for up to four players. A larger party faces more enemies, so simply adding additional damage without coordination can create a battlefield that is harder to read and slower to control.
Divide responsibilities according to the current heroes and builds rather than inventing rigid roles that the game does not require. One player can keep captains occupied, another can remove ranged enemies, while the remaining players protect the objective or clear the horde surrounding it.
Call out route choices before committing on the campaign map. A player pursuing one Emblem family may gain far more from a lateral node than another member who only sees the encounter as an unnecessary detour.
Coordinate special gauge use during difficult objectives. Four players spending their strongest clearing attacks simultaneously may leave the party without an answer for the next wave, while staggered commands maintain control for much longer.
Review rewards and progression before the group disbands. Comparing soldier experience, Village changes, Emblem effects, and successful interactions helps everyone understand what actually happened instead of assuming that the loudest effect caused the victory.
A Reliable First Campaign Plan
Begin in the Village by reviewing the available hero, recruiting enough battalion soldiers, and spending any permanent currency already available. Enter the campaign with the goal of learning one hero’s basic attacks, defensive timing, and battalion commands rather than testing every system simultaneously.
During the opening nodes, use block and parry as the default defense and save dodge for large telegraphed attacks. Choose one Emblem direction based on an action you can trigger consistently, then use the map to seek rewards that reinforce it.
Follow the shorter route through Act 1 unless an event or lateral node directly solves a weakness. Monitor Threat Level before every optional fight and prioritize objective targets over ordinary enemies.
Use one-bar battalion commands during difficult elite encounters instead of saving the entire gauge indefinitely. Protect experienced soldiers, preserve health, and enter the act boss with enough resources to learn its patterns rather than attempting to overpower it immediately.
After victory or defeat, return to the Village and spend permanent progression before launching again. The strongest Tears of Metal strategy is not finding one unbeatable combination among more than 100 Artifacts. It is building enough permanent strength and campaign discipline that several different combinations can still carry the battalion forward.