The Blood of Dawnwalker Trophy Guide
The Blood of Dawnwalker has 47 trophies to earn, and the Platinum looks much more intimidating than it actually is. There are technically 19 missable trophies, multiple endings, a 30-day story timer, difficulty-related requirements, and enough character questlines to make blindly cleaning everything up at the end sound like a terrible idea.
The good news is that one playthrough is enough. The game gives you 54 manual save slots, and if you use them properly, those saves basically become your substitute for New Game Plus, chapter select, and an ending selector all at once.
I would worry much more about creating good saves than trying to complete every trophy as early as possible. In fact, doing too much side content during the story can make the Platinum unnecessarily complicated because Dawnwalker's time system starts mattering once certain quest objectives are active.
The clean route is to start on Duelist, level through open-world activities, push the main story while staying comfortably below the 30-day deadline, create a permanent save before the ending, finish your Duelist ending, and then reload that save for everything else.
Jump To Section:
Platinum Overview
One-Playthrough Roadmap
Missable Trophy Strategy
Duelist Difficulty
Ending Trophies
Skill and Combat Trophies
Character Quest Trophies
Exploration and Collectibles
Platinum Cleanup
The Blood of Dawnwalker Platinum Overview
The Blood of Dawnwalker has 47 offline trophies: one Platinum, three Gold, five Silver, and 38 Bronze. There are no online trophies, and the expected Platinum time is roughly 40 to 60 hours.
The estimated difficulty is around 5/10, although most of that difficulty comes from Uphill Battle because you need to finish a full ending on Duelist difficulty.
There is no New Game Plus and no normal post-story cleanup where you simply finish the campaign and keep wandering around completing everything. Once you reach an ending, you need to reload an earlier save to continue working on trophies.
That makes the 54 manual save slots one of the most important Platinum mechanics in the entire game.
I would make a fresh manual save at least once per in-game day, plus separate permanent saves after the Prologue, before major bosses, before starting important character questlines, and especially before the final quest.
The one save you absolutely do not want to overwrite is your pre-ending save. That is what allows one playthrough to become effectively several different ending runs.
Best One-Playthrough Trophy Roadmap
The easiest Platinum route is not to immediately clear the map. I would split the game into a Duelist story run followed by a much less stressful cleanup phase.
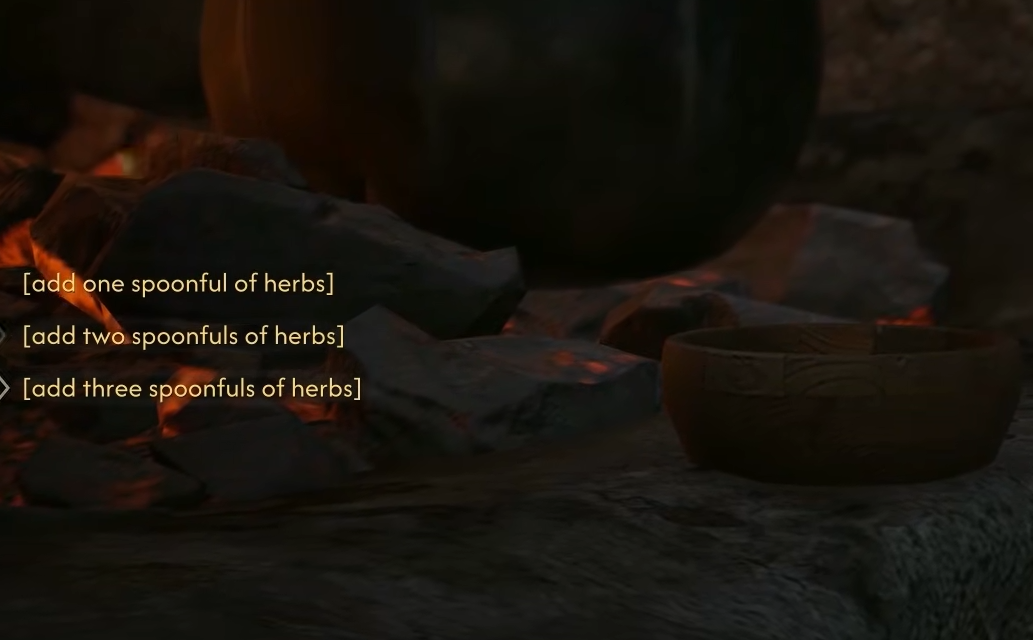
Start the game on Duelist and leave it there until you have earned Uphill Battle. During the Prologue quest Withering Away, make Esme's medicine correctly using hot water and three spoonfuls of herbs.
Once the world opens up, your next goal is simply to make Duelist easier without burning through too much campaign time.
Shapeshift from the Vampirism tree and Mercurial Fervor from Witchcraft are useful early purchases because both improve traversal. Shapeshift is particularly useful at night because becoming a wolf lets you cover the world considerably faster.
I would then climb the 11 Towers at night. Aside from eventually earning Bird's-Eye View, scouting the towers reveals points of interest across the map, giving you a much easier way to find useful activities for XP and progression.
Monster Lairs, Persons in Danger, Bandit Camps, Soldier Camps, Ancient Circles, and other open-world locations give you things to do without immediately committing to a pile of side questlines.
Around level 20 is a much more comfortable point for general exploration. The southern parts of Vale Sangora are more dangerous, and enemies marked with red skulls are an obvious signal that you've pushed into an area before you're ready. Level 25 or higher is a better target for some of those tougher regions.
I would try to stay below roughly Day 15 while doing this. You have 30 days to rescue your family, but the story itself consumes around seven to ten in-game days, so there is no reason to burn half the calendar upgrading everything before you've even started dealing seriously with the Court.
From there, focus on Court Activities for Ambrus, Bakir, and Xanthe. You only need roughly three quarters of their available Court Activities to push their anger high enough to unlock their boss quests.
My target would be to have the main bosses finished and the ending available somewhere around Day 22. That leaves a healthy buffer rather than turning the last few days into a panic.
After all three Boyars are dealt with, progress until Brencis offers to parley and A Deal with the Devil becomes available.
This is where you make the most important manual save of the playthrough.
Do not overwrite it.
Take Brencis's deal first and complete The Turncoat ending while you are still on Duelist. This route skips the final Brencis fight, making it the most practical way to satisfy Uphill Battle.
Once Uphill Battle is unlocked, reload the permanent save. You can now reduce the difficulty to Story and work through alternate endings, character questlines, combat trophies, collectibles, level 50, and anything else you skipped.
How Missable Trophies Actually Work
The trophy list calls 19 trophies missable, but that number sounds scarier than the actual Platinum route.
Many of these are missable because Dawnwalker allows you to kill non-hostile NPCs and quest givers, make mutually exclusive decisions, spend finite progression resources, or pass certain points in a questline. They are not all ticking time bombs from the moment the open world becomes available.
That is why I would avoid randomly murdering civilians or quest characters during a Platinum run. The game gives you that freedom, but turning Vale Sangora into your personal murder sandbox is also a fantastic way to delete trophy questlines.
Side quests are another reason I prefer leaving most optional story content until after the Duelist ending. Some quests contain objectives with their own timers once you progress far enough into them. These are shown in the journal with a blue clock icon.
You do not need to race around accepting and completing every quest before Day 30. In many cases, doing the opposite is safer: leave the questline alone until you're ready to actually follow it.
Keep checking the journal if you do start optional quests, and prioritize anything currently displaying the time-sensitive clock indicator.
Uphill Battle – Complete the Game on Duelist
Uphill Battle is the trophy I would plan the entire first portion of the Platinum around.
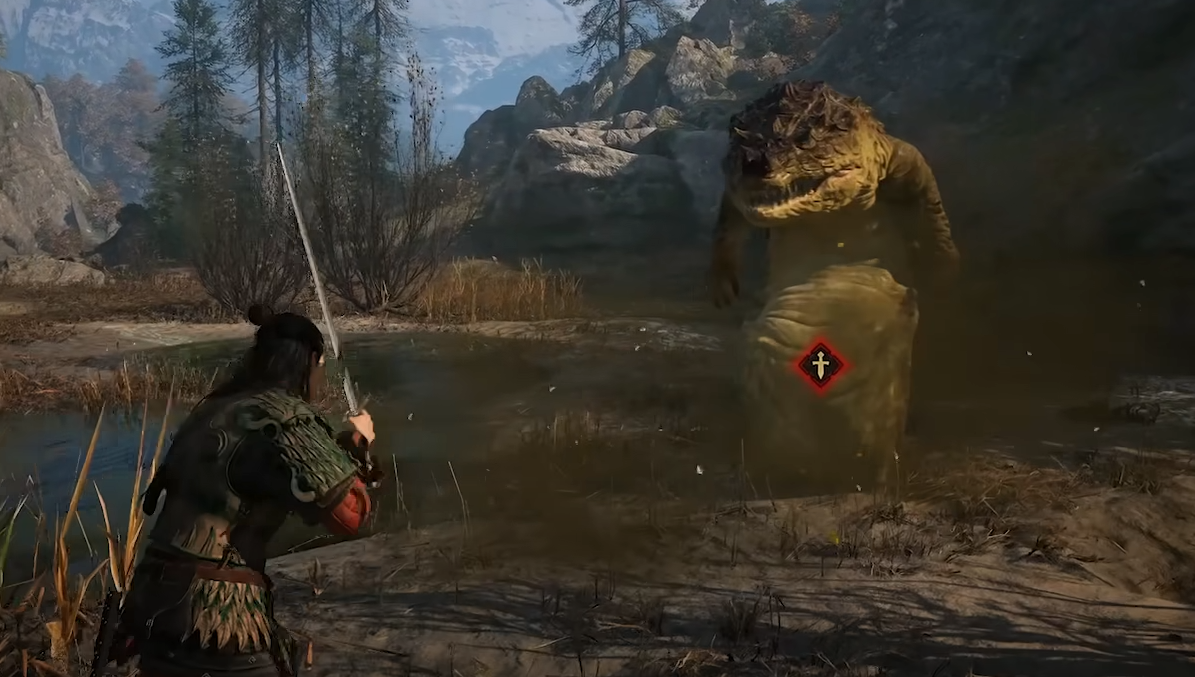
Duelist is the highest preset difficulty and removes the visual directional indicator that normally helps tell you where an incoming attack needs to be blocked. You have to read enemy animations instead.
Enemies also hit hard enough that missed blocks can kill you quickly, although their health is somewhat reduced, so the fights are not necessarily longer.
The beginning is likely to be the roughest part because you are simultaneously learning the combat system and playing with a limited build.
Rather than repeatedly throwing yourself into difficult main encounters, spend some time after the Prologue gaining levels through open-world activities. Towers are especially useful because revealing the surrounding points of interest gives you an entire menu of potential XP sources.
Quicksave aggressively before fights. Dawnwalker does not constantly protect you with free-roam autosaves, and losing a large chunk of exploration progress because you forgot to save is completely avoidable.
Once you reach the ending, choose The Turncoat first. Agreeing to Brencis's offer lets you trigger a proper ending without completing the final Brencis encounter, which cuts the hardest fight out of your Duelist run.
After Uphill Battle pops, reload your permanent pre-ending save and drop to Story difficulty for whatever remains.
In the Nick of Time – Rescue Your Family Within 30 Days
In the Nick of Time is the other trophy that should shape your first run.
You need to rescue your family before the 30-day deadline. Any of the four primary endings can satisfy the requirement.
The timer is considerably more manageable than it first appears because time does not simply tick away while you're walking around. It is spent through actions, quests, upgrades, and other activities that consume time segments.
I still would not try to 100% the map before finishing the story. Get strong enough to survive Duelist, finish the Boyar story progression, secure your under-30-day ending, and then stop caring about the deadline on your cleanup saves.
The Turncoat – Betray Your Allies
The Turncoat requires you to accept Brencis's deal and betray your allies in exchange for getting your family back.
This should be my first ending on a Platinum run because it pairs perfectly with Uphill Battle. You skip the final Brencis battle while still satisfying the requirement for a full Duelist ending.
Once it is done, reload the save you created before A Deal with the Devil rather than continuing forward.
The Patricide – Defeat Brencis With Lacra
The Patricide is one of the alternate ending trophies and requires reaching the ending where Lacra joins you against Brencis.
Lacra has an entire side questline that feeds into her ending, so this is something I would set up after getting the Duelist run out of the way rather than trying to juggle it simultaneously with the 30-day route.
Keep your permanent pre-ending save so you can establish the necessary Lacra progression, earn this ending, and then return to the same general point for the others.
The Knyazmaker – Defeat Brencis With Crake
The Knyazmaker is the corresponding Crake ending trophy.
Crake has a longer quest chain associated with his route, and you should work through it before committing to his ending.
This is another reason the pre-ending save is so valuable. You are not replaying the entire campaign to see a different ending; you're branching the final portion of the same run.
The Folk Hero – Defeat Brencis Alone
The Folk Hero is earned by defeating Brencis without Lacra or Crake accompanying you.
Unlike the Turncoat route, this means actually fighting Brencis, so I would absolutely leave this until after Uphill Battle has already been completed and you are free to lower the difficulty.
A Hero They Deserve – Secret Early Ending
A Hero They Deserve is one of Dawnwalker's strange early endings, and you can actually trigger it shortly after reaching the open world.
Head to the western side of the map in Briar Sloughs, where there is a broken bridge leading toward an open gate.
Visit at night so you have access to Planeshift and Shadowstep. Those abilities let you climb the canyon wall and reach the path beyond the broken bridge.
At the gate, choose the option to leave the valley forever.
That immediately triggers the ending.
I would save immediately before doing this because the entire point is earning the trophy and then returning to your actual campaign.
Together Forever – Secret Family Ending
Together Forever is the more involved secret early ending and one of the trophies where knowing the trick beforehand saves a lot of confusion.
Travel to Silts Tower in the far south and make your way through the tower to the door on the top floor. Opening it begins Home Sweet Home.
You are pulled into a repeating dream based around the Prologue. Fight through the first enemies, the second group, and the Gargoyle boss.
After the initial loop, the game starts pointing you toward a well near the second enemy group. That well is how you are supposed to escape the dream.
For Together Forever, ignore it.
Keep completing the entire loop and defeating the boss. Do this for four full cycles. When the fifth cycle begins, the interaction with your family changes and Coen chooses to remain in the dream with them, triggering the trophy.
I would make a save before committing to this because you'll obviously want to return to the real game afterward.
The Blood of Dawnwalker – Finish the Story
This is the general completion trophy and unlocks when you reach an ending.
Interestingly, the two secret early endings can trigger it too, so you may earn The Blood of Dawnwalker well before completing the actual central campaign depending on when you tackle them.
A Dawnwalker is Born – Complete the Prologue
A Dawnwalker is Born is automatic and unlocks during Smoke and Ashes when the open world becomes available and Coen can leave Laslea.
There is nothing special to prepare for here.
The Right Fist of the Knyaz – Defeat Ambrus
Progress Ambrus's Court Activities until his anger reaches its maximum and The Gilded Gauntlet becomes available.
Defeating Ambrus during the resulting duel awards the trophy.
There is an optional opportunity to poison Ambrus before the fight. It is not required for the trophy, but I would absolutely take whatever legal advantage the game gives me while still playing on Duelist.
The Mad Khan – Defeat Bakir
Complete enough of Bakir's Court Activities to maximize his anger and unlock The Lunar Game.
Defeating Bakir during that quest earns The Mad Khan.
This is essentially part of normal story progression while working toward the ending.
The Dark Mistress – Neutralise Xanthe
Xanthe works a little differently from the other two Boyars.
Complete enough of her Court Activities to unlock The Cycle of Love. You then need to neutralise the threat she poses, but killing her is not actually mandatory.
You can strike a deal with Xanthe and secure her cooperation instead, and the trophy still counts.
Throne of Thorns – Reach Maximum Infamy
Maximum Infamy is Level 9.
Infamy increases through Court Activities, Soldier Camps, and defeating the three Boyars. Each major boss provides an entire Infamy level by itself.
You should naturally reach Level 9 while progressing the campaign because getting all three boss quests already requires substantial Court progress.
Higher Infamy is not purely beneficial. Edicts introduce additional consequences such as more patrols and higher vendor prices, so I would not rush Infamy purely for the trophy. Let the story take you there naturally.
Better Safe than Sorry – Artery Strike and Burning Blood
Better Safe than Sorry requires you to decapitate an enemy using Artery Strike while that enemy is affected by Burning Blood.
You receive Burning Blood through Witchcraft during early progression, but Artery Strike needs to be unlocked through its Manuals.
The base version of Artery Strike only has a 10% decapitation chance, which makes trying to force the trophy immediately pretty annoying.
I would upgrade Artery Strike before worrying about it. Additional Manuals improve the ability, and at maximum level you can guarantee the decapitation when the target is already suffering from Bleed.
Set up Burning Blood, satisfy the condition for the stronger Artery Strike execution, and finish the enemy with the ability.
Make It Rain – Explode an Enemy
Despite the wording implying several abilities might work, Make It Rain is tied to the Vampirism ability Blood Surge.
You need access to Xanthe's blood before you can purchase Blood Surge.
The simple route is drinking Xanthe's blood after defeating her. If you make a different choice, there is another source in Svartrau City's cathedral.
Enter the cathedral and reach the ground-floor storage room in the northern corner. Inspect the book on the table to obtain the Treasury Key.
Then enter the square treasury building on the north side of the courtyard, head upstairs into the side room, and loot the golden chest containing the Phial of Xanthe's Blood.
Consume it, unlock Blood Surge, equip the ability, and use it against a normal enemy without a skull icon. The resulting explosion earns the trophy.
Absolutely Insatiable – Equip Three Passive Abilities
You need three Passive Abilities equipped simultaneously.
Passive icons are distinguished from normal active abilities and do not occupy the standard quick slots in the same way.
Mercurial Fervor and Shapeshift appear to count once unlocked even though they occupy their own dedicated positions in the Active Abilities menu.
If you already picked up both for traversal like I recommend earlier, you may only need one additional Passive Ability equipped to finish the requirement.
Untouchable – Perform Five Perfect Blocks in a Row
Untouchable requires five consecutive Perfect Blocks.
Hold guard and input the correct direction as the attack reaches you. On difficulties below Duelist, the shield indicator turning orange gives you a visual timing cue.
I would not grind this while struggling through the early Duelist campaign. You can earn it naturally, and if it never happens, drop the difficulty to Story during cleanup. Enemy attacks are slower and the Perfect Block timing is more forgiving there.
Balanced Diet – Drink Blood 10 Times
Regain health by drinking blood ten times to unlock Balanced Diet.
You can feed on animals at night or use Voracious Bite against enemies in combat.
The important detail is that feeding at full health does not count. You need to actually restore missing health.
Because Voracious Bite is already useful for healing and Corruption progression, this should happen naturally if you use Vampirism regularly rather than treating it as an emergency-only mechanic.
Feral Hunger – Lose Control Outside Combat
Feral Hunger requires Coen to lose control and automatically drain someone while starting a conversation at night.
You need to be extremely low on the vampire health bar, at one segment or less, and the chance appears to increase as your health drops further.
Get into combat, let an enemy reduce you to roughly half of your final health segment, escape, and approach a non-hostile NPC at night. Tavern innkeepers give you convenient dialogue targets.
Repeatedly enter and leave the interaction until Coen loses control immediately upon trying to speak with them.
I would try to do this before buying Closing Wounds. That perk keeps pushing your health toward a completed segment and can apparently make the condition considerably harder to produce.
Dead Man Talkin’ – Use Compel Soul
Dead Man Talkin' is automatic during the early main quest Smoke and Ashes.
The story requires you to use the Witchcraft ability Compel Soul on a dead person, which immediately fulfills the trophy condition.
Shadow Roamer – Travel 1,000 Metres With Vampiric Abilities
You need to travel a cumulative 1,000 metres using Vampiric traversal abilities.
Shadowstep and Planeshift count, but Shapeshift is the easiest option because wolf form lets you sprint around the map much faster.
This is another reason I like taking Shapeshift early. You're simultaneously reducing traversal time and working toward Shadow Roamer without needing a separate grind.
Mastery – Fully Upgrade an Ability
Mastery requires fully leveling one Ability from Swordmastery, Witchcraft, or Vampirism.
The distinction matters because Dawnwalker separates Abilities from ordinary Perks. You need one of the actual colored Ability nodes on the right side of the skill trees, not simply a passive perk with several ranks.
Pick an Ability that fits the build you're already using and commit enough upgrades to reach its maximum level.
Master of Arms – Unlock a Swordmastery Ultimate Perk
Swordmastery Ultimate Perks require you to spend 35 Skill Points specifically on Swordmastery Perks before the Ultimate becomes available.
Abilities do not contribute toward that 35-point requirement.
After spending the 35 points, the Ultimate itself costs another four, making 39 Skill Points the effective requirement from an empty tree.
You also need the appropriate Manuals before all relevant perks can actually be purchased.
There is no normal respec system, so I would not dump every Skill Point the moment I earn it during cleanup.
Instead, save enough points to finish one tree, create a manual save, spend what you need for the Ultimate and unlock the trophy, then reload.
Arch Warlock – Unlock a Witchcraft Ultimate Perk
Arch Warlock follows the same basic rules as Master of Arms.
Spend at least 35 points in Witchcraft Perks, then another four on the Ultimate itself.
The easiest way to earn both Skill Point-heavy trophies without permanently destroying your preferred build is to stockpile points and use the same save-and-reload strategy between Swordmastery and Witchcraft.
Creature of the Night – Unlock a Vampirism Ultimate Perk
Vampirism works differently.
You do not need to invest 35 Skill Points into the tree. Instead, Ultimate access is tied to Corruption Level 15, which is the maximum.
Corruption increases when you drink blood from enemies, humans, animals, or consumable blood sources.
Voracious Bite can increase Corruption even when you're already at full health, so use it regularly throughout combat rather than waiting until the end of the game to farm everything from scratch.
Once Corruption reaches Level 15, unlock one of the available Vampirism Ultimates for the trophy.
Glass Ceiling – Reach Level 50
Level 50 is the maximum character level and will probably be one of your final trophies.
I would not even attempt to reach 50 before rescuing your family. There is enough content in the game that you'll likely need to exceed the original 30-day deadline before reaching the cap anyway.
Once all time-sensitive ending work is finished, reload your cleanup save and start clearing the side content you deliberately ignored earlier.
Quests and Court Activities provide better XP than simply farming random enemies, so prioritize actual unfinished content first.
If you've genuinely exhausted the map and still need XP, regular enemies can provide the final amount.
Sins of the Past – Complete Anca’s Questline
Sins of the Past is tied to Anca and the Font of Life storyline.
Her first quest, Echoes of Silenced Bells, begins after completing the Prologue. You can then find Anca at the Crossroads Inn on the eastern side of the map.
The relevant sequence is Echoes of Silenced Bells, Between the Words, Where Old Devils Lie, and Stronger Than Achilles.
Finish the full sequence to earn the trophy.
Anca's storyline is self-contained and does not determine which main ending you receive, so this is exactly the type of side content I would leave for the post-Duelist cleanup phase.
Misery Loves Company – Complete The Night of Horrors
Misery Loves Company comes from Lacra's questline, but you do not simply need to finish every quest.
The trophy is specifically tied to the optional The Night of Horrors quest that branches from Our Rotten Roots.
Lacra's progression runs through A Friend Like This, Song of the Mountain, Hive and Seek, and Our Rotten Roots before eventually reaching her ending content.
Complete The Night of Horrors before progressing into Midnight Reckoning.
This is one of those trophies where blindly following only the primary quest marker can cost you an optional requirement, so I would make another manual save when reaching the later portion of Lacra's storyline.
The Manumit – Learn All of Crake’s Secrets
The Manumit has a similar optional-quest trap inside Crake's storyline.
Progress through The Firebrand, Shadows in the Woods, Where Loyalty Lies, What Hunts the Night, What Moves the Dead, and Who Pulls the Strings.
From there, complete the optional Distant Shadows and then A Closer Look.
A Closer Look is the actual trophy requirement.
Do both optional quests before moving into Rise at Dawn, which is part of Crake's ending progression.
The Unquenchable Thirst – Finish Vicho’s Story
Vicho is a Vrakhiri living in Svartrau.
His storyline begins with A Study in Crimson, which can be discovered through related information, through Lacra, or simply by going to Vicho's house.
After completing the initial objectives, wait a couple of in-game days. The Good Samaritan then becomes available during the daytime in Svartrau.
Complete that quest to earn The Unquenchable Thirst.
Vicho's story is self-contained rather than being required for one of the primary endings.
The Outcast – Complete Ocha’s Quest
Find Ocha inside a tavern in central Svartrau and speak with her at the table in the corner.
This begins The Heart Wants What It Wants.
Complete the side quest to earn The Outcast. The final outcome of the quest does not prevent the trophy, so you are free to make the choice you actually prefer.
The Tsarina’s Favourite Human – Complete the Sanzhani Quests
You need to complete five quests for the Sanzhani.
Start with Good Home. The other Sanzhani involved in the trophy do not appear at their quest locations until Good Home is completed.
After that, complete Come Hither, Burrow Sorrows, Pearly and Precious, and Tiny Dancer.
Letters to Lunka is associated with the Sanzhani but is not required for the trophy.
There is also a useful campaign benefit here. After finishing all five required quests, return to the Sanzhani leader at Yawning Burrow in the Svartrau Outskirts and you can receive one in-game day back.
Arbiter’s Blade – Restore St. Mihai’s Sword
Arbiter's Blade requires completing the Forge it Anew questline and creating the Legendary Imbued Sword of St. Mihai.
The quest begins automatically once you find any one of the three blade pieces.
The three pieces are associated with Forge it Anew: Do Not Disturb, Forge it Anew: Hostile Takeover, and Forge it Anew: Executive Order.
You also need the sword's hilt.
Complete Night Terrors in Svartrau City at night to gain access to the underground area containing the boss that drops the hilt.
Once you have the three shards and the hilt, return to the Uriash Blacksmith in northwest Briar Sloughs.
Have the weapon reconstructed, complete the fights that follow, and the finished Legendary greatsword earns Arbiter's Blade.
Arbiter’s Regalia – Complete the Arbiter Armour Set
Arbiter's Regalia is tied to A Bulwark Against Darkness and ultimately rewards the Enhanced Armour of the Arbiter.
The quest becomes available after reaching at least Infamy Level 4. A character eventually delivers a letter that starts it, although the exact moment can vary.
The four required materials are not conveniently handed to you through normal quest markers.
The Large Lizard Moult is found inside a cave around the boundary between Briar Sloughs and Maragir Wealds, south of the Witchcraft Vendor.
For the required Amulet Relic, either the Relic of St. Tyna or Relic of St. Dasius works.
The Relic of St. Tyna can be obtained during Anca's Echoes of Silenced Bells, although it is possible to give that relic away later. A guaranteed Relic of St. Dasius can instead be found inside Xanthe's Howling Keep once the mansion becomes accessible during The Cycle of Love.
The Flask of Quicksilver is found at Silts Tower after progressing through Home Sweet Home and properly escaping its looping dream.
Instead of repeatedly completing the loop for Together Forever, inspect the well near the second enemy encounter with Focus Mode.
Follow the escape sequence into the church flashback and interact with Alin, Esme, and Coen in that order. Continue through the opened path and finish the sequence. Once you return to Silts Tower, the Flask of Quicksilver can be collected from the previously inaccessible room at the top.
Finally, Silk Threads become purchasable from the Sanzhani Merchant after Pearly and Precious. They cost 6,500 denarii.
Bring all four materials back to the Uriash Blacksmith and have her create the Legendary armour to complete the quest and unlock the trophy.
Gear of the Gods – Equip Legendary Gear in Every Slot
Gear of the Gods requires all eight equipment slots to contain Legendary items simultaneously.
The Arbiter trophy questlines already solve most of this for you. Arbiter's Blade gives you the Legendary Sword of St. Mihai, while Arbiter's Regalia provides the Legendary armour pieces.
That leaves two rings and an amulet to complete the eight-slot setup.
Do not sell useful Legendary equipment just because you've outleveled it. You can store old gear at Shrines, and equipment can be upgraded to your current level later through the appropriate vendors if you actually want to continue using it.
The trophy itself only checks that all eight slots are Legendary at the same time, so item level does not matter.
Bird’s-Eye View – Climb All 11 Towers
Climb and scout all 11 Towers throughout Vale Sangora.
I would do these near the start of the open world rather than saving them as a collectible cleanup task. Each tower reveals nearby points of interest, so the trophy also makes the rest of your playthrough easier.
Nighttime traversal abilities such as Shadowstep make climbing them considerably more convenient.
Capture the Flag – Destroy All Five Brencis Flags
There are five Brencis banners to tear down for Capture the Flag.
You need all five, so treat this as a true collectible rather than something guaranteed through story progression.
If one is missing during cleanup, this is the sort of trophy I would specifically cross-reference against your explored regions rather than wandering the entire map again.
Delivery Delay – Destroy Eight Vrakhiri Transports
There are ten Vrakhiri Transports in the game, but Delivery Delay only requires destroying eight.
Transports are part of the Court Activity system and appear as groups moving along roads.
The annoying part is that they are not simply marked permanently on the map for you, so I would attack them whenever you naturally encounter one instead of assuming you can trivially clean all eight up later.
Tour Guide Training – Visit All Eight Villages
Visit each of the eight villages scattered around Vale Sangora.
There are no complicated quest conditions attached to this one. Once all eight settlements have been visited, Tour Guide Training unlocks.
Combining this with your Tower and open-world cleanup is more efficient than traveling around exclusively for villages.
Big-City Living – Visit Svartrau
Enter Svartrau City for the first time.
Svartrau is the large central city and an important location for several quests and vendors, so this will happen naturally very early in a normal campaign.
Antique Aficionado – Discover Ancient Ruins
Enter an Ancient Ruin for the first time.
There are several opportunities throughout Vale Sangora, and you are very likely to enter one while completing other content.
One early opportunity is Deep Down in Laslea, which is available during the Prologue. Xanthe's Excavation Court Activities can also lead into Ancient Ruins later.
Realmwalker – Enter Anachora
Anachora is the afterlife realm associated with the Vrakhiri.
You can reach it through several routes, including drinking the blood of major bosses after defeating them or progressing far enough into Lacra's storyline.
If you somehow avoid all of those optional routes, the game eventually takes you there during the second portion of the Brencis boss fight.
Because The Turncoat skips that fight, you may not see Anachora during the initial Duelist ending, but it remains easy to pick up while working through the other ending routes.
Selfish – Sell Fish to a Fishmonger
This is one of the easiest trophies to miss purely because the correct vendor is not labeled particularly clearly.
There is one Fishmonger in the market area of Svartrau City during the day. On the map, she appears as a regular Food Vendor, but the interaction prompt identifies her as a Fishmonger.
You do not need to catch some rare fish or build an entire fishing economy.
Buy a Dried Fish from her and immediately sell it straight back.
That's enough.
Miser – Hold 5,000 Denarii
Miser checks how much money you currently possess, not how much you've earned across the entire playthrough.
You need 5,000 denarii in your inventory simultaneously.
Sell excess loot and equipment as you progress, but once you're approaching 5,000, stop spending for a little while until the trophy unlocks.
You should earn considerably more than this over the course of the Platinum, so there is no reason to deliberately grind money unless you're constantly emptying your wallet at vendors.
Smuggler – Earn 1,000 Denarii Selling Silver
Smuggler tracks a cumulative 1,000 denarii earned specifically from selling silver items.
There is only one Silver Trader, located in Svartrau, and he will not trade with you until you reach Notorious Infamy, which is Infamy Level 4.
I would therefore keep every silver item you find early rather than dumping or ignoring them. Put them into storage if carrying them becomes annoying.
Once Infamy reaches Level 4, visit the trader and start selling your stockpile.
Do this before hitting maximum Infamy if possible. At Infamy Level 9, the gates to Svartrau close and the guards become hostile on sight, making access to the trader considerably more troublesome.
Best Platinum Cleanup Order
Once Uphill Battle and your under-30-day ending are finished, the Platinum becomes much more relaxed.
Reload your permanent pre-ending save and lower the difficulty if you want. From this point, I would stop thinking of the campaign timer as the central objective and start systematically converting your existing save into a completion file.
First, establish the Lacra and Crake questlines required for their respective ending trophies. While doing those, make sure you complete The Night of Horrors for Misery Loves Company and Distant Shadows followed by A Closer Look for The Manumit before advancing past their relevant quest points.
Then finish the self-contained Anca, Vicho, Ocha, and Sanzhani questlines. Those will naturally push your XP higher and open additional items and locations needed elsewhere.
After that, finish Arbiter's Blade and Arbiter's Regalia. Those two quests give you most of the Legendary equipment needed for Gear of the Gods, making them much more efficient than randomly hunting eight unrelated Legendary pieces.
Clean up Towers, villages, transports, Brencis's flags, exploration trophies, and any simple combat conditions you did not earn naturally.
Keep feeding with Voracious Bite until Corruption Level 15 for Creature of the Night, and continue clearing substantial quests and activities until you eventually reach Level 50 for Glass Ceiling.
Finally, look at your Swordmastery and Witchcraft Skill Point totals.
Because there is no respec, I would save a pool of Skill Points rather than permanently committing them all. Remember that each Ultimate needs 35 points invested specifically into Perks plus another four points to purchase the Ultimate.
Create a manual save, finish whichever tree is closest, buy its Ultimate, earn the trophy, reload, and repeat the process with the other tree.
That save-reload approach is really the underlying theme of The Blood of Dawnwalker's Platinum. The trophy list looks like it wants multiple playthroughs because of the endings, missable quests, permanent progression choices, Duelist requirement, and 30-day timer.
It doesn't.
As long as you preserve the right saves, avoid killing important NPCs, and resist the urge to activate every optional storyline during your timed Duelist run, you can turn almost the entire trophy list into cleanup on one campaign.
Every Last Drop – Unlock the Platinum Trophy
Every Last Drop unlocks after earning the other 46 trophies in The Blood of Dawnwalker.
The Platinum does not require DLC, multiplayer, New Game Plus, or a second full campaign.
The hardest part is getting the first Duelist ending completed safely. Once that is out of the way and you still have your pre-ending manual save, nearly everything else becomes a matter of working through the remaining branches of the same playthrough.