Mina the Hollower: How To Get Sparks Back
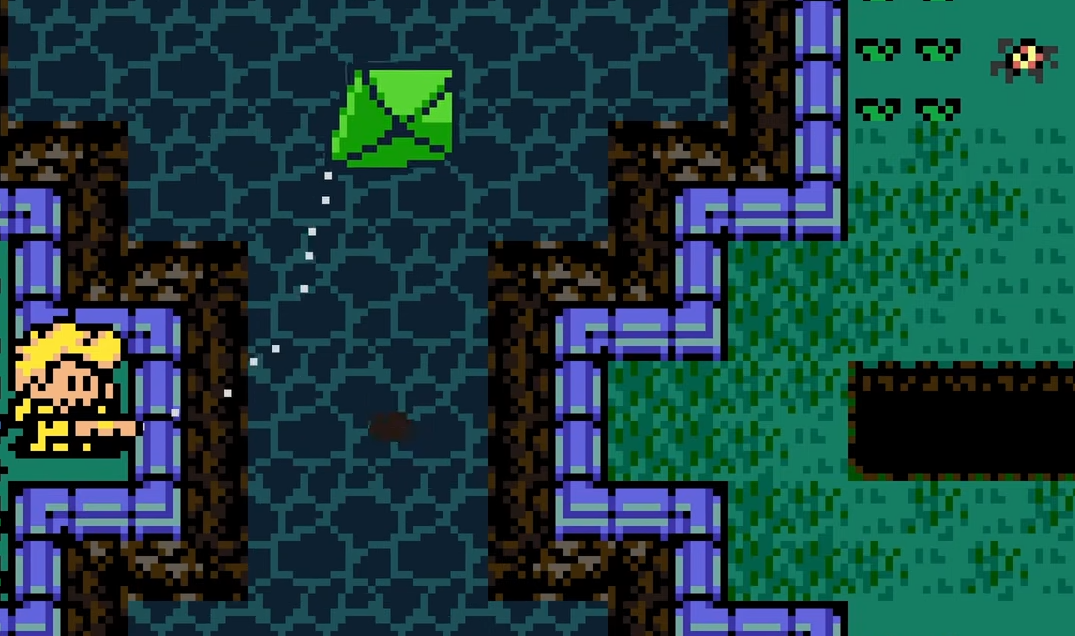
Sparks in Mina the Hollower are easy to misunderstand because they look like a small UI detail, but they control how death, Bones loss, and recovery actually work. Getting Sparks back depends on how Mina died, because hazards can leave the Spark on the ground while enemies can take it and force Mina to hit them to recover it.
Jump To
How To Get Sparks Back In Mina The Hollower
To get Sparks back in Mina the Hollower, return to the spot where Mina died and either collect the dropped Spark from the ground or hit the enemy that absorbed it.
Spark recovery changes based on the death. If Mina dies to an environmental hazard, the Spark can stay on the ground in that screen and can be picked up by touching it. If Mina dies to an enemy, that enemy can absorb the Spark, which means Mina needs to hit that enemy to recover it.
This is the part that causes most confusion. The Spark is not always a simple bloodstain sitting where Mina died. Sometimes it is attached to an enemy instead. That can make it look like the Spark vanished, especially if the enemy moved, the screen got busy, or the game placed the Spark on a tougher enemy in the same area.
The safest rule is simple. After dying, return carefully, look for the blue Spark indicator, and attack the enemy that seems to be holding it. Do not rush the second attempt if Mina is carrying a lot of Bones. A second bad death while sparkless is where the game stops being cute and starts taking the wallet.
What Sparks Do In Mina The Hollower
Sparks work like extra lives in Mina the Hollower, protecting Mina from losing all carried Bones immediately after death.
When Mina still has a Spark, dying does not instantly remove all carried Bones. Instead, the Spark becomes the recovery target. If Mina dies again without recovering a Spark, then the carried Bones can be lost. That is why the blue Spark icon near the health bar matters so much.
The game does not explain this as clearly as it should. It is easy to think the Spark is just a small UI marker or that Bones work like a normal soulslike corpse run. They do not. Sparks are the buffer between a normal death and a real Bones loss.
That also means the right move after dying is not always “run straight back and fight harder.” Sometimes the right move is recovering the Spark, retreating, spending Bones, and then returning with less risk. Very brave. Very boring. Usually correct.
| Spark State | What It Means |
|---|---|
| Mina has at least 1 Spark | Death is buffered, and Bones are protected unless another death happens without recovery. |
| Mina lost a Spark to a hazard | The Spark can appear on the ground in that screen. |
| Mina lost a Spark to an enemy | The enemy can hold the Spark until Mina hits it. |
| Mina dies with no Spark | Carried Bones can be lost. |
How To Recover A Spark From An Enemy
To recover a Spark from an enemy, return to the area and hit the enemy that absorbed the Spark.
The enemy does not always need to be killed. In many cases, landing a hit is enough to recover the Spark. This matters a lot against bosses and tougher enemies, because forcing a full kill before recovery would make some rematches much harsher than they need to be.
The hard part is finding the correct enemy. The enemy that took the Spark may not always be the easiest one in the room. If the Spark does not seem to be on the enemy that got the final hit, check the stronger enemies in the same screen or nearby area. The game can make the recovery target feel less obvious than it should.
If Mina gets the Spark back, back off for a second and check the situation. If health is low or Bones are high, retreating is smarter than turning the recovery into another death. Spark recovered, pride slightly damaged, progress saved. Fine trade.
How To Recover A Spark From A Hazard Death
If Mina dies to an environmental hazard, the lost Spark can appear on the ground in that screen and can be recovered by walking into it.
This is the easier version of Spark recovery. There is no enemy to chase, no boss to hit, and no guessing which target absorbed the Spark. The main risk is dying again while trying to reach it.
Take the route back slowly. If the Spark is on a dangerous platform, near a pit, or inside a room with enemies, clear enough space first. Mina does not need to make the recovery look stylish. She just needs the blue orb back before another mistake turns into lost Bones.
This is also where learning how to dodge and burrow helps. Better burrow timing makes Spark recovery safer, especially when the recovery spot is surrounded by enemies or hazards.
How Bosses And Sparks Work
Bosses can take Sparks in Mina the Hollower, and hitting the boss may recover the Spark, though some boss situations can feel inconsistent or confusing.
Boss Spark recovery is where the system gets messiest. In normal enemy fights, hitting the enemy that holds the Spark is usually the answer. With bosses, the Spark can feel like it stays held longer, especially if the fight has special rules, revive effects, or a gated arena.
The practical answer is to assume a boss can hold the Spark and treat the rematch carefully. If Mina has no Spark and is carrying a lot of Bones, spend the Bones or convert safe resources before throwing another attempt into the arena. Bosses are already rude. They do not also need access to Mina’s savings account.
If the boss arena requires Sparks to enter, be extra careful. Some late or special areas can create awkward situations where losing a Spark inside a Spark gated space makes recovery harder. If that happens, use restoration options if available, such as leveling up, Spark Catcher, or other recovery methods tied to Spark Containers.
How To Restore Missing Sparks
You can restore Sparks by recovering them from the death spot, leveling up, or using Spark related tools such as Spark Catcher when available.
Leveling up is one of the cleanest emergency fixes because it can restore Sparks. That makes Bonestone useful as a backup plan. If Mina is close to a level up, keeping enough Bonestone available can help restore Sparks at short notice instead of risking a sparkless death.
This connects directly to Bones management. Bonestone is safer than carrying loose Bones because it is not lost the same way. If Mina is entering a boss rematch or dangerous recovery route, saving enough Bonestone for a level up can be a smart emergency option.
The Mina the Hollower save guide covers the broader checkpoint, Bones, and Bonestone loop, but for Sparks specifically, the safest plan is to avoid going into a second death with no backup. Recover first, spend second, then continue.
| Recovery Method | Best Use |
|---|---|
| Collect Spark from ground | Best after hazard deaths. |
| Hit the Spark holding enemy | Best after enemy deaths. |
| Level up | Useful when Sparks need to be restored before another risky attempt. |
| Spark Catcher | Useful for improving Spark recovery and increasing Spark safety. |
| Spend Bones before retrying | Best when recovery is risky and Mina has too much to lose. |
What Spark Catcher Does
Spark Catcher is a Trinket that helps with Sparks by granting an extra Spark Container and improving Spark recovery.
Spark Catcher is useful because Sparks control the death safety system. More Spark protection means more room for mistakes before Bones are lost. That is especially valuable in dangerous regions, boss fights, and routes where enemy placement makes recovery annoying.
The Trinket is also helpful in weird recovery situations because it gives Mina more Spark flexibility. It will not make every death safe forever, but it makes the whole system less punishing and gives more room to recover from bad routing.
If Spark loss keeps causing problems, Spark Catcher is worth considering. It is not as flashy as a damage upgrade, but staying alive long enough to keep the Bones is usually better than having a stronger weapon and no money left to prove it.
Common Spark Recovery Mistakes
The biggest Spark recovery mistake is assuming the Spark always drops on the ground like a normal death marker.
That is only true in some cases. Enemy deaths can put the Spark on the enemy instead, while hazard deaths can leave it on the ground. If Mina returns to the death spot and the Spark is not there, start checking enemies in that area rather than assuming the game deleted it.
Another mistake is going straight back into a boss rematch while sparkless and carrying a lot of Bones. If the boss is holding a Spark, that rematch should be treated like a recovery mission first. Get the Spark back if possible, then decide if the fight should continue.
| Mistake | Better Move |
|---|---|
| Looking only for a ground orb | Check if an enemy absorbed the Spark. |
| Trying to kill the enemy every time | Hit the enemy first, since a hit may recover the Spark. |
| Rushing a boss while sparkless | Recover the Spark or spend Bones before another risky attempt. |
| Ignoring the blue Spark icon | Check Spark status before entering dangerous rooms. |
| Carrying too many Bones into recovery | Spend, level up, or use Bonestone when possible. |
| Forgetting the hub route options | Use the main Mina the Hollower guide hub for related route and combat help. |
For players still getting used to combat, weapon comfort matters too. A safer weapon can make Spark recovery much easier because Mina only needs one clean hit to recover from many enemy held Sparks. The best starting weapon guide breaks down the safer early weapon choice, while the all weapon upgrades guide covers how each weapon improves later.
Final Blurb
To get Sparks back in Mina the Hollower, return to where Mina died and check how the death happened. Hazard deaths can leave the Spark on the ground, while enemy deaths can make the enemy absorb it. Hit the Spark holding enemy to recover it, and do not assume the Spark vanished just because it is not sitting in the exact spot Mina died.
Sparks are the buffer before a real Bones loss, so treat recovery carefully. Check the blue Spark icon, recover before taking another big risk, spend Bones before dangerous boss rematches, and use level ups or Spark Catcher when the system gets messy. The mechanic is useful once it makes sense. The game just explains it with the gentle clarity of a locked basement note.