Battleplan Tips and Tricks
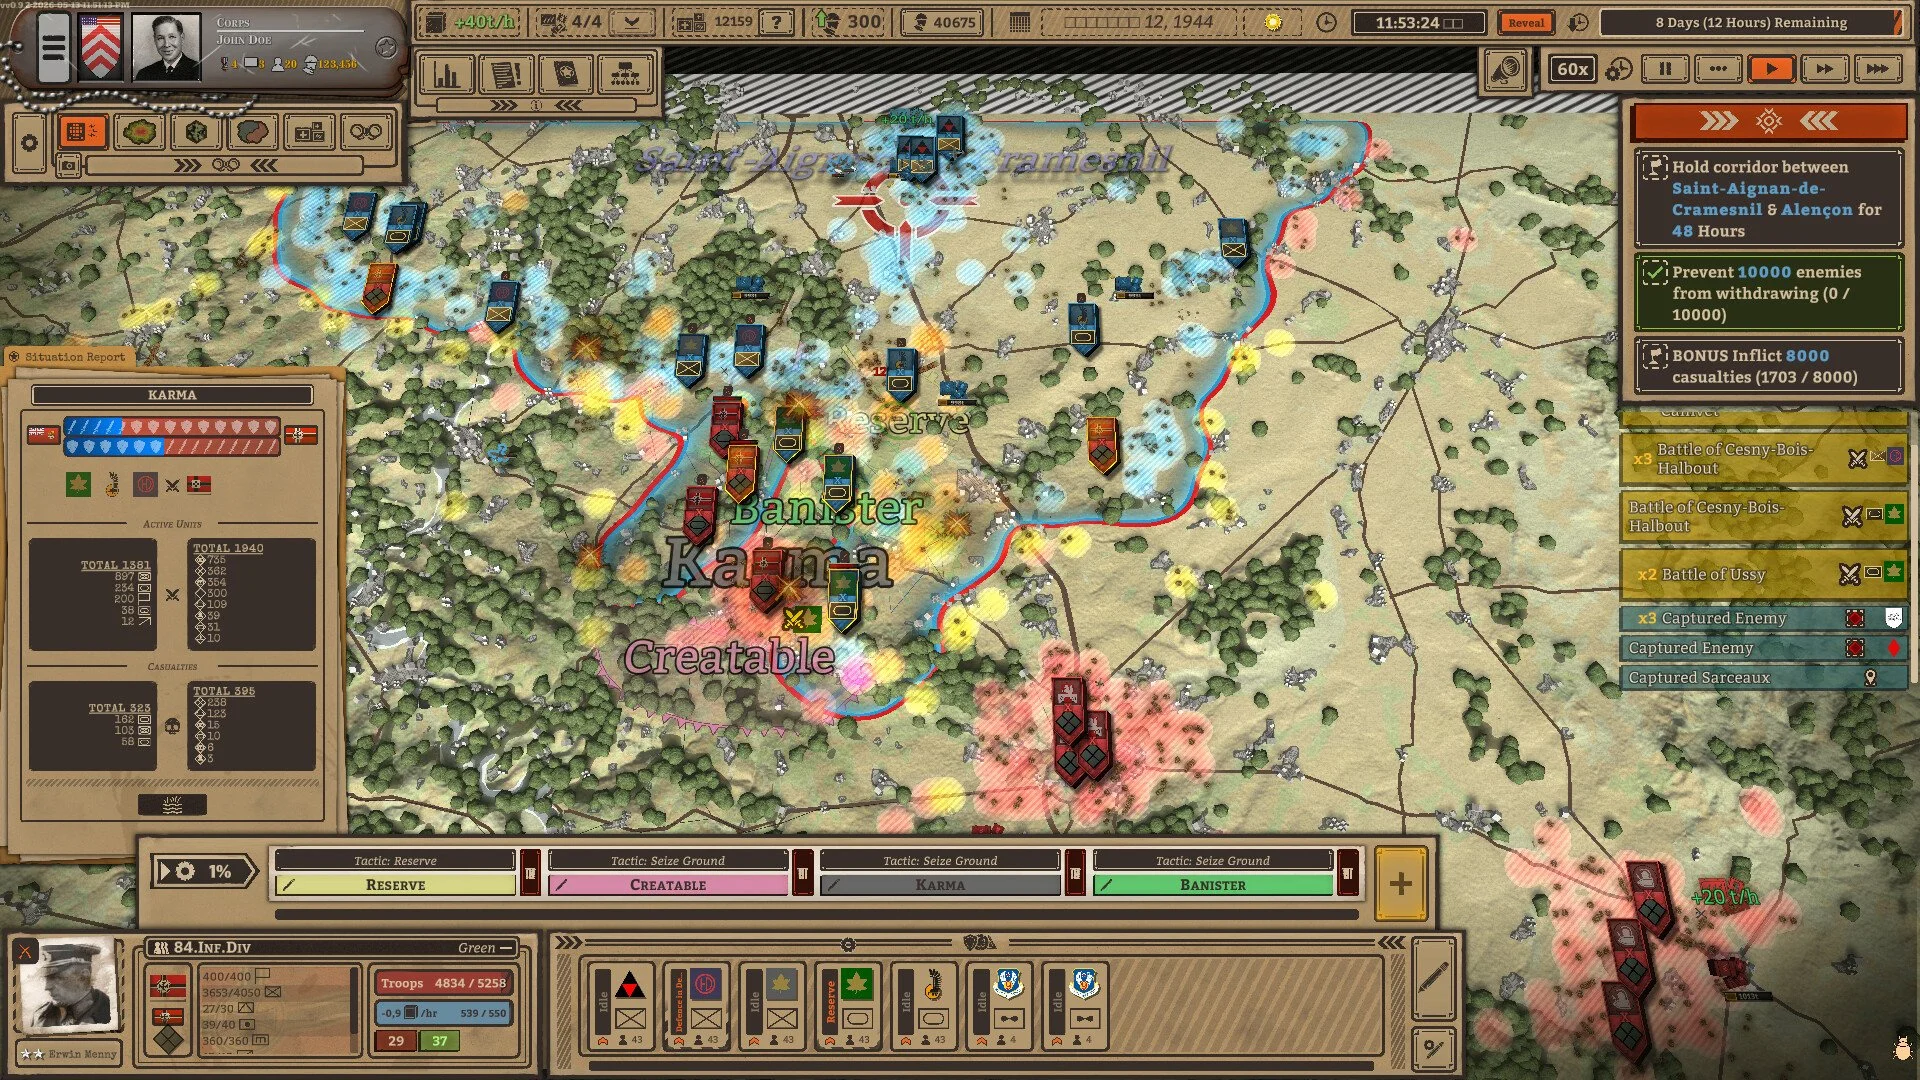
Battleplan rewards a different set of habits than most real-time strategy games. You are not trying to issue more commands per minute than the enemy; you are building an operation that can keep working after the first contact. The strongest plans account for what happens after the breakthrough, where the next supply comes from, which formation holds the ground, and what your army will be doing several hours or days later.
Jump To Section:
Best Battleplan Tips and Tricks
Use Readiness Mode While Learning
Plan Two Moves Ahead
Scout Before You Attack
Build Offensives Around Supply
How to Make a Breakthrough Stick
Zone Orders vs Timeline Orders
Use Combined Arms Properly
Better Defensive Positions
Match Officers to Their Job
Use the Mission Clock
Common Beginner Mistakes
If you are also going for 100% completion while learning the game, our Battleplan achievements guide covers all 53 achievements and the best way to work on the longer requirements during the campaign.
Best Battleplan Tips and Tricks
The biggest Battleplan tip is to stop thinking about each order as an isolated command. A good operation is a chain: reveal the enemy, weaken the position, create the breakthrough, occupy the corridor, move supply forward, then have the next attack preparing before the first one is finished.
Before attacking: Check time, terrain, supply and reconnaissance
During the attack: Keep infantry, armour and specialists doing different jobs
After a breakthrough: Occupy the corridor and move logistics forward
While that happens: Start preparing the next plan instead of waiting
When something changes: Pause and adjust rather than fast-forwarding through a failing operation
That operational loop is more important than finding one perfect order. Battleplan gives your officers and formations a lot of autonomy, so your advantage comes from creating conditions where their next action already has somewhere useful to go.
Use Readiness Mode While Learning Battleplan
Readiness Mode is the more forgiving planning system for a first campaign because it allows you to create plans throughout the day rather than restricting you to a single planning phase.
The tradeoff is readiness itself. Plans need time to prepare, and executing before they reach full readiness carries a penalty. That means the flexibility of making plans whenever you want does not mean every plan should be fired immediately.
A useful beginner rhythm is to create orders early, let readiness build while another operation is already underway, and only commit when the formation is actually prepared unless the battlefield forces you to act sooner.
Learning the game: Start with Readiness Mode
Plan available but not ready: Let readiness build if the situation allows
Emergency: Accept the penalty only when waiting is worse than acting early
Always Have the Next Two Moves Preparing
The most useful habit in Battleplan is to plan ahead while the current operation is still running.
Orders take time to prepare. If you wait for a breakthrough to completely finish before drawing the follow-up, your army can reach the perfect position and then sit there while the next plan slowly becomes ready.
Instead, think in three layers.
Current: What the formation is executing now
Next: What should happen if the current plan succeeds
Contingency: What you will do if the attack stalls, the flank collapses or supply cannot keep up
For an armoured attack, the current order might be the breakthrough. The next plan is infantry seizing the corridor behind it. The contingency might be a counterattack or defensive order covering the exposed flank.
This also makes fast-forward much safer. You are no longer accelerating toward the end of a plan with nothing prepared behind it.
Scout Before You Spend Artillery and Troops
Reconnaissance does more than remove fog of war.
Scouts and recon aircraft can reveal enemy positions and apply combat penalties to spotted formations. Recon also makes artillery more effective against the target and can expose enemy supply positions that are worth including in your attack route.
That makes scouting the natural first stage of a serious offensive rather than an optional extra after you have already started fighting.
A strong sequence is:
1. Recon: Reveal the actual defence and important logistics
2. Artillery: Reduce fortification and morale where you intend to attack
3. Engineers: Handle mines and difficult fortified approaches
4. Assault: Commit the formation after the preparation has created an advantage
Sending an expensive armoured formation into an unscouted position reverses that order. You discover the minefield, fortification or concentrated defence by driving into it instead of finding it before the attack starts.
Treat Supply as the Maximum Range of Your Offensive
Battleplan tracks ammunition, fuel and food as supply, and consumption rises dramatically when formations are moving or fighting.
This creates one of the most important rules in the game: the distance your tanks can physically travel is not the same as the distance your offensive can sustainably reach.
Official guidance recommends avoiding major attacks with formations below roughly half supply. Armoured divisions are especially demanding because their speed lets them burn resources while moving farther from the network replenishing them.
Before drawing a deep attack, ask where that formation will receive its next load of supply after it succeeds.
Fresh and well supplied: Good candidate for an offensive
Below roughly half supply: Replenish before committing to a major attack
Armour moving deep: Prepare forward logistics and infantry follow-up
Enemy Depot on the route: Consider routing the attack through it
Supply transfer also depends on more than straight-line distance. The terrain between a Depot and headquarters affects how efficiently resources move, so the closest-looking Depot is not always supplying a formation as well as expected.
Leapfrog Supply Forward Instead of Fixing It After the Attack
Supply Depots can be dismantled and established again as the frontline moves.
During deployment this can be immediate, but once the battle is underway relocating logistics takes time. That makes Depot movement something to anticipate rather than something to start only after your spearhead is already flashing low-supply warnings.
The better pattern is to move logistics in stages.
As infantry secures newly captured territory, identify a safe forward location for the next Depot. Start the relocation while the front is stable enough to absorb the delay, then use that new position as the base for the next offensive.
Captured enemy Depots are particularly valuable because they can solve two problems at once: the enemy loses stored supply and your own offensive gains a forward logistics point.
Tanks Break the Line but Infantry Makes the Breakthrough Useful
Armour can move through a weak point much faster than infantry, which makes it ideal for opening the enemy position and reaching deeper operational targets.
The problem is that a Breakthrough Attack does not automatically turn every kilometer your tanks cross into secure territory.
Infantry needs to follow behind, occupy the corridor and deal with units left around the shoulders of the penetration. Otherwise the spearhead can end up deep behind the line while enemy forces close the gap behind it and sever supply.
Armour: Punch through and exploit speed
Infantry: Seize and hold the ground behind the spearhead
Supply: Move forward through the secured corridor
Recon and air support: Work ahead of the next armoured move
This turns a breakthrough into a rolling cycle rather than one long arrow drawn toward the final objective.
A useful way to visualize it is that tanks create depth, infantry creates ownership, and logistics determines whether either one can continue.
You Do Not Need to Attack Everywhere to Keep the Enemy Busy
A breakthrough is easier when the rest of the enemy line cannot freely respond to it.
Use other formations to maintain pressure, counterattack, seize limited ground or otherwise keep nearby defenders occupied while the main assault concentrates elsewhere.
This is especially useful when one armoured formation is carrying the decisive attack. Your infantry does not need to win a huge offensive across the entire front at the same time. Its job may simply be to prevent those formations from shifting toward the breakthrough.
The broader lesson is that every order does not need to capture an objective to be useful. Some plans exist to create the conditions that let another formation win somewhere else.
Use Zone Orders for Responsibility and Timeline Orders for Sequence
Battleplan's Zone Orders and more detailed plans solve different command problems.
Zone Orders are useful when you want to divide a front into areas of responsibility and let formations manage those areas without drawing every individual action yourself. A Regimental Plan can divide a larger area into zones, assign regiments to them and keep support elements in reserve.
Timeline-style planning is more valuable when order and timing matter: reconnaissance, barrage, attack, follow-up, then another movement at a specific point.
Use Zone Orders when: Holding or advancing across a broad front
Use detailed plans when: Several actions need to happen in a specific sequence
Use manual intervention when: One local problem needs immediate correction
Zone Orders also show predicted attacking and defending outcomes for the area. If a zone looks heavily unfavorable, do not automatically accept the forecast and send everyone anyway. Shift battalions into it, reduce the amount of ground that formation is responsible for, or change the tactic.
That turns the prediction into a planning tool rather than merely a warning.
Mixed Formations Get More Than Just More Unit Types
Battleplan rewards combined arms directly.
Different types of nearby units provide different support bonuses to friendly forces. Infantry can improve defence and morale, tanks increase offensive power, engineers help with fortifications and mines, scouts improve mobility, and support guns increase damage and fortification destruction.
The bonuses come from having different capabilities working near each other, not simply stacking more copies of the same unit.
That means formation composition should be based on what the operation requires.
Fortified objective: Infantry + artillery/support guns + engineers
Mobile breakthrough: Armour + mechanized support + scouts
Mine-heavy approach: Engineers become critical
Holding ground: Infantry supported by reserves and appropriate guns
Specialists also do not need to remain trapped inside whatever formation they started with. If an attack badly needs engineers or additional artillery, reorganizing those assets can be more valuable than leaving them somewhere they are contributing little.
Engineers Solve Several Problems at Once
Engineers are one of the highest-value specialist units because their usefulness changes with the situation instead of disappearing when the attack ends.
On offense, they can deal with enemy minefields and help destroy fortifications. On defence, they improve entrenchment and can lay minefields of their own.
This makes engineers particularly valuable around the point where you expect a battle to be decided rather than spread randomly across the frontline.
If an offensive repeatedly stalls against prepared infantry, check whether the problem is raw numbers or whether you are trying to force armour and infantry through fortifications and mines without the specialist support designed to handle them.
Use Artillery to Change the Fight Before It Starts
Artillery is most valuable when it alters the conditions your ground troops are about to enter.
Prepared defenders gain substantial value from fortifications. Bombarding them first reduces those defences and morale, making the subsequent assault less expensive.
Longer preparatory barrages can produce a stronger effect but consume more ammunition, so the right duration depends on how difficult the position is and how much time and supply you can spend.
The useful comparison is not "does artillery get kills?" It is "how many casualties and how much time does the ground attack save because the target was softened first?"
Build Your Defence Before the Clock Starts
Deployment is part of the battle, not simply the screen before it.
Units positioned during deployment begin with fortifications, so moving defenders into place after the mission starts gives up preparation you could have received immediately.
Infantry is usually the better frontline choice because it benefits more from fortifications. Armour and mechanized formations are more valuable as mobile reserves that can respond after an enemy breakthrough reveals where the real threat is.
A thin infantry line backed by a strong mobile reserve is often more flexible than putting every valuable formation directly on the front.
Defend the Edge of Good Terrain
Forests and towns provide useful defensive benefits, but where you sit inside that terrain matters.
Positioning toward the edge forces the attacker to cross exposed ground before reaching the defended position while your own units are already benefiting from the terrain.
Swamps, wetlands and beaches can be much worse places to fight because they reduce several aspects of unit performance. A route that looks shorter on the map can therefore create a harder battle than a slightly longer approach through better ground.
Use the elevation view as well. High ground improves observation and combat value, making terrain something to check before drawing the attack rather than after units have already committed to the route.
Keep a Reserve That Has Not Already Been Given Another Job
A reserve only works if it is still available when the unexpected happens.
Putting every regiment into the initial frontline creates a visually strong defence but leaves you with nothing fast enough to answer a penetration somewhere else.
Armoured and mechanized units are particularly effective reserves because their mobility lets them move toward a developing crisis instead of being permanently committed to one part of the line.
A useful reserve position also protects more than the frontline. Keeping mobile strength near important roads, objectives or logistics means the same formation can counter an enemy breakthrough before it reaches the supply network behind you.
Match Officers to the Formation's Actual Job
Officer bonuses flow down the chain of command to the units beneath them, so assigning officers randomly leaves useful bonuses in the wrong place.
An officer with movement or offensive bonuses is more valuable commanding a formation expected to break through than sitting over infantry whose job is to hold fortified terrain for a week.
The reverse also applies. Defensive and general-purpose officers do not need to occupy the spearhead simply because they have the highest level.
Before a major mission, look at what each formation is supposed to accomplish and match the command structure to that job.
Keeping those officers alive also matters because your campaign army persists between battles. Short-term aggression that gets a developed officer killed can cost more than the immediate ground gained.
Remember That Aircraft Have a Logistics Chain Too
Recon and close-air-support squadrons can become ineffective if their supporting headquarters or airfield is left behind as the ground army advances.
Aircraft consume substantial fuel and supplies while operating. Their base therefore needs access to a Supply Depot, but it also should not be positioned so close to the front that enemy ground forces can easily threaten it.
When you remove or relocate a Depot that was supporting your air units, check the aircraft afterward. Rebase them when necessary instead of assuming they will continue operating normally just because their icons are still on the map.
Let the Mission Clock Decide How Elaborate the Attack Should Be
Battleplan scenarios give you a finite amount of time, and that should influence the type of operation you create.
If time is running short and the defence is relatively weak, a fast Breakthrough Attack followed by an Assemble order can gain ground without requiring a huge multi-stage operation.
If you have days available and the objective is heavily fortified, spend that time. Scout, bombard, assemble the right formations and coordinate the attack rather than paying for speed with unnecessary casualties.
Little time + weak defence: Favor speed
Plenty of time + strong defence: Prepare a deeper coordinated attack
Reinforcements arriving soon: Compare their arrival against preparation time before attacking without them
Objective already achievable: Do not overcomplicate the final push
The strongest plan is not always the most elaborate one. It is the plan that accomplishes the mission inside the time and resource budget you actually have.
Fast-Forward Stable Plans, Not Unstable Fronts
Battleplan lets you pause, run in real time or accelerate the simulation heavily. The temptation is to increase speed whenever troops are moving slowly across a huge map.
That is safest when the operation is already stable.
Slow down or pause when a breakthrough reaches its destination, a plan fails, a flank changes unexpectedly, supply warnings appear, or several formations are close to completing their current orders.
Those are the moments where the next decision has the most leverage.
Fast-forwarding through them can turn a small problem into a completely exposed corridor before you have even noticed the operational picture changed.
Battleplan Beginner Mistakes to Avoid
Most early mistakes come from solving the immediate fight while ignoring what happens after it.
Launching from low supply: The formation can succeed initially and collapse before finishing the operation
Sending tanks without infantry: The breakthrough outruns the ground needed to keep its supply corridor open
Waiting to plan the follow-up: Readiness delays turn momentum into idle time
Attacking without scouting: You discover enemy strength, mines and logistics the expensive way
Ignoring specialists: Fortifications and minefields become much harder than necessary
Using every formation on the frontline: Nothing remains to respond to a breakthrough
Leaving supply behind: Your effective frontline stops long before your drawn arrows do
Forgetting air rebasing: Squadrons gradually become starved of fuel and supply
Fast-forwarding through warning signs: Problems compound before you issue the correction
The Best Battleplan Habit Is to Preserve Momentum
A successful Battleplan offensive should make the next operation easier, not harder.
If taking an objective leaves your tanks empty, infantry miles behind, aircraft unsupported and the nearest Depot on the old frontline, you won the local fight but created a poor starting position for everything afterward.
The better result is a smaller breakthrough that leaves infantry holding the corridor, logistics already moving forward, enemy supply disrupted, reconnaissance working ahead and the next plan building readiness.
That is the difference between winning individual battles on the map and running an operation that keeps moving. Scout first, soften the point that matters, break through with the right formation, secure what you took, move the supply network with you, then prepare the next step before the current one is finished.