Shroom and Gloom looks like a deckbuilder where the obvious goal is assembling increasingly ridiculous combat combos, but a lot of runs actually start going wrong before the next fight even begins. Exploration uses its own cards and stamina, resting can hurt you, useful interactions compete for limited resources, and grabbing one more reward can leave you poorly prepared for the room that actually matters.
That also means getting better at Shroom and Gloom is less about memorizing one overpowered build and more about recognizing what a run needs right now. The following tips are the things I would prioritize first, especially while learning how exploration and combat feed into each other.
Jump To Section:
Stop Trying to Loot Everything
Use Combat to Reset Stamina
Make Resting Your Last Resort
Clean Up Campsites Before Resting
Build Both Decks Toward the Same Goal
Treat Health Like Exploration Currency
Plan the Entire Combat Turn First
Read Enemy Intent Before Attacking
Stop Taking Cards Just Because You Can
Develop Cards You Actually Use
Don't Ignore Rats and Other Creatures
Treat Knowledge as Your Real Upgrade
The Best Shroom and Gloom Tip Is to Stop Trying to Loot Everything
The easiest way to make an otherwise healthy Shroom and Gloom run worse is to assume every object in an exploration room needs to be interacted with before you leave.
Your Explore deck can give you ways to dig, break objects, light fires, open routes, and interact with other things you discover underground, but those actions compete for stamina. Spending everything because a room happens to contain several tempting interactions can leave you without the resource needed to actually continue.
I would therefore give every exploration room a priority before touching anything: progression first, high-value improvements second, optional loot last.
If there is a door between me and the next area, I want to know that I can deal with the door before I start spending stamina digging up every suspicious patch of ground. The same applies to anything else required to continue the route.
This reverses the usual completionist instinct. You are not clearing a checklist of everything in the room. You are buying the best things the room offers while making sure you can still afford to leave it.
If you find the Foresight during a run, our Shroom and Gloom Growing Confidence guide explains exactly what triggers its Max HP increase and why adding every permanent card you find can still make your deck worse.
A Fight Can Actually Solve Your Stamina Problem
One of the more important interactions to understand is that stamina replenishes after combat. That completely changes how I would judge the final few exploration actions before an encounter.
If you can reach a fight without resting, reaching that fight can effectively become the solution to your low stamina rather than another problem caused by it.
That means there is a huge difference between having little stamina with progression still blocked and having little stamina with a reachable encounter ahead. In the first situation you may be forced into a bad rest. In the second, pushing forward can potentially reset the resource you were worried about.
I would not deliberately waste stamina just because a fight is nearby, but this makes hoarding your entire stamina bar unnecessarily cautious. Once the important route forward is secured, you can spend the remaining amount on worthwhile exploration interactions and then use combat as the transition into your next full stamina cycle.
In practice, I think of each battle as a checkpoint in an exploration budget. The goal is not necessarily to arrive with maximum stamina. It is to arrive without accidentally stranding yourself before you get there.
Resting Is an Emergency Button, Not Your Normal Stamina Refill
Running low on stamina makes resting look like the obvious solution. Shroom and Gloom deliberately makes that decision much uglier than it would be in most roguelikes.
Resting in dangerous areas can cost health, and the game shows you the damage associated with sleeping at a campsite. That turns rest into a trade rather than a free reset.
I would always check whether I can reach another fight instead. If progressing into combat restores the stamina I need without paying the health cost of sleep, that is usually a much better exchange.
This is also why wasting stamina earlier in the room can become so expensive. Breaking one unnecessary object does not just cost the stamina printed on that action. If that expenditure is what forces you to rest before continuing, its real price includes whatever damage the rest causes.
That is a useful way to judge exploration decisions throughout a run: calculate their consequences, not merely their immediate cost.
If You Have to Rest, Make the Campsite Safer First
Sometimes resting is unavoidable, but you still have some control over how bad that decision becomes.
Campsites can contain sources of danger that can be dealt with before sleeping, including nearby mushrooms and human remains, while lighting a campfire can also improve the situation. I would never hit the rest option immediately just because I have decided I need stamina.
First, look at the projected damage. Then check the room for anything you can remove, kill, light, or otherwise deal with to make the campsite less hostile. Only after doing that would I judge whether the remaining damage is worth paying.
The important part is doing this before you reach desperation health. A mediocre campsite is much easier to tolerate when you have a meaningful HP buffer than when your previous fights already left you barely alive.
If the cost still looks terrible after improving the area, reconsider whether resting is actually necessary. Shroom and Gloom gives you enough information to make that choice deliberately, so taking a huge chunk of damage simply because your stamina bar is empty should rarely come as a surprise.
Your Explore and Combat Decks Should Solve Each Other's Problems
The two-deck system is the defining gimmick of Shroom and Gloom, but I think the more useful way to understand it is that you are building one run with two toolboxes.
Your Combat deck decides whether you can survive the mushrooms waiting ahead. Your Explore deck decides what condition you are in when you reach those mushrooms and what resources or improvements you can collect along the way.
Building an absurd damage engine is much less useful if poor exploration decisions repeatedly send you into battles missing health. At the same time, squeezing every possible reward out of exploration accomplishes very little if your Combat deck cannot reliably remove dangerous enemies.
I would use whichever side of the run currently feels weaker to decide what I want next. If fights are comfortable but navigating rooms keeps forcing expensive rests, exploration utility becomes more attractive. If I am reaching encounters comfortably but struggling once combat begins, another cute exploration option is probably less valuable than improving my actual kill condition.
The best reward is therefore not always the individually strongest card. It is often the card that repairs the weakest part of the loop you already have.
Think of Health as a Currency You Spend to Improve the Run
Because so many exploration decisions can eventually translate into damage, I find it more useful to think about HP as part of the run's economy rather than something that matters exclusively during combat.
A dangerous interaction can still be worthwhile if the reward makes the rest of your run considerably stronger. A valuable card, useful upgrade, or important route can justify taking a calculated hit.
The mistake is spending health on rewards that do not meaningfully change anything.
If an optional action costs me enough resources that I will probably need a damaging rest afterward, I would ask whether I would willingly trade that amount of HP for the reward in front of me. If the answer is no, there is no reason to make the trade indirectly.
This becomes increasingly important as a run goes on. Five health spent when you are comfortable is not equivalent to five health spent when one bad enemy turn can kill you.
The value of your remaining HP rises as your margin for error shrinks, so I become progressively stingier with optional exploration as a run gets more fragile.
If you want to turn those individual card synergies into a complete setup, our Shroom and Gloom best build guide covers how to combine Fatal effects, energy refunds, card draw, food, and focused upgrades into one consistent build.
Plan the Entire Combat Turn Before You Start Playing Cards
Shroom and Gloom's combat is built around doing more than simply throwing your largest attack at whatever mushroom has the lowest health.
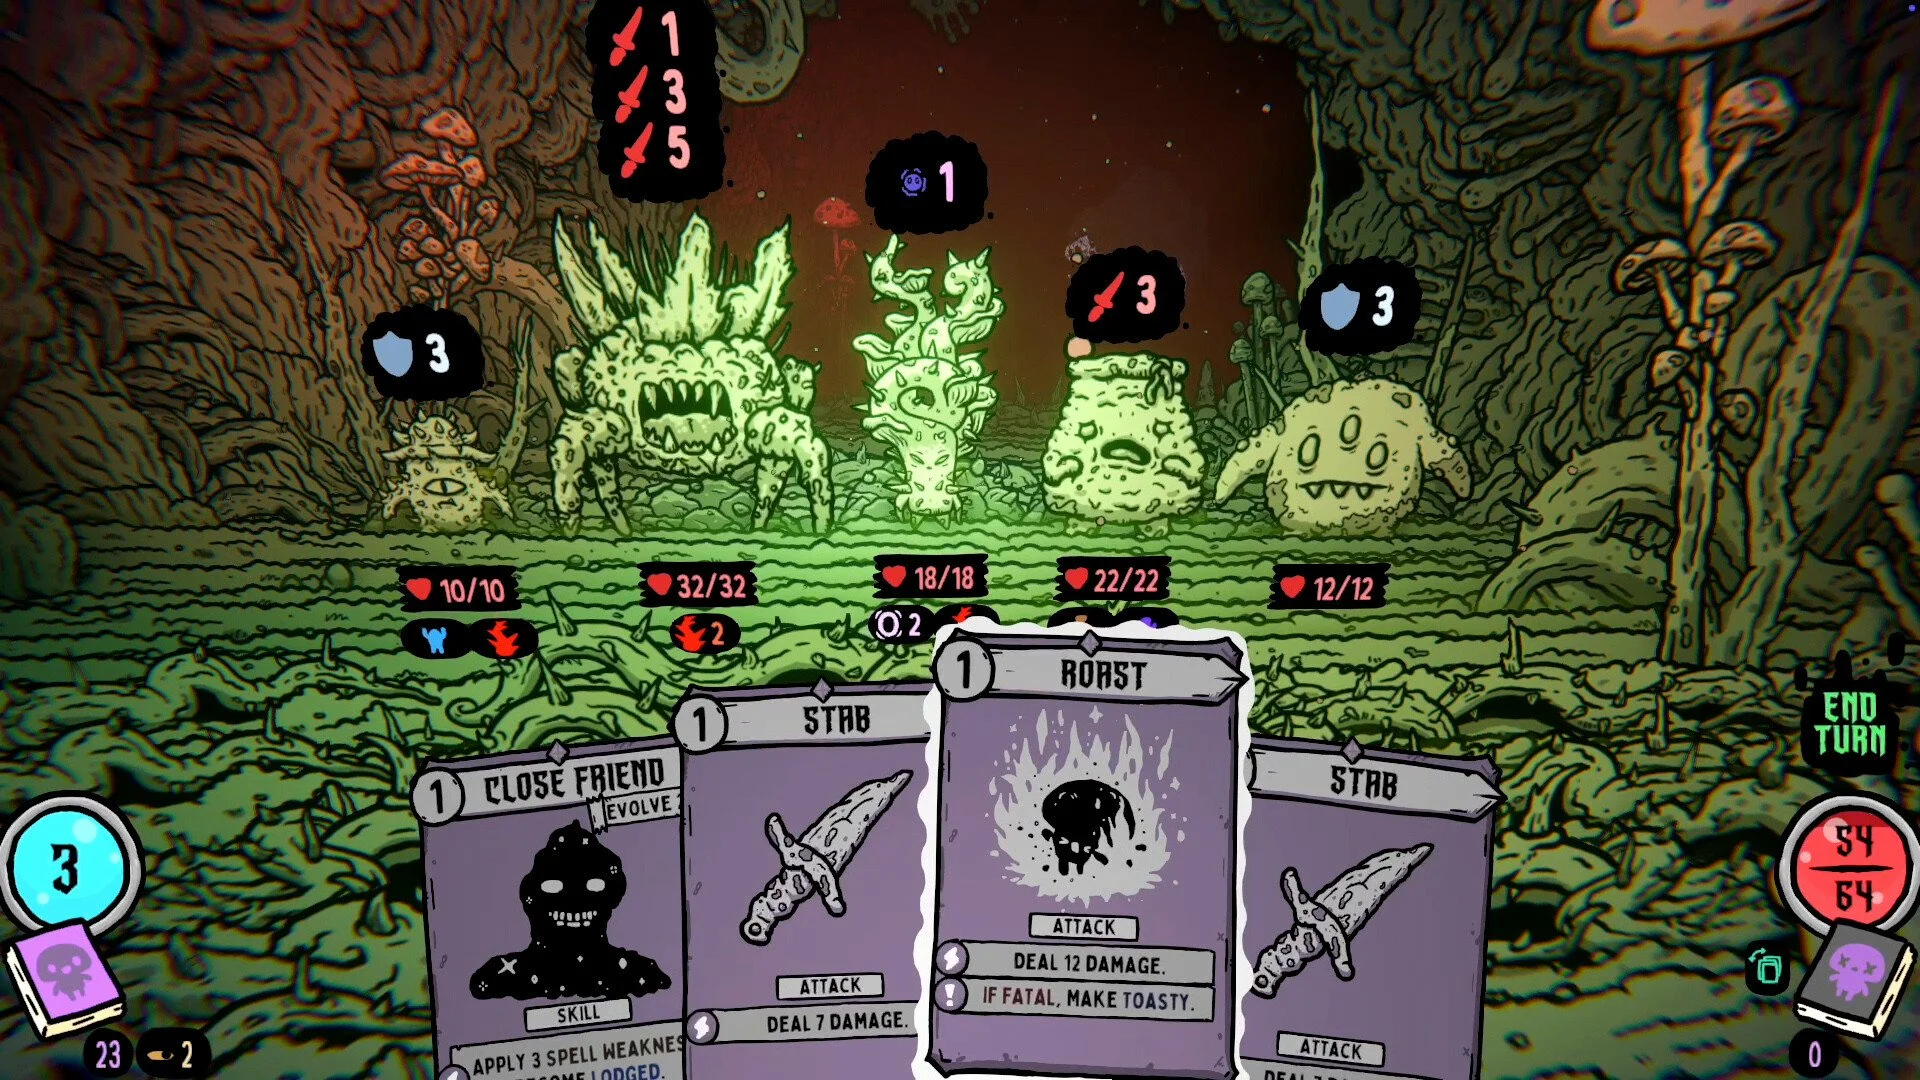
You can manipulate enemies with attacks, status effects, cooking-related interactions, healing, and combinations where one action improves the value of another. If you begin playing cards immediately without checking the rest of your hand, it is easy to use part of a combo in the wrong order.
I prefer to identify the end of my turn first.
Which enemy needs to die? What do I want to use to finish it? Which cards make that finishing attack better? Is there healing or another effect I can squeeze out before combat ends?
Then work backward.
If adding spice, sauce, cooking an enemy, or applying another effect makes the later part of your sequence stronger, using the setup first is obviously more valuable than discovering the interaction after you already spent your main attack.
This gets even more important when a card rewards a particular finishing blow. The card that can kill something is not automatically the card that should kill it.
Read What Every Enemy Is Doing Before Choosing a Target
Target priority in Shroom and Gloom should be based on what is about to happen, not just which mushroom is closest to zero health.
Enemy intent can warn you about incoming attacks and other undesirable actions, including enemies preparing to interfere with your deck through Curse cards. Some enemies can also Evolve, meaning reaching zero HP does not necessarily resolve the entire threat the way you might initially expect.
Before attacking, I would scan the whole encounter and identify the enemy whose next action creates the biggest problem.
An enemy with more health can sometimes wait. A weaker enemy preparing to ruin your next turn may need to disappear immediately. Likewise, pouring everything into an enemy capable of changing form can be dangerous if you leave yourself without enough resources to deal with what happens afterward.
There is a broader rule here that applies to almost every fight: spend damage to prevent future problems, not merely to make current health bars smaller.
A New Card Is Not Automatically an Upgrade
One of the fastest ways to sabotage a good deckbuilder run is to confuse having more cards with having a better deck.
Every mediocre card you add is another card you can draw instead of the attack, healing tool, energy effect, or combo piece you actually wanted.
I would rather develop a smaller group of cards with clear jobs than collect a giant pile of individually interesting effects that do not reliably appear together.
When considering a new card, ask what changes after adding it. Does it improve your main damage sequence? Fix a recovery problem? Give you a type of utility you currently lack? Make an existing card considerably stronger?
If you cannot answer that, skipping the addition can be the upgrade.
Deck thinning becomes valuable for the same reason. Removing a weak option increases the frequency with which you see everything that remains. A modest improvement to consistency can end up helping on every combat turn instead of giving you another situational card that occasionally does something spectacular.
Put Your Card Development Into Things You Already Want to Play
Card evolution adds another reason to think about frequency instead of collecting isolated powerful effects.
Cards can progress toward evolution through repeated use, which naturally rewards cards that already fit into the actions you want to take. That makes an unremarkable-looking card with strong synergy potentially more interesting than something flashy that rarely belongs in your turn.
I would watch which cards I naturally keep playing during successful fights. Those are strong candidates to become the backbone of the deck because you are advancing their development without having to distort your strategy just to do it.
The reverse is useful too. If a card is technically capable of becoming great but I constantly avoid playing it because its current version does not fit the situation, I would question how much future value I am really going to extract from it.
Your best cards should ideally become better because you are using them to win, not require you to play awkward turns now in the hope that they eventually become worthwhile.
Don't Treat Rats and Frogs Like Background Decorations
The strange creatures you encounter during exploration can be part of your build rather than environmental flavor.
Rats and frogs can be fed for unique benefits, which means carrying food has potential value beyond simply recovering health. In particular, feeding the rat is one of those interactions I would be looking for rather than walking past automatically.
There is still an opportunity cost. Food can help keep you alive, and not every creature necessarily wants whatever edible item happens to be sitting in your inventory.
Check the interaction before blindly committing something valuable, especially if it is your only reliable recovery option.
More broadly, Shroom and Gloom rewards paying attention to weird environmental interactions. A shovel, lighter, piece of food, or other utility option may solve a problem that initially looks unrelated to it. The Explore deck is not merely a movement deck; it is effectively your inventory of possible answers to the dungeon.
Your Most Important Permanent Upgrade Is Knowing What Went Wrong
Shroom and Gloom does have unlocks and character progression, but it does not lean on huge permanent stat upgrades to eventually overpower the same problems that killed you before.
That means dying without learning anything is considerably more expensive than dying while discovering a new interaction.
When a run ends, I would identify the earliest mistake that contributed to the loss rather than only blaming the final fight. Maybe the boss killed you, but the actual mistake happened several rooms earlier when you spent too much stamina, took a damaging rest, entered the next section at reduced health, and never recovered.
That distinction matters because roguelikes often disguise cause and effect. The thing that kills you is not necessarily the thing that lost the run.
The same applies to combat. If a particular enemy keeps causing problems, learn its intent. If a card combination suddenly produced huge damage, remember the sequence. If an exploration tool saved an otherwise terrible route, its value should affect how you evaluate it next time.
This is why early deaths in Shroom and Gloom are not completely wasted runs. Unlocks help, but knowledge of enemies, interactions, card synergies, campsite decisions, and route management follows you into every attempt.
Use One Simple Rule for Every Shroom and Gloom Run
If all of these tips feel like a lot to track at once, I would reduce the entire game to one question: what does my run need to safely reach and win the next fight?
During exploration, secure your route forward before spending stamina on optional rewards. If stamina is low, check whether reaching combat can refresh it before accepting the health cost of resting. If you must rest, reduce the campsite's danger first.
During combat, read every enemy intent before committing attacks. Identify the actual threat, plan the finishing portion of your turn, and then use your setup cards in the order that makes that finish stronger.
When choosing cards and upgrades, improve the strategy you already have or fix a specific weakness rather than adding something simply because it is available. When choosing optional exploration rewards, consider the health and stamina required to obtain them as part of their price.
Most importantly, leave some value behind when taking it would put the run in a worse position.
Shroom and Gloom constantly dangles one more hole to dig, object to break, creature to feed, card to take, or opportunity to squeeze out of a room. Learning that you do not need all of it is one of the biggest differences between stumbling into the next encounter and arriving there ready to turn another group of mushrooms into dinner.