Graveyard Keeper 2 Factory Guide: Unlock, Power & Automation
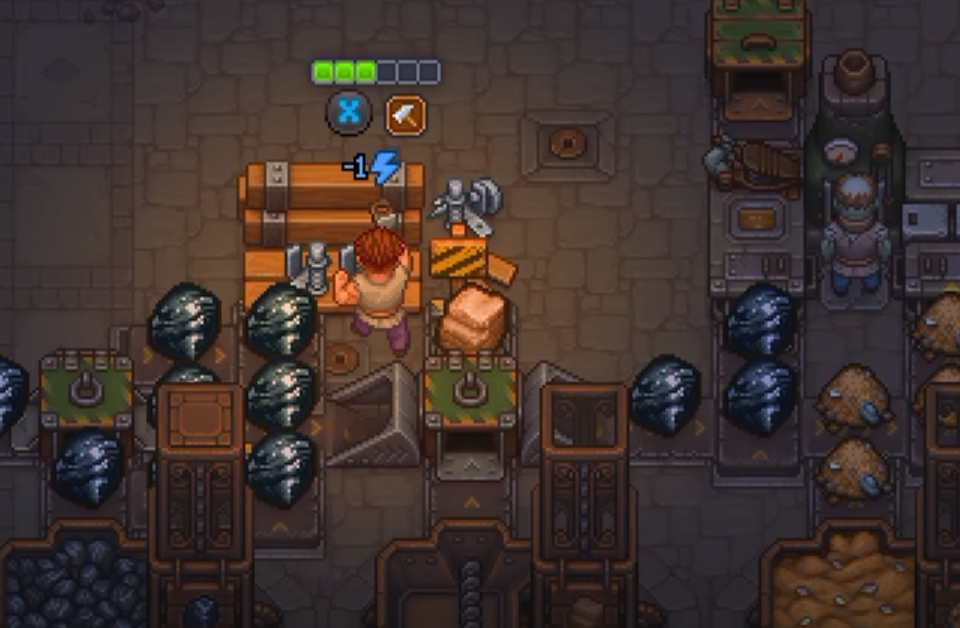
The Factory in Graveyard Keeper 2 is where zombie automation starts becoming a real production system instead of a collection of isolated workers. Getting inside is only the first step: the Factory also needs power, conveyor access, a compatible workstation, a trained zombie, and a recipe that the worker can actually perform before anything starts moving.
Jump To Section:
How to Start the Factory
Zombie Carousel Power
Unlock Conveyors & Assembly Bench
Build Your First Production Line
Why Your Factory Isn't Working
Best Early Factory Upgrades
Factory Stations Explained
Start the Factory by Opening an Entrance and Powering It
You reach the Factory through the cellar beneath the Inquisition Base. After Albert's early conversation at the base, explore the cellar route toward the abandoned Factory and clear one of the available entrance blockages.
You do not need to clear every possible Factory entrance just to start the sequence. Clearing an accessible entrance is enough to progress the discovery and trigger Larry's scene.
The two home-side blockage tasks require 4 Iron Detail, 1 Reinforced Beam, and Building Mastery 8.
Getting Into the Factory
Enter through the Inquisition Base cellar
Clear one accessible blockage
Requirement: 4 Iron Detail
Requirement: 1 Reinforced Beam
Requirement: Building Mastery 8
Finish Larry's Factory discovery scene
Opening the area still doesn't make it operational. The Factory's machinery depends on Zombie Carousels for power, so your next goal is repairing one and putting a zombie inside it.
Zombie Carousels Are the Factory's Power Source
The Factory does not run from a passive power grid. Zombie Carousels generate the capacity needed to operate your conveyor network.
The first Broken Zombie Carousel can be repaired with 6 Bronze Gear, 4 Bronze Detail, and 4 Wooden Plank, with Building Mastery 5 required for the repair.
Repairing it isn't enough. A zombie has to be assigned to the Carousel before it contributes power.
This also means one zombie cannot do everything. The zombie generating power in a Carousel is separate from the zombie assigned to operate your crafting station.
If you need more workers before expanding the Factory, the Graveyard Keeper 2 Zombies guide covers resurrection, worker setup, Red Skulls, tools, perks, and automation.
Unlock Conveyors Before Building Out the Factory
Once you have access and power, the next real gate is the Building technology tree.
Conveyors sit behind Tool Rack II and a 50-reputation requirement with Jack. Unlocking Conveyors costs 70 red and 20 blue technology points.
Assembly bench comes directly after that and costs another 75 red and 20 blue.
Core Factory Technologies
Conveyors: 70 Red + 20 Blue
Assembly bench: 75 Red + 20 Blue
Combined: 145 Red + 40 Blue
Earlier prerequisite technologies are not included
I would get those two before worrying about a complicated Factory layout. They give you the basic pieces needed to prove that your automation chain actually works.
Keep Your First Production Line Short
A good first Factory line is an Assembly bench connected with only enough conveyor to make the station functional.
Assign a compatible zombie to the Assembly bench, feed the line with the required materials, and select a recipe the worker has enough Mastery to perform.
The basic Wooden Kit I recipe is a useful test because it unlocks alongside the first Assembly bench technology and has simple inputs:
First Factory Test
Recipe: Wooden Kit I
Input: 1 Log
Input: 4 Bronze Nails
Worker requirement: Building Mastery 2
Output: 4 Wooden Kit I
If that line works, you've confirmed all of the important pieces at once: the Carousel is supplying enough power, the conveyor is connected, the bench has a worker, the worker qualifies for the recipe, and the ingredients can reach the station.
That is much easier to troubleshoot than immediately filling the room with belts, splitters, storage, and multiple crafting stations.
A Factory Can Look Finished and Still Do Nothing
When a production line refuses to run, check the system in order instead of tearing the whole layout apart.
Factory Troubleshooting
1. Is a zombie assigned to the Zombie Carousel?
2. Does the Factory have enough power capacity?
3. Is the workstation connected to the conveyor network?
4. Is another zombie assigned to the workstation?
5. Does that zombie meet the recipe's Mastery requirement?
6. Are the correct ingredients being supplied?
7. Is a valid recipe actually selected?
The worker requirement is particularly easy to overlook. For example, the basic Wooden Kit I recipe only needs Building Mastery 2, but later Factory recipes and upgraded production methods can ask for more.
Every Extra Belt Eats Into Your Available Power
The Factory tracks power as capacity versus demand.
A standard conveyor segment adds 1 demand, while a zombie working a Carousel supplies 7 capacity before any Beltmaster bonus.
If demand exceeds your available capacity, the conveyor network stops working.
This is why I wouldn't build long decorative conveyor routes early. Shorter connections are cheaper to power, easier to debug, and leave more capacity available for additional stations.
As the network grows, add more Carousel power or redesign the belt layout before continuing to extend production.
Also note that spare power is not the same thing as the separate Factory Tour rating requirement. Having a large amount of unused Carousel capacity does not automatically satisfy that objective.
The Auto-Hammer Is a Strong First Production Upgrade
Once the basic Assembly bench line is working, Wooden Kit I technology gives you a useful upgrade path.
The technology costs 100 red and 10 blue points and unlocks the Auto-hammer extension alongside an alternate Wooden Kit I recipe.
Instead of needing 1 Log plus 4 Bronze Nails, the Auto-hammer version converts 1 Log directly into 4 Wooden Kit I. The tradeoff is that the worker needs Building Mastery 3 rather than 2.
Auto-Hammer Wooden Kit I
Input: 1 Log
Bronze Nails: Not required
Worker requirement: Building Mastery 3
Output: 4 Wooden Kit I
That's a meaningful automation upgrade because it removes an entire recurring ingredient from the production chain.
The Factory Eventually Expands Well Beyond the Assembly Bench
The Assembly bench is only the starting point. Later Factory technology opens additional workstations, upgrades, logistics tools, and extensions.
Assembly benches can advance through multiple tiers and support extensions such as the Auto-hammer, Drill press, Lathe, Sewing machine, and Spinning wheel. Other Factory branches include Kitchens, Smithies, and the Bioreactor.
The logistics side also expands beyond basic belts with Conveyor Chests, splitters, Underground Conveyors, Supply Stations, storage pallets, and Zombie Supply Porters.
The Bioreactor has its own role as well, including production related to Zombie Power.
I wouldn't try to unlock and build all of those at once. Factory progression works better when each expansion solves a specific bottleneck: more recipes, better logistics, more power, or a more efficient version of something you're already producing.
Build Around Power and Recipes, Not an Empty Floor Plan
The Factory gives you enough freedom that it is tempting to design a huge conveyor system first and decide what everything will make afterward. That usually creates more problems than it solves.
A cleaner approach is to build outward from actual production goals. Start with one powered line, prove it works, then add the next station only when you know what recipe it needs to run and how its ingredients are getting there.
Smithy I is one example of the next stage. It becomes available through the Iron Anvil progression and costs 75 red and 20 blue technology points to unlock. Kitchens and more advanced Assembly benches open additional supply and crafting routes later.
Factory progression also overlaps with other systems. If you're clearing walls around the Factory or mine to open more space and conveyor routes, Alcohol can become part of the chain because it is used for Dynamite. The Graveyard Keeper 2 Alcohol guide covers how to unlock and produce it.
The best early Factory is therefore not the biggest one. Get inside, give it Carousel power, unlock Conveyors and the Assembly bench, make one short Wooden Kit I line work, then expand only after the system is stable. Once that foundation is running, the Factory can grow into the larger zombie-powered production network the game is built around.