Graveyard Keeper 2 Fishing Guide: Fish, Bait & Rods
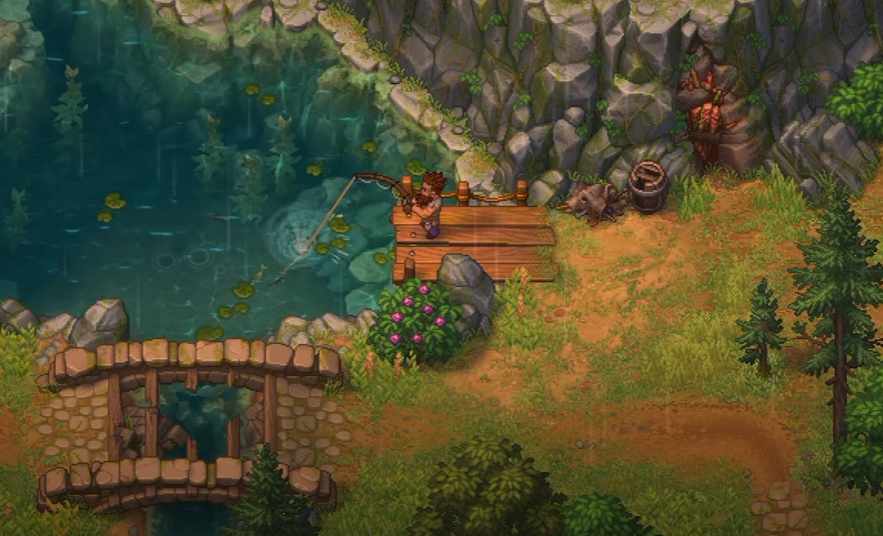
Fishing in Graveyard Keeper 2 is built around three checks: your Farming Mastery, the rod you're using, and whether the fish wants bait. Even after a fish bites, the catch isn't automatic. You reel while the yellow exclamation mark is showing, ease off when the fish fights back, and repeat until you land it. Trying to brute-force a fish above your current setup usually ends with very little progress or a red line that's about to snap.
Jump To Section:
How to Fish
Farming Mastery and Fish Difficulty
Rods and Bait
Fish Locations and Requirements
Best Fishing Progression
Fishing Tips
How to Fish in Graveyard Keeper 2
You need at least Farming Mastery Level 1 before you can properly start fishing. Once you have access to a fishing spot and a rod, choose the fish slot you want, add bait if that species requires it, and wait for the bite.
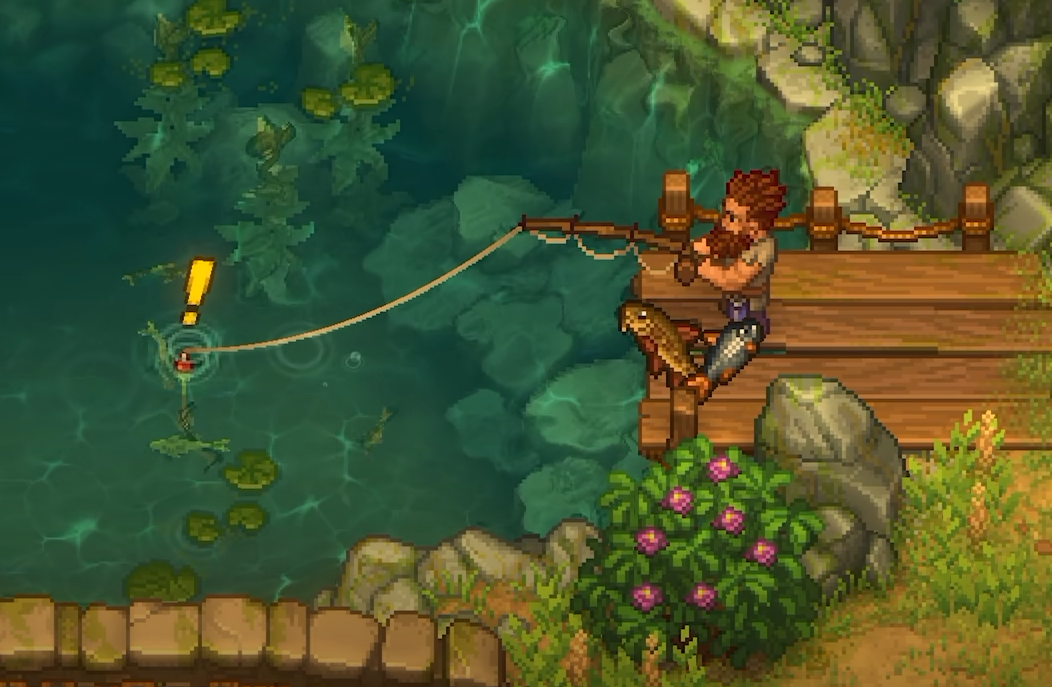
When the yellow exclamation mark appears, hold the reel input: left-click on mouse or A on controller. Keep reeling while the exclamation mark is visible.
As soon as the exclamation mark disappears, stop holding the button. The fish is fighting back during this phase. You can tap the input to keep it from gaining too much distance, but don't continue holding it down. Doing so makes the rod and line turn red, and eventually the line can snap.
Fishing Rhythm
Yellow exclamation mark appears: hold the reel button.
Exclamation mark disappears: release and only tap if needed.
Line turns red: you're applying too much pressure.
Fish barely comes closer between fights: your Farming Mastery may be too low.
The last point saves a lot of wasted attempts. Graveyard Keeper 2 doesn't always stop you from hooking something that's effectively beyond your current fishing level. If you're gaining almost no distance before the fish fights again, backing out and returning with higher Mastery is usually better than trying to win a marathon tug-of-war.
Fishing Progression Runs Through Farming Mastery
Fishing isn't its own isolated skill tree. The fish themselves are gated by Farming Mastery, with stronger species requiring progressively higher levels.
That gives you a simple way to diagnose most failed catches. Bait decides which fish can appear, while Farming Mastery determines whether you're realistically ready to land it.
For example, Roach starts at Mastery 1, Gudgeon at 2, and Crucian at 3. Later fish climb much higher, with Mackerel requiring 7 and Pike requiring 8 based on the launch-era fish currently documented.
I wouldn't rush toward a high-level fishing spot just because you've crafted a rod. Follow the Mastery requirements instead. The early fish are effectively your progression ladder, not filler you should immediately skip.
Graveyard Keeper 2 Fishing Rods and Bait
The early fishing setup has two documented rods and two basic bait types. Both rods are crafted through the Woodworking Workbench, although the Amateur Rod requires the Tool Rank extension.
Basic Rod
3 Stick
2 Bronze Detail
2 Flax Thread
Crafted at the Woodworking Workbench
Amateur Rod
2 Wooden Plank
2 Polished Bronze
4 Flax Thread
Crafted at the Woodworking Workbench with the Tool Rank extension
The Basic Rod is enough to get started, but don't expect it to carry you through every area. The current launch findings specifically report that it isn't useful at the Port, where upgrading to the Amateur Rod becomes necessary.
Bait is much simpler:
Breadcrumb Bait
1 Bread
Crafted at the Kitchen Table
Live Bait
1 Lacquer
1 Flesh
Crafted at the Kitchen Table
Changing bait also changes the available fish slots at a location. Unknown catches appear as question marks, so cycling through the bait you have is an easy way to see whether you're missing possible species before leaving a fishing spot.
Known Fish Locations, Mastery Levels, and Bait
Fishing spots appear on the map as wooden docks marked with a small fish drawing. Different locations have their own fish pools, so unlocking fishing doesn't mean every species suddenly becomes available from the closest dock.
The following are the fish documented so far around the launch version. The source itself lists this portion as a work in progress, so this should be treated as a useful progression list rather than a guaranteed complete fish encyclopedia.
Inquisition Base
Roach — Farming Mastery 1 — No bait
Gudgeon — Farming Mastery 2 — No bait
Crucian — Farming Mastery 3 — No bait
Pike — Farming Mastery 8 — Breadcrumb Bait
This is the easiest place to understand the progression curve because the first three documented species don't require bait. You can focus entirely on learning the reel-and-release rhythm before adding bait requirements to the equation.
Village
Roach — Farming Mastery 1 — No bait
Gudgeon — Farming Mastery 2 — No bait
Crucian — Farming Mastery 3 — No bait
Herring — Farming Mastery 4 — Breadcrumb Bait
Bream — Farming Mastery 5 — Breadcrumb Bait
The Village makes a good next step because it extends the same early progression into your first documented breadcrumb-dependent fish. Once you reach Mastery 4 and 5, keeping Bread available starts mattering more.
Port Area
Anchovy — Farming Mastery 4 — Breadcrumb Bait
Mackerel — Farming Mastery 7 — Breadcrumb Bait
Amateur Rod recommended for this area
The Port is where I'd stop thinking of the Basic Rod as your permanent fishing tool. If you're heading there specifically for its fish pool, upgrade first rather than discovering after the trip that your starting equipment isn't doing the job.
A Better Fishing Route Is Mastery First, Collection Second
Trying to catch every available fish the moment you discover a dock is an inefficient way to approach fishing. The Mastery requirements create a cleaner route.
Start with Roach at Mastery 1 and use those early catches to get comfortable with releasing the reel button when the fish fights. At Mastery 2 and 3, add Gudgeon and Crucian. Once you reach Mastery 4, Breadcrumb Bait starts opening more useful options such as Herring and Anchovy.
From there, Bream appears at 5, Mackerel at 7, and Pike currently sits at the top of the documented early progression at Mastery 8.
That means you can save yourself a lot of failed casts by checking the species requirement before worrying about technique. If you're Mastery 3 and struggling endlessly with a Mastery 7 fish, tighter button timing isn't going to solve the underlying mismatch.
Fishing Is More Useful When You Tie It Into the Rest of Your Week
Fishing doesn't have to be a completely separate side activity. River fish can feed into other systems, including Town Gratitude once you start working with fish fillets.
If you're trying to fill the thumbs-up meter before your next sermon, my Graveyard Keeper 2 Town Gratitude guide covers the documented fish contribution alongside crops, burial certificates, quests, and the weekly Gratitude caps.
That can make a fishing trip more worthwhile than simply chasing a new species. If you're already near a dock and still need Gratitude for the week, fish can contribute to another progression goal instead of becoming inventory you caught without a plan.
For the actual minigame, I'd keep one rule in mind above everything else: don't fight the fish when it's fighting you. Reel aggressively when the yellow exclamation mark appears, back off when it disappears, and use your lack of progress as information. Graveyard Keeper 2 fishing gets much easier once you recognize when the problem is your timing and when the game is simply telling you to come back with more Farming Mastery or better equipment.